macOSやLinuxであれば、mDNSを使って、raspberrypi.localで見つかります。
Windows PCからネットワーク上のRaspberry Piを探す
· 約2分
Maintainer of this blog
macOSやLinuxであれば、mDNSを使って、raspberrypi.localで見つかります。
ThingsBoardはオープンソースのIoTプラットフォームです。 デバイス管理やデータ収集、処理、可視化が可能です。 オープンソースのCommunity Editionの他に商用サービスのProfessional Editionもあります。
機能はかなり豊富は印象です。リモートアクセス機能も提供されていますので紹介します。
過去にQiitaに投稿した内容のアーカイブです。
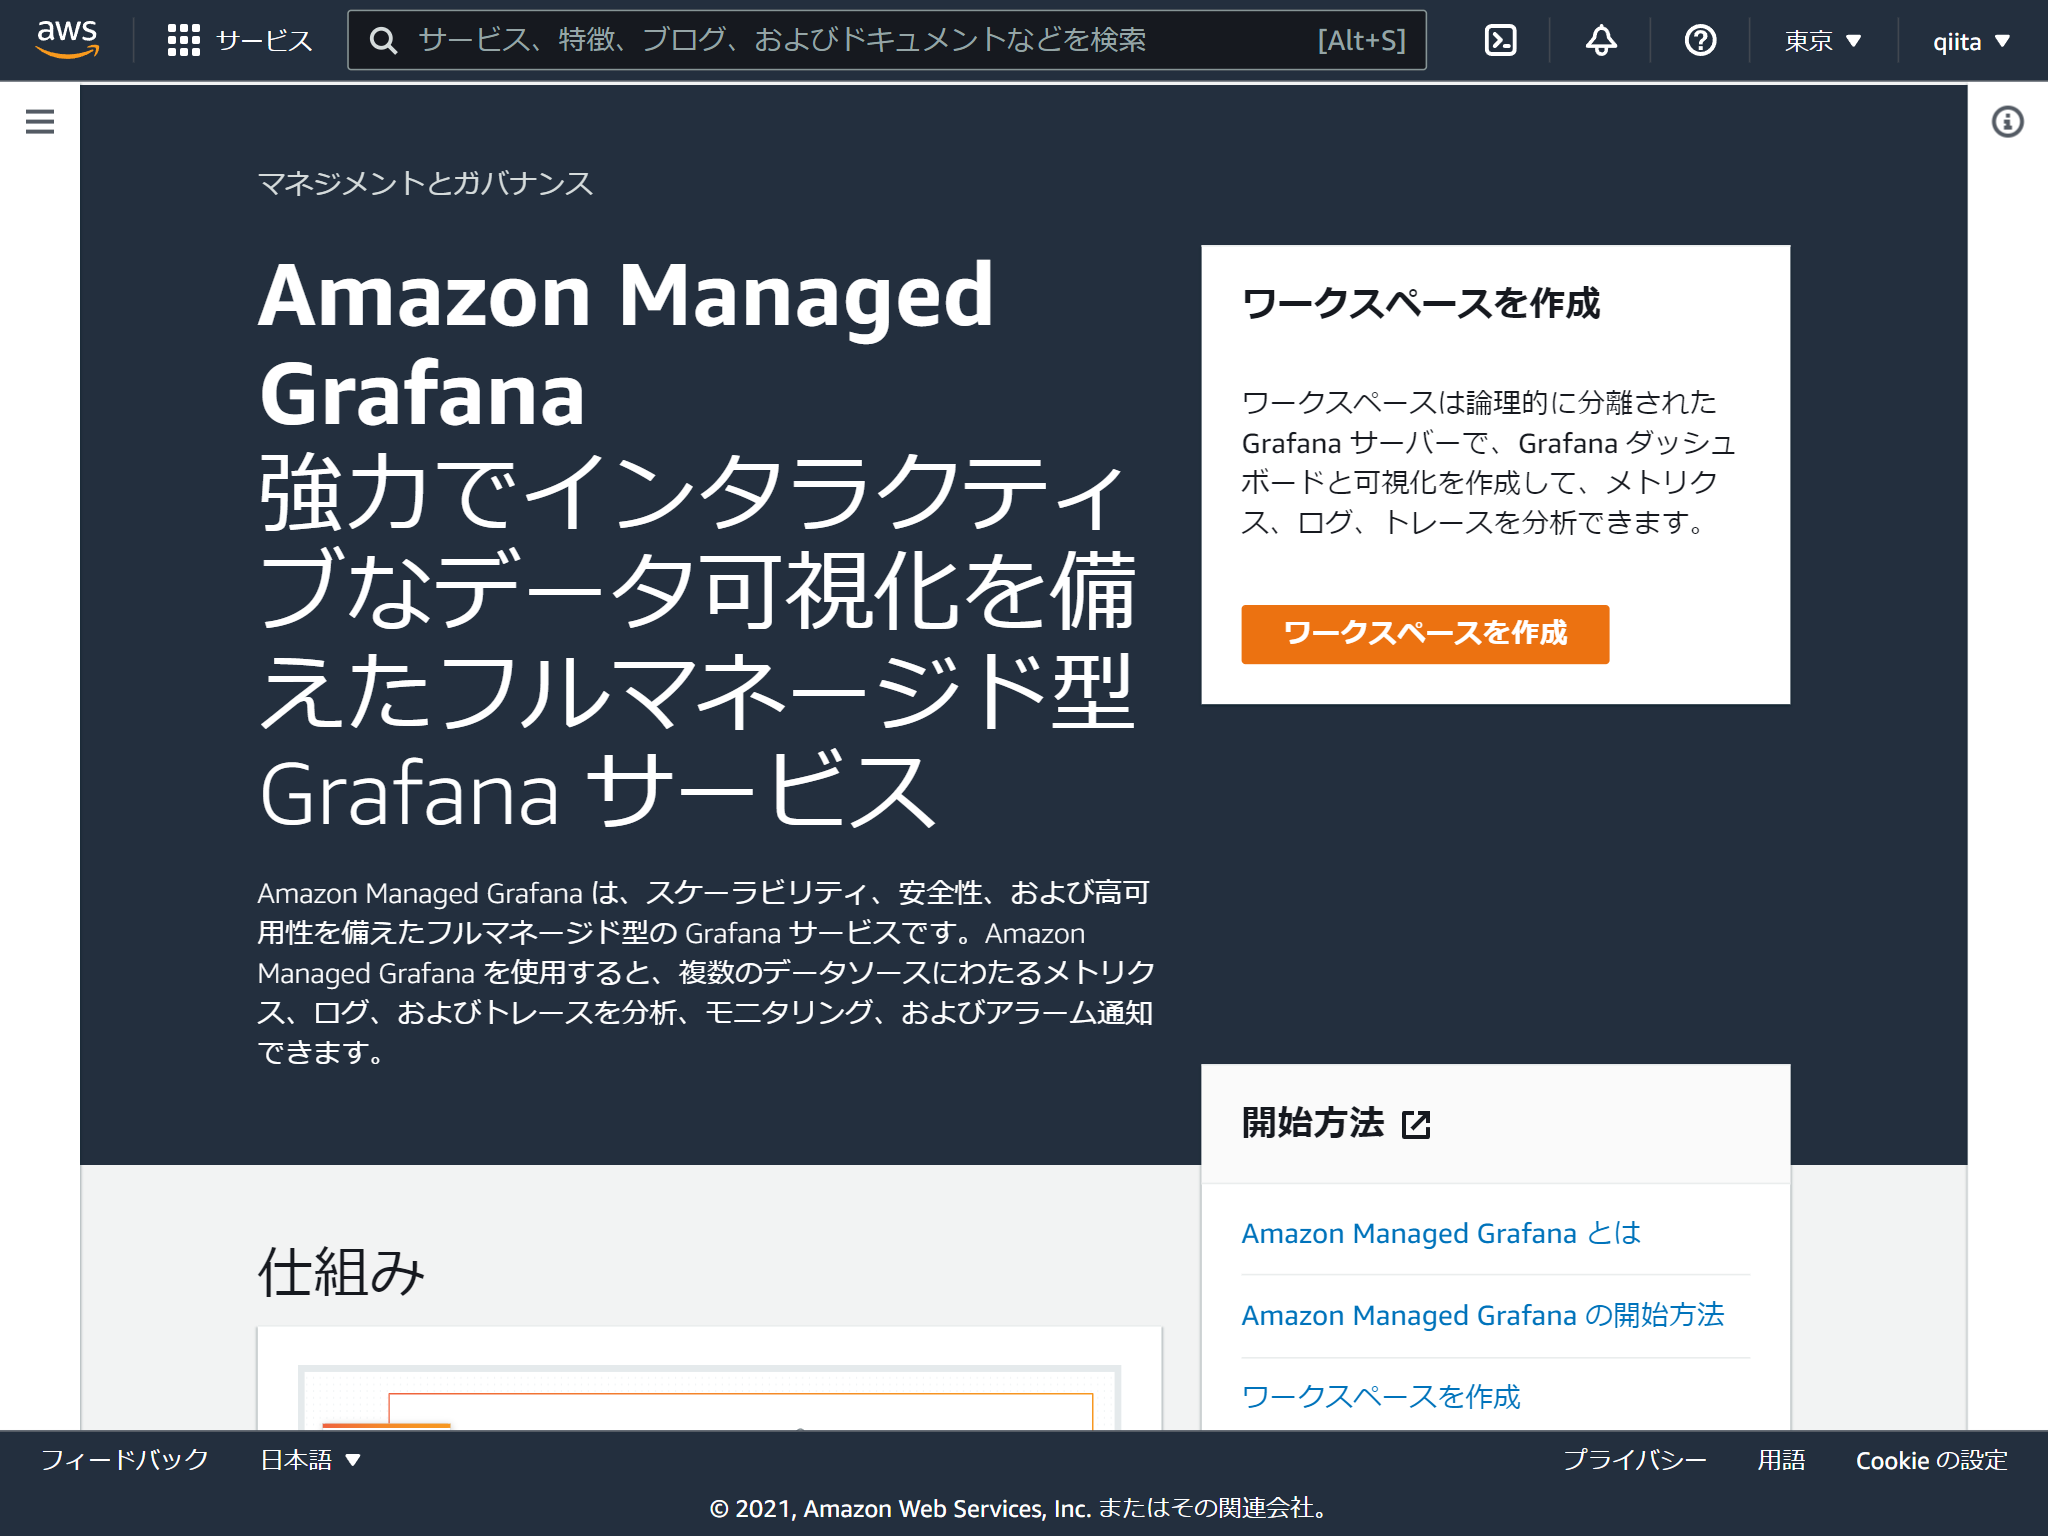
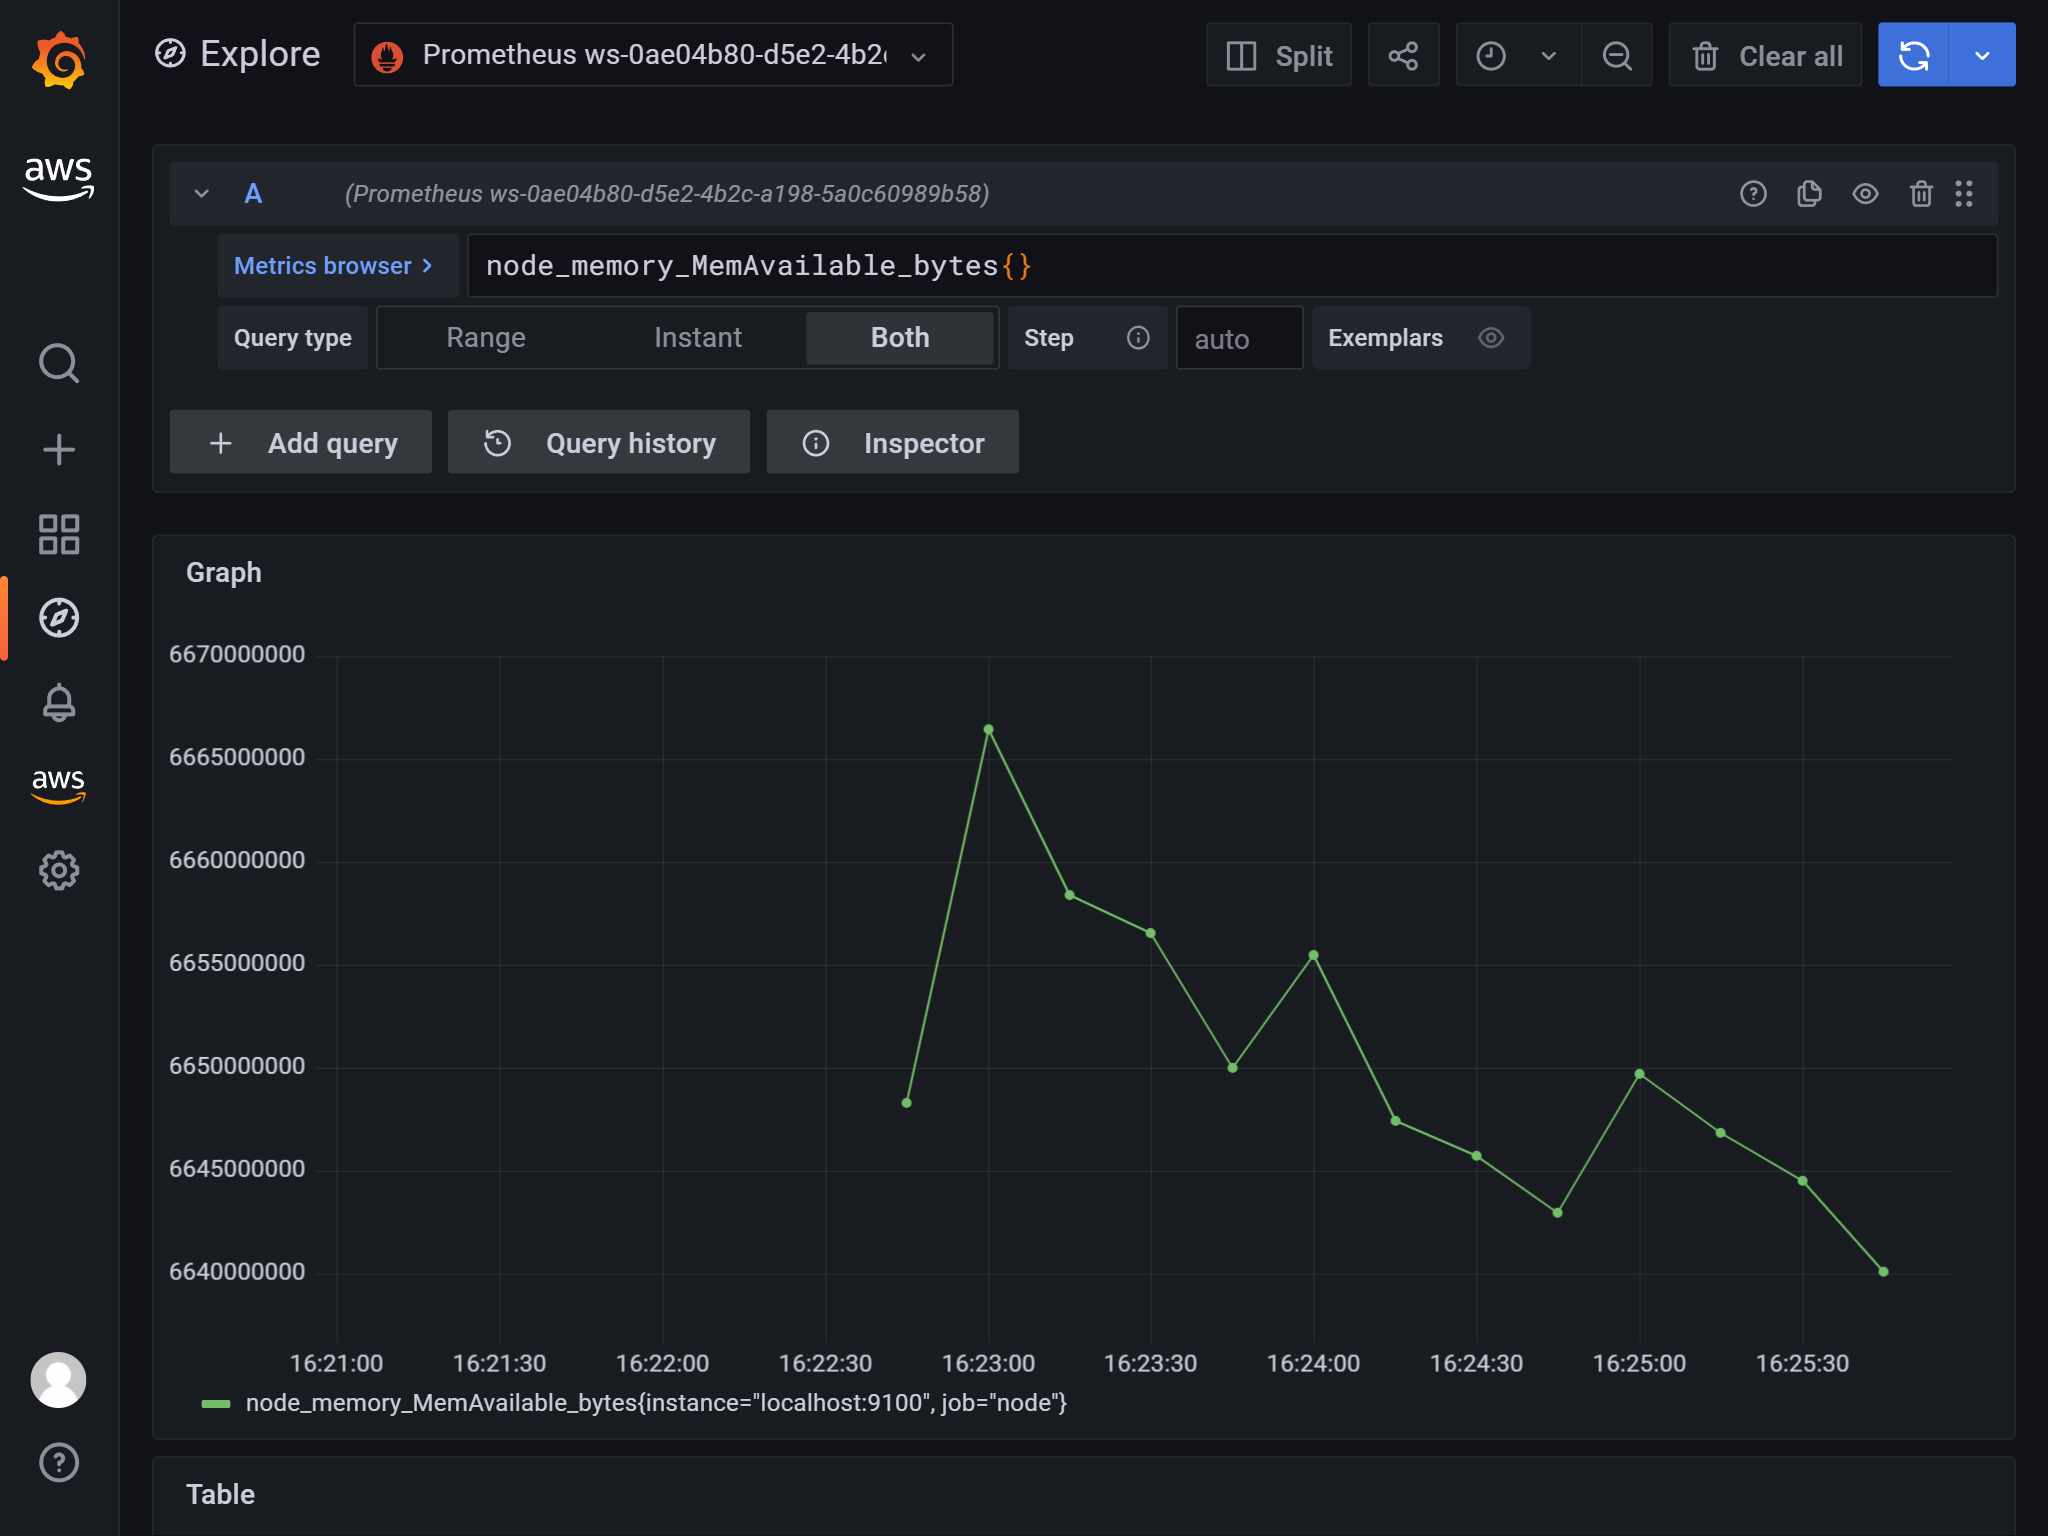
Amazon Managed Service for PrometheusとAmazon Managed Grafanaを使ってRaspberry Piのメトリクスを可視化してみました。(名前が長い。。そして統一感がない。。)
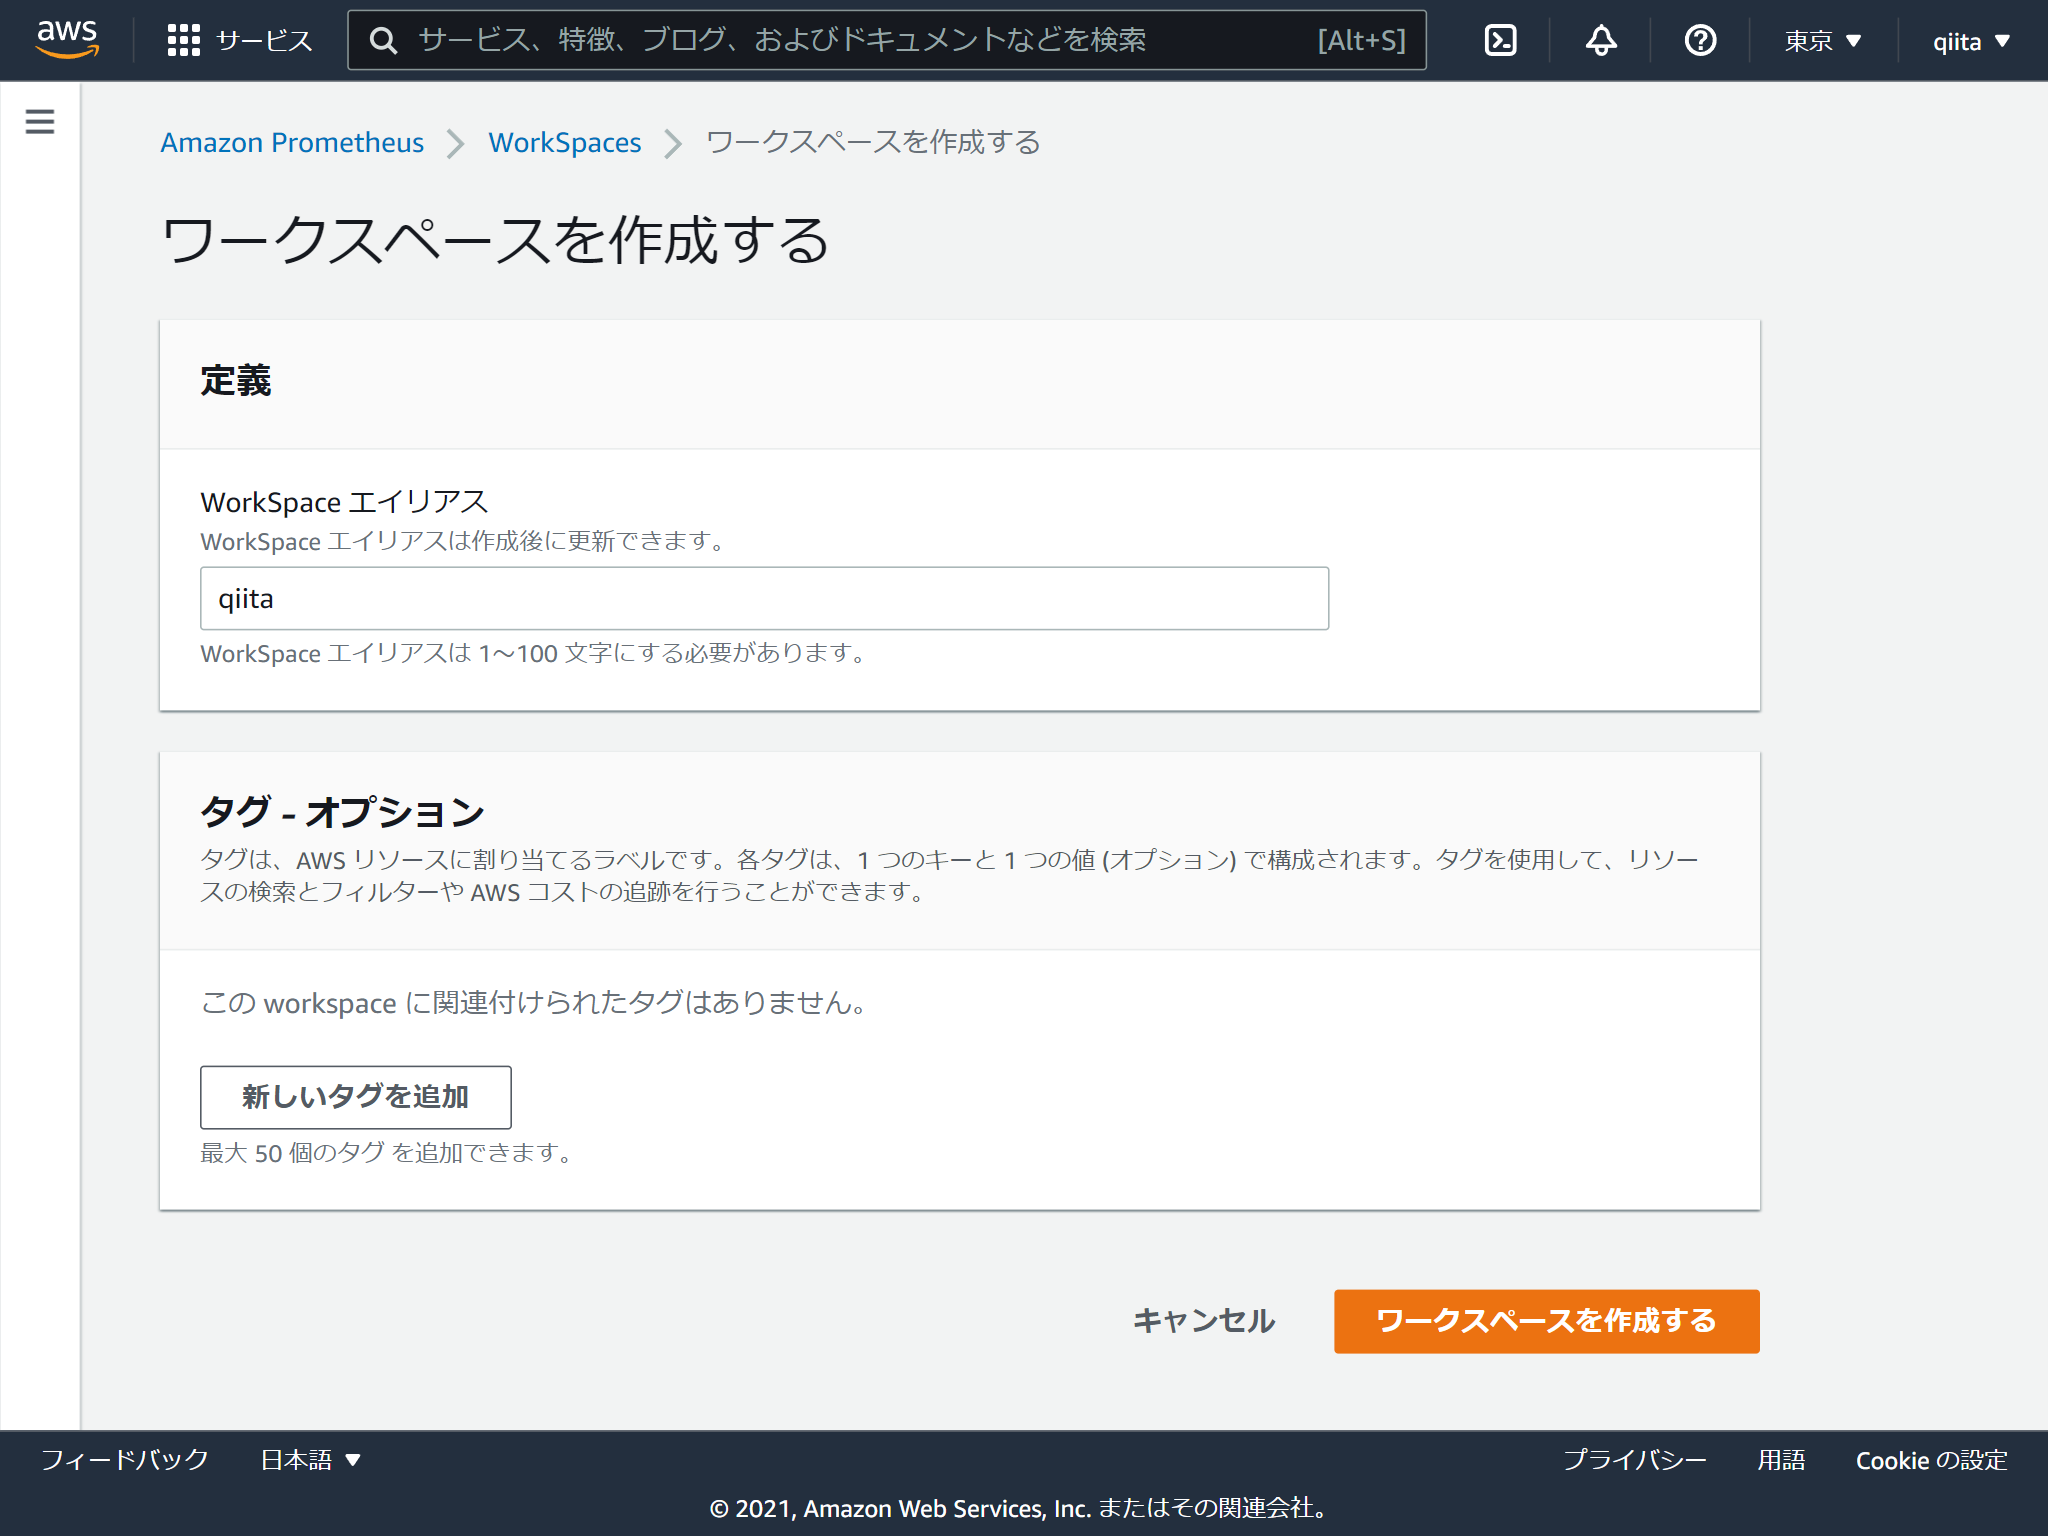
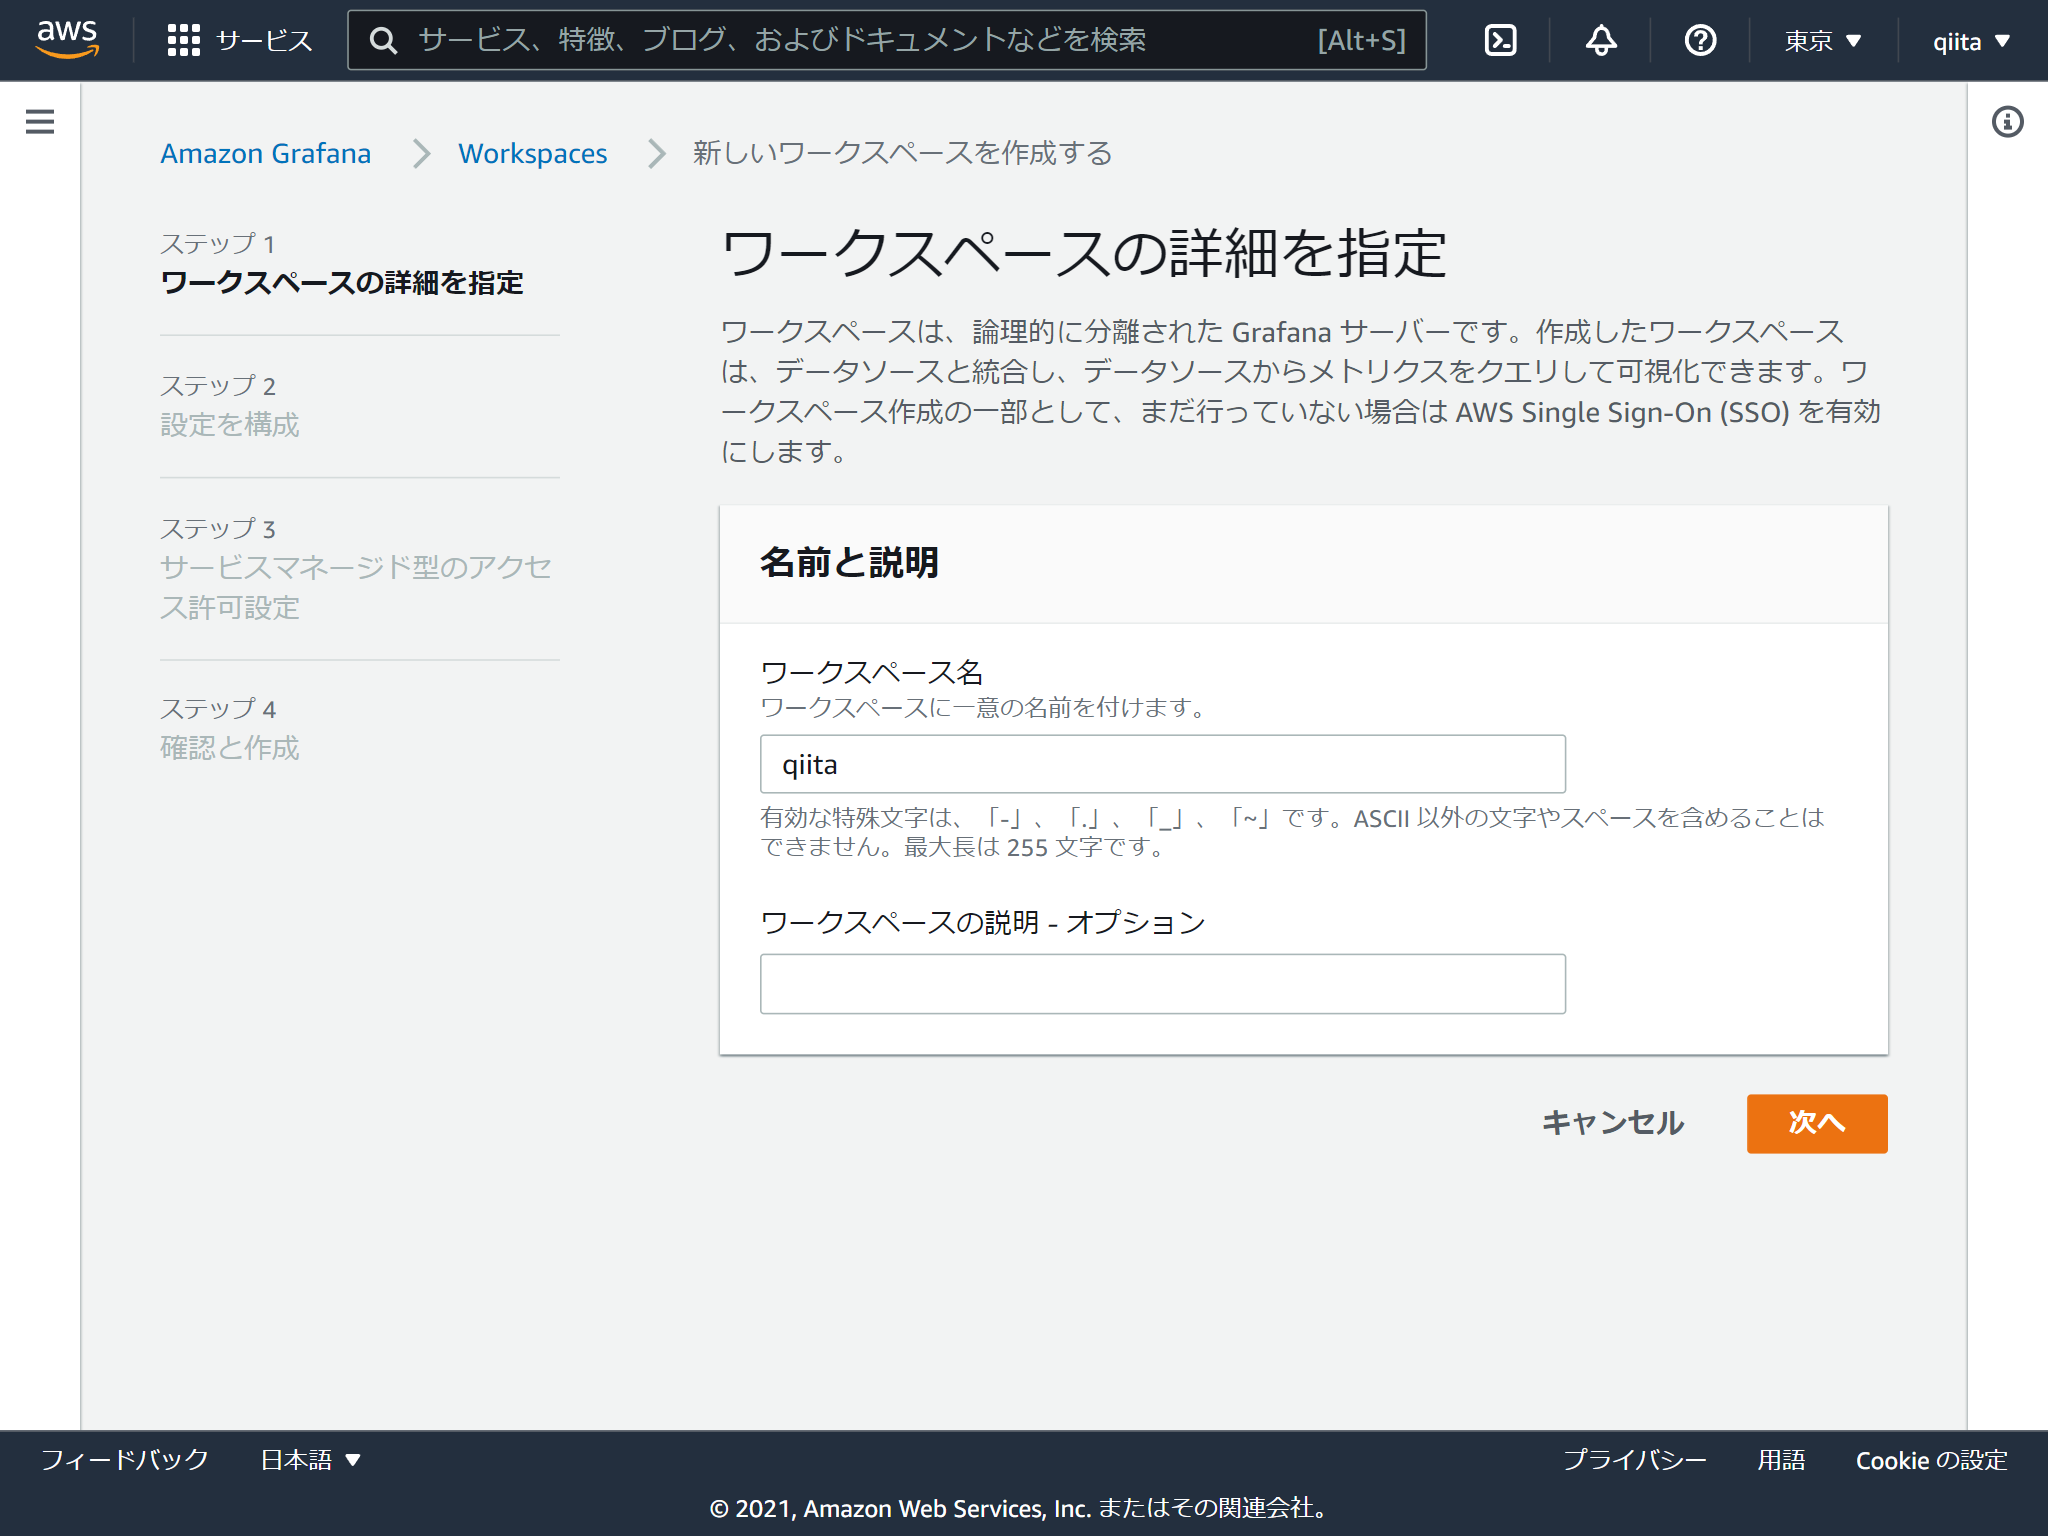
ワークスペースの名称を決めるだけです。
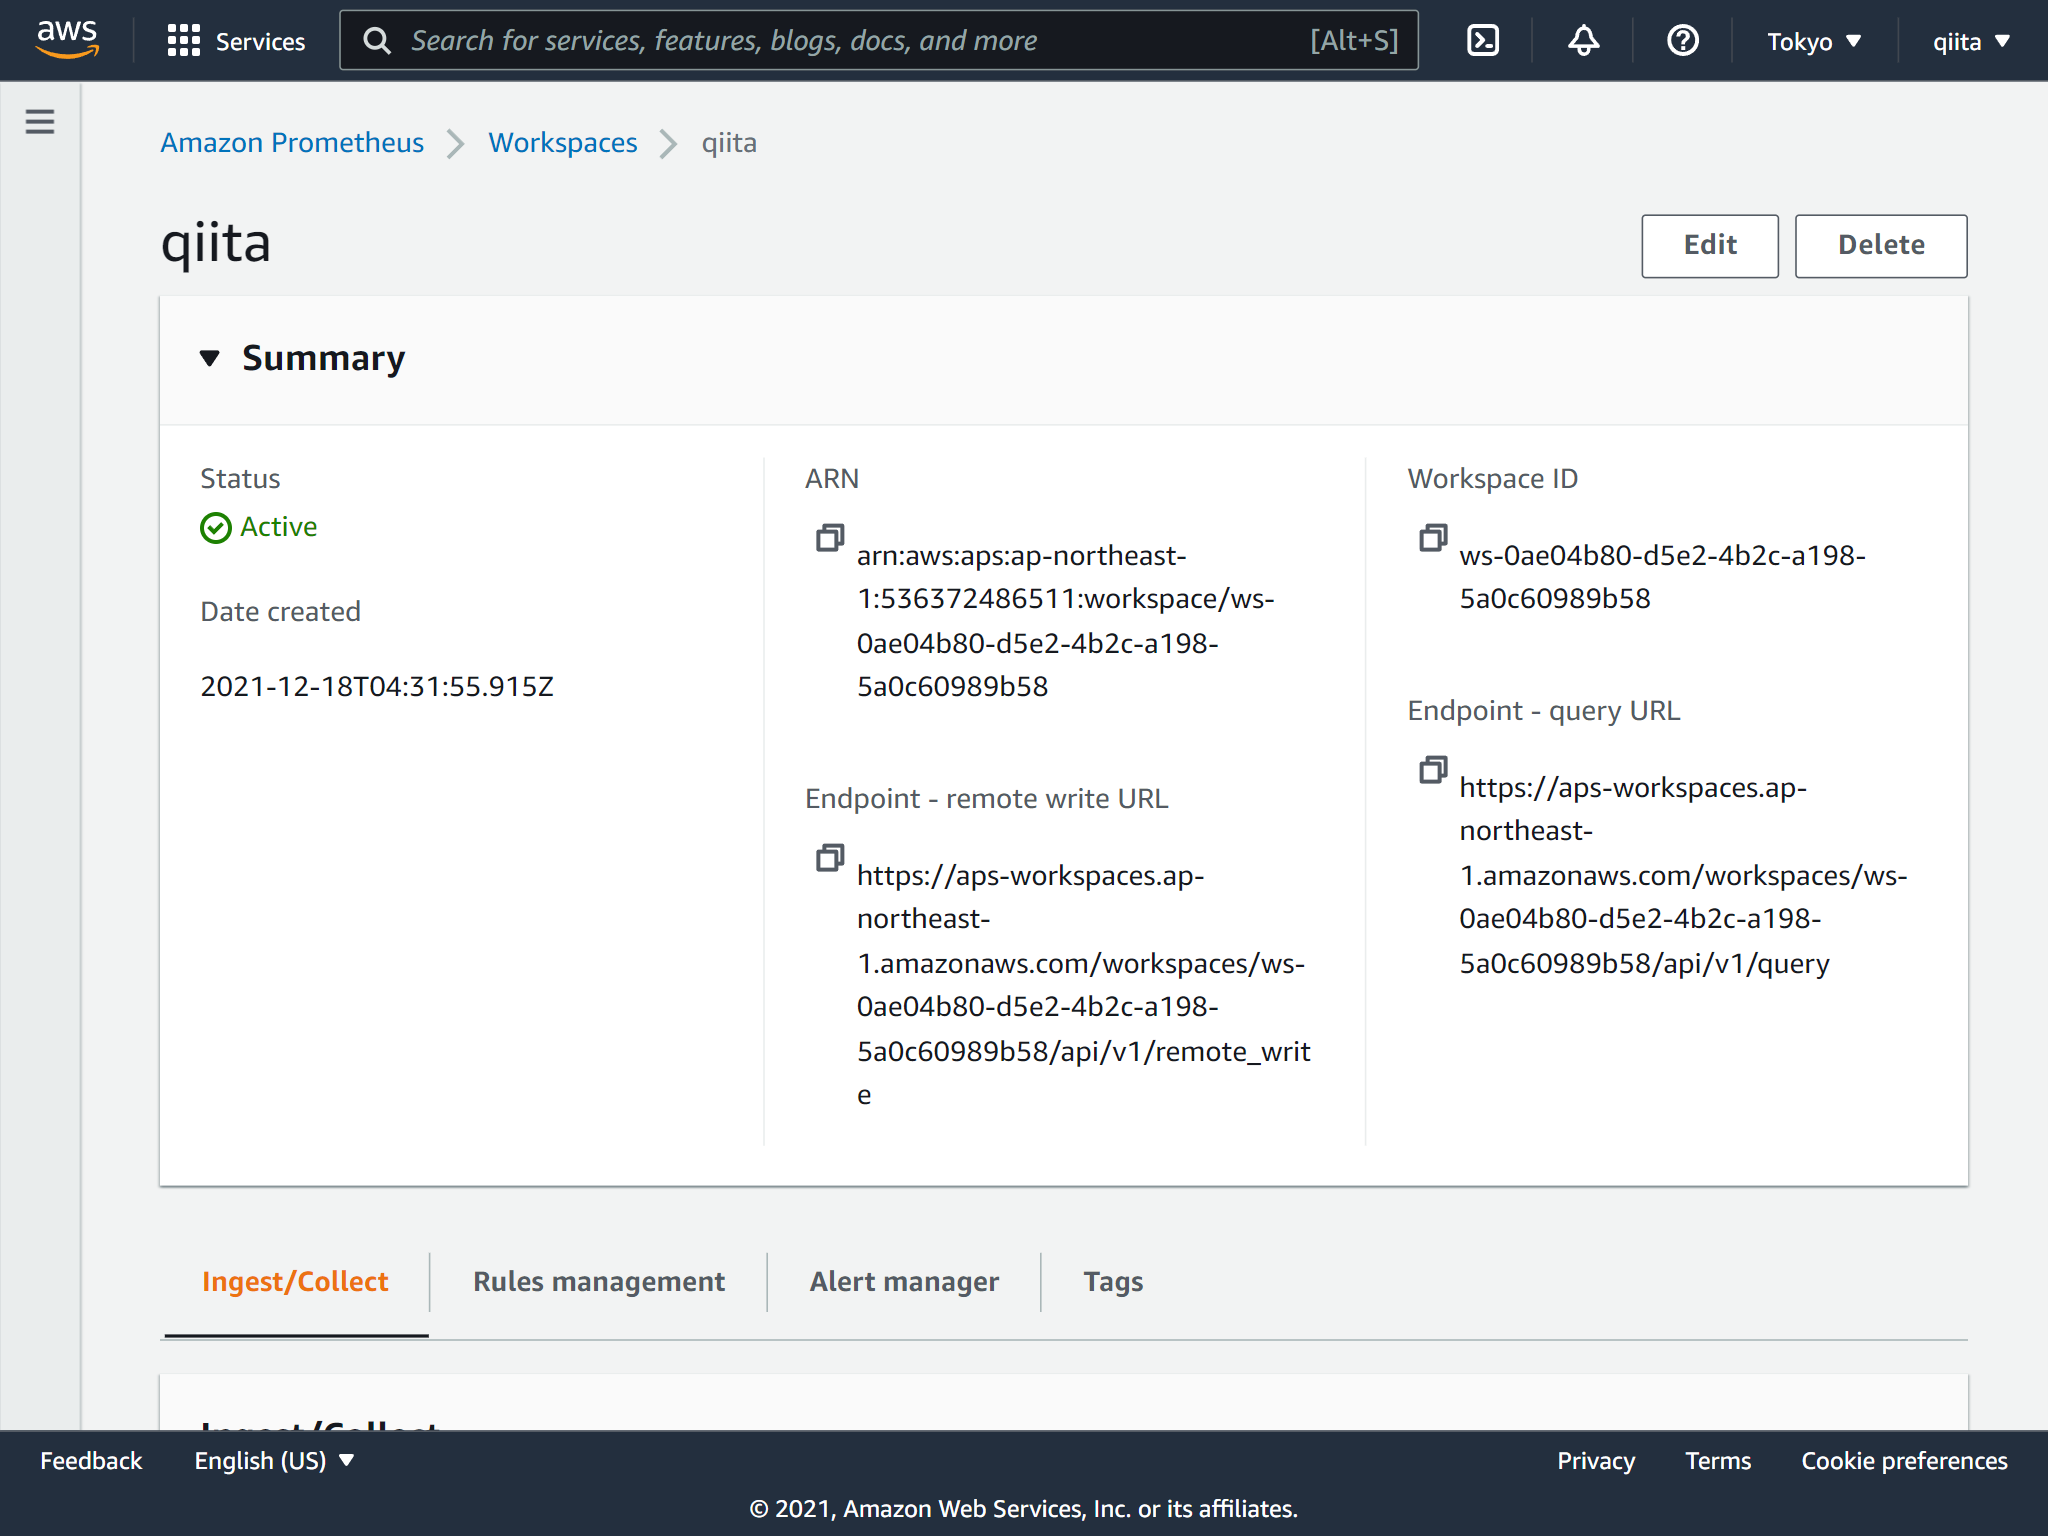
出来上がり。超簡単
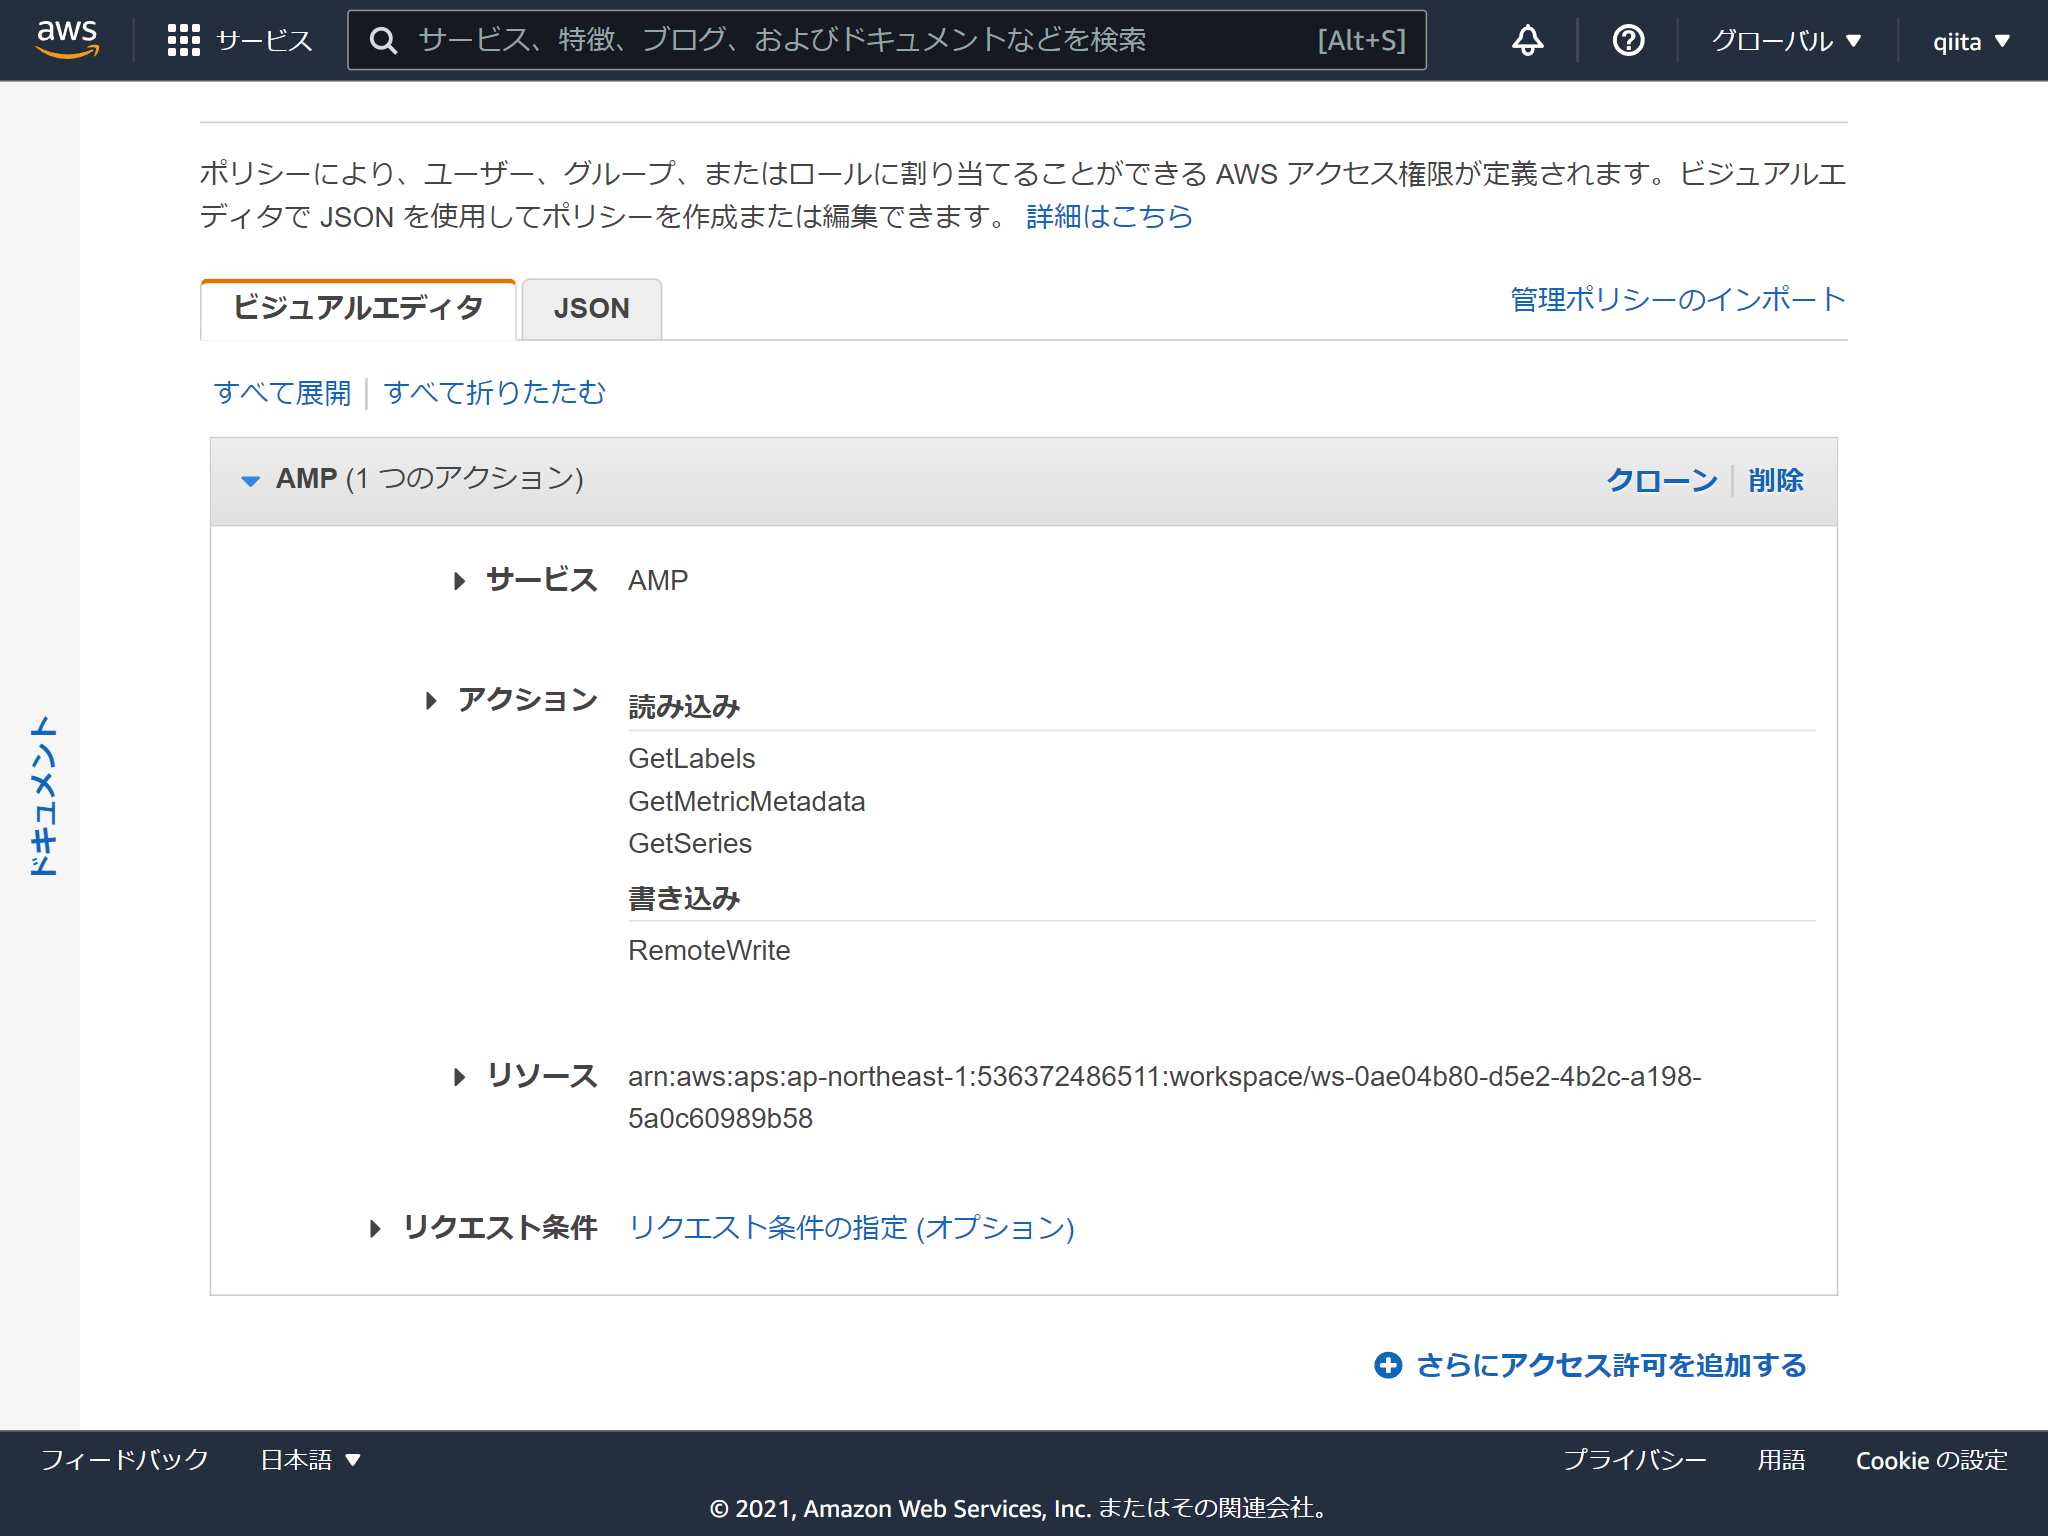
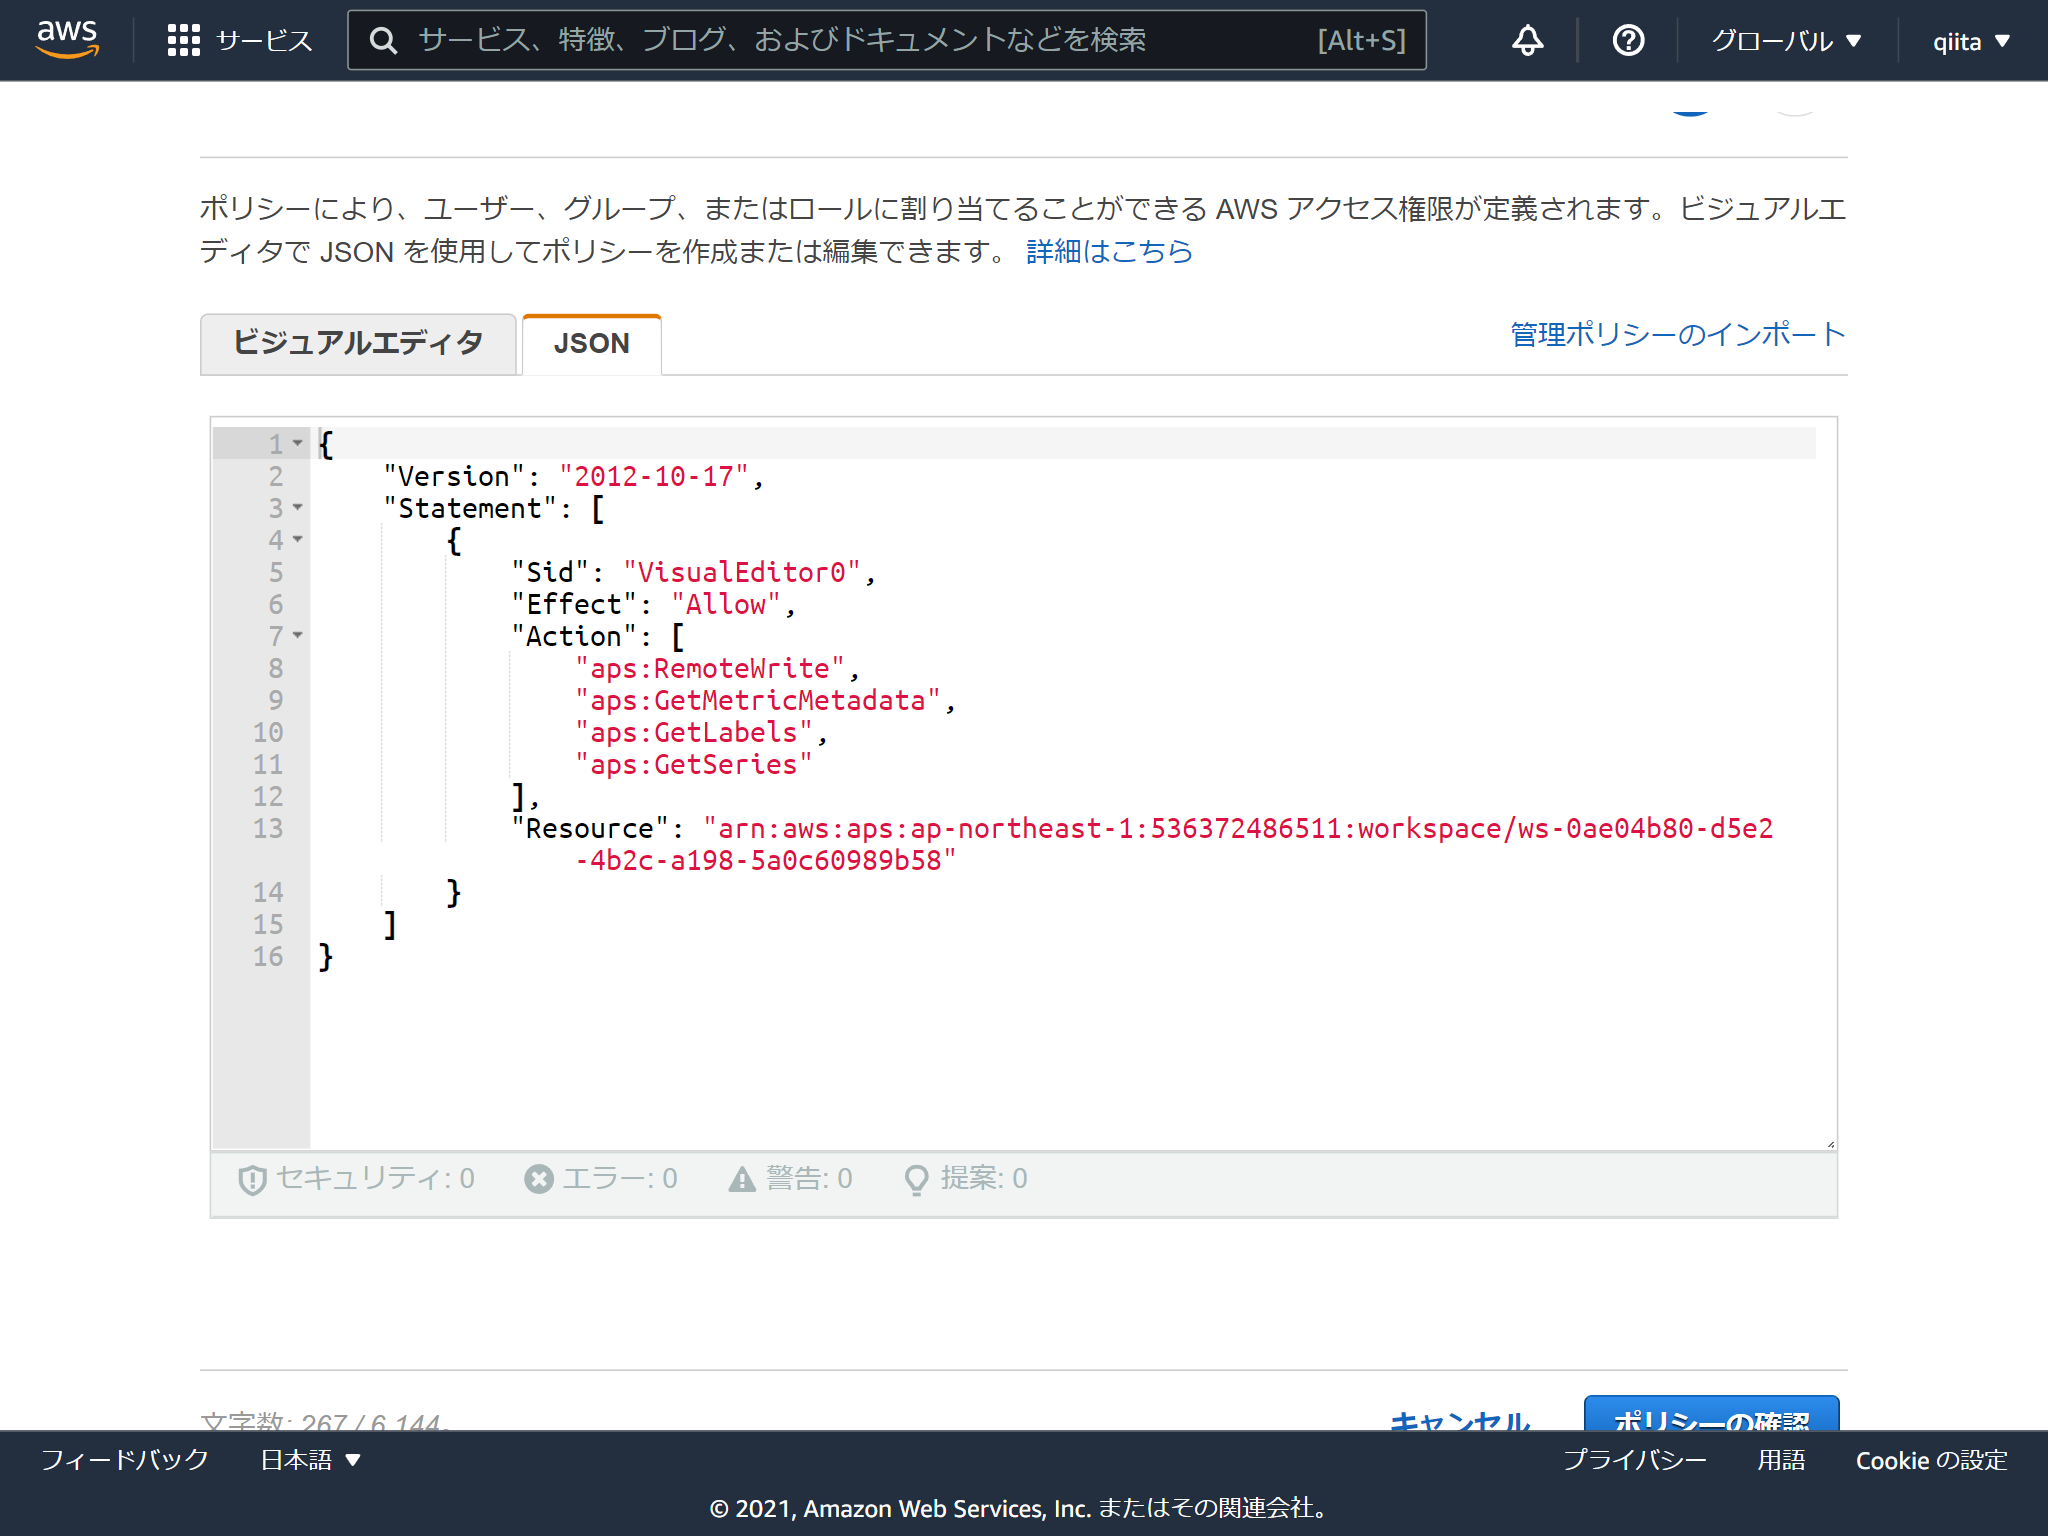
IAMユーザーのアクセスキー情報が必要ですので、IAMユーザーを作成します。
必要なポリシーはこんな感じです。aps:RemoteWriteだけでいいかもしれません。
注意点はなんといってもサービス名が AMP ってところです。さらにActionの接頭辞は aps (笑)
Docker ComposeでPrometheusとNode exporterを起動します。
version: '3.8'

services:
  prometheus:
    image: quay.io/prometheus/prometheus:latest
    network_mode: host
    volumes:
      - ./prometheus.yml:/etc/prometheus/prometheus.yml

  node-exporter:
    image: quay.io/prometheus/node-exporter:latest
    container_name: node_exporter
    command:
      - '--path.rootfs=/host'
    network_mode: host
    pid: host
    restart: unless-stopped
    volumes:
      - '/:/host:ro,rslave'
remote_writeのところに認証情報をセットします。
## my global config
global:
  scrape_interval:     15s # Set the scrape interval to every 15 seconds. Default is every 1 minute.
  evaluation_interval: 15s # Evaluate rules every 15 seconds. The default is every 1 minute.
  # scrape_timeout is set to the global default (10s).

## Alertmanager configuration
alerting:
  alertmanagers:
  - static_configs:
    - targets:
      # - alertmanager:9093

## Load rules once and periodically evaluate them according to the global 'evaluation_interval'.
rule_files:
  # - "first_rules.yml"
  # - "second_rules.yml"

## A scrape configuration containing exactly one endpoint to scrape:
## Here it's Prometheus itself.
scrape_configs:
  # The job name is added as a label `job=<job_name>` to any timeseries scraped from this config.
  - job_name: 'prometheus'

    # metrics_path defaults to '/metrics'
    # scheme defaults to 'http'.

    static_configs:
    - targets: ['localhost:9090']

  - job_name: 'node'

    static_configs:
    - targets: ['localhost:9100']

remote_write:
- url: https://aps-workspaces.ap-northeast-1.amazonaws.com/workspaces/ws-0ae04b80-d5e2-4b2c-a198-5a0c60989b58/api/v1/remote_write

  sigv4:
    # The AWS region. If blank, the region from the default credentials chain
    # is used.
    region: ap-northeast-1

    # The AWS API keys. If blank, the environment variables `AWS_ACCESS_KEY_ID`
    # and `AWS_SECRET_ACCESS_KEY` are used.
    access_key: XXXXXXXXXXXXXXXXXXXX
    secret_key: XXXXXXXXXXXXXXXXXXXX
起動します
## docker-compose up
ワークスペース名をつけます
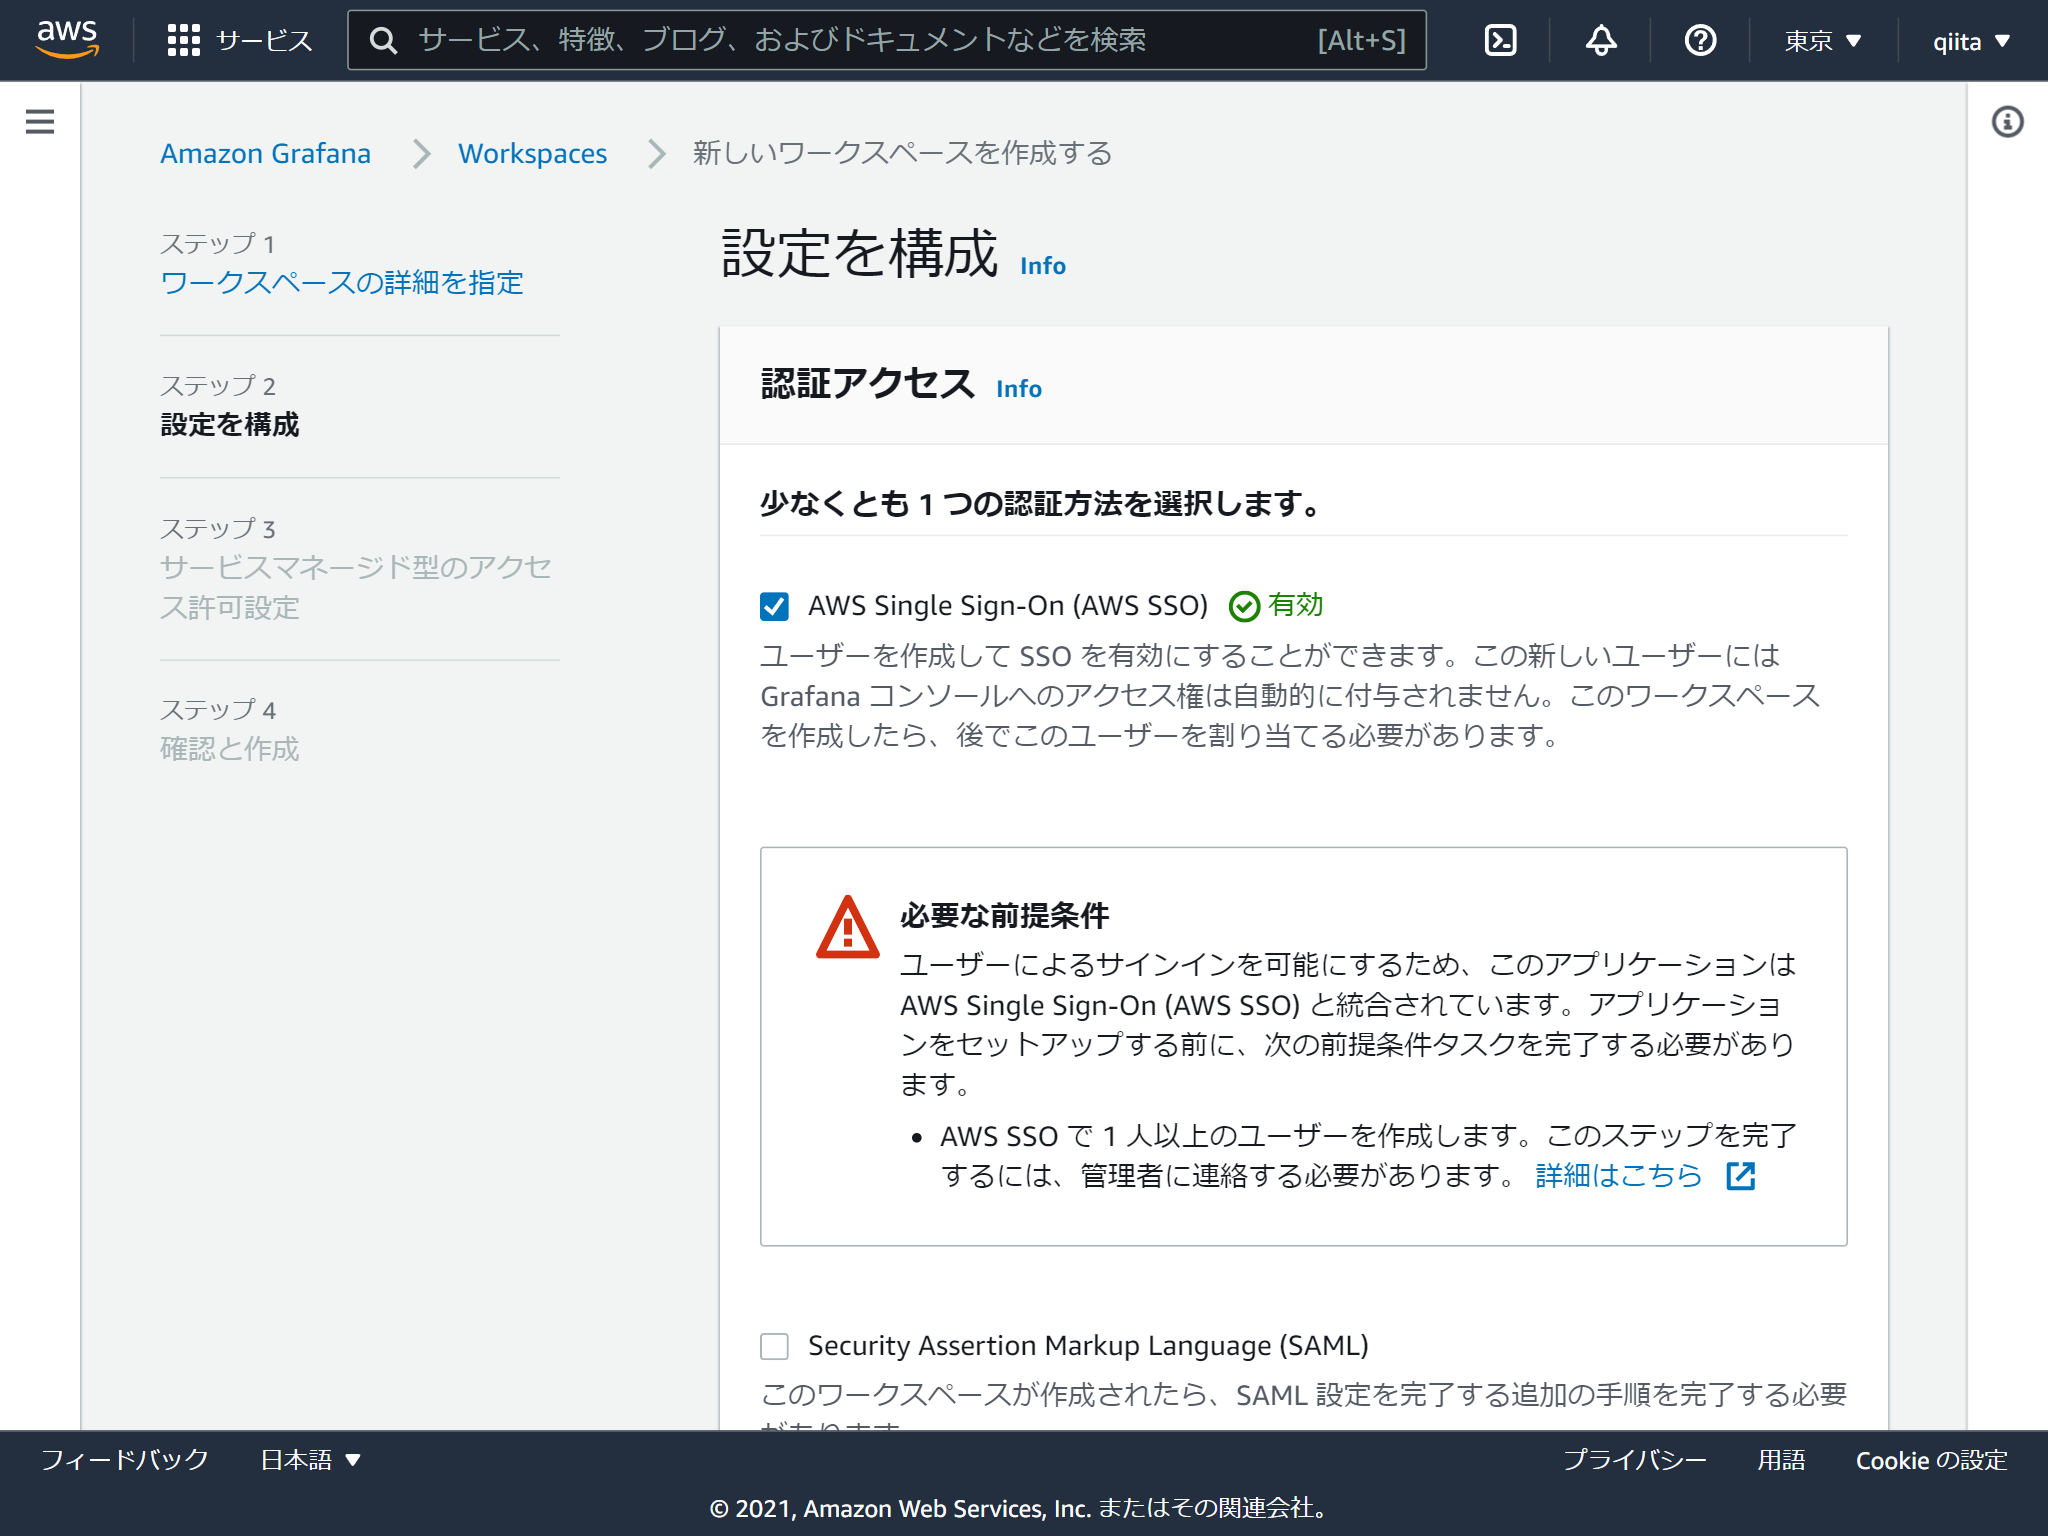
Grafanaの画面にログインする際に使う認証情報を選択します。AWS SSOにしてみました。
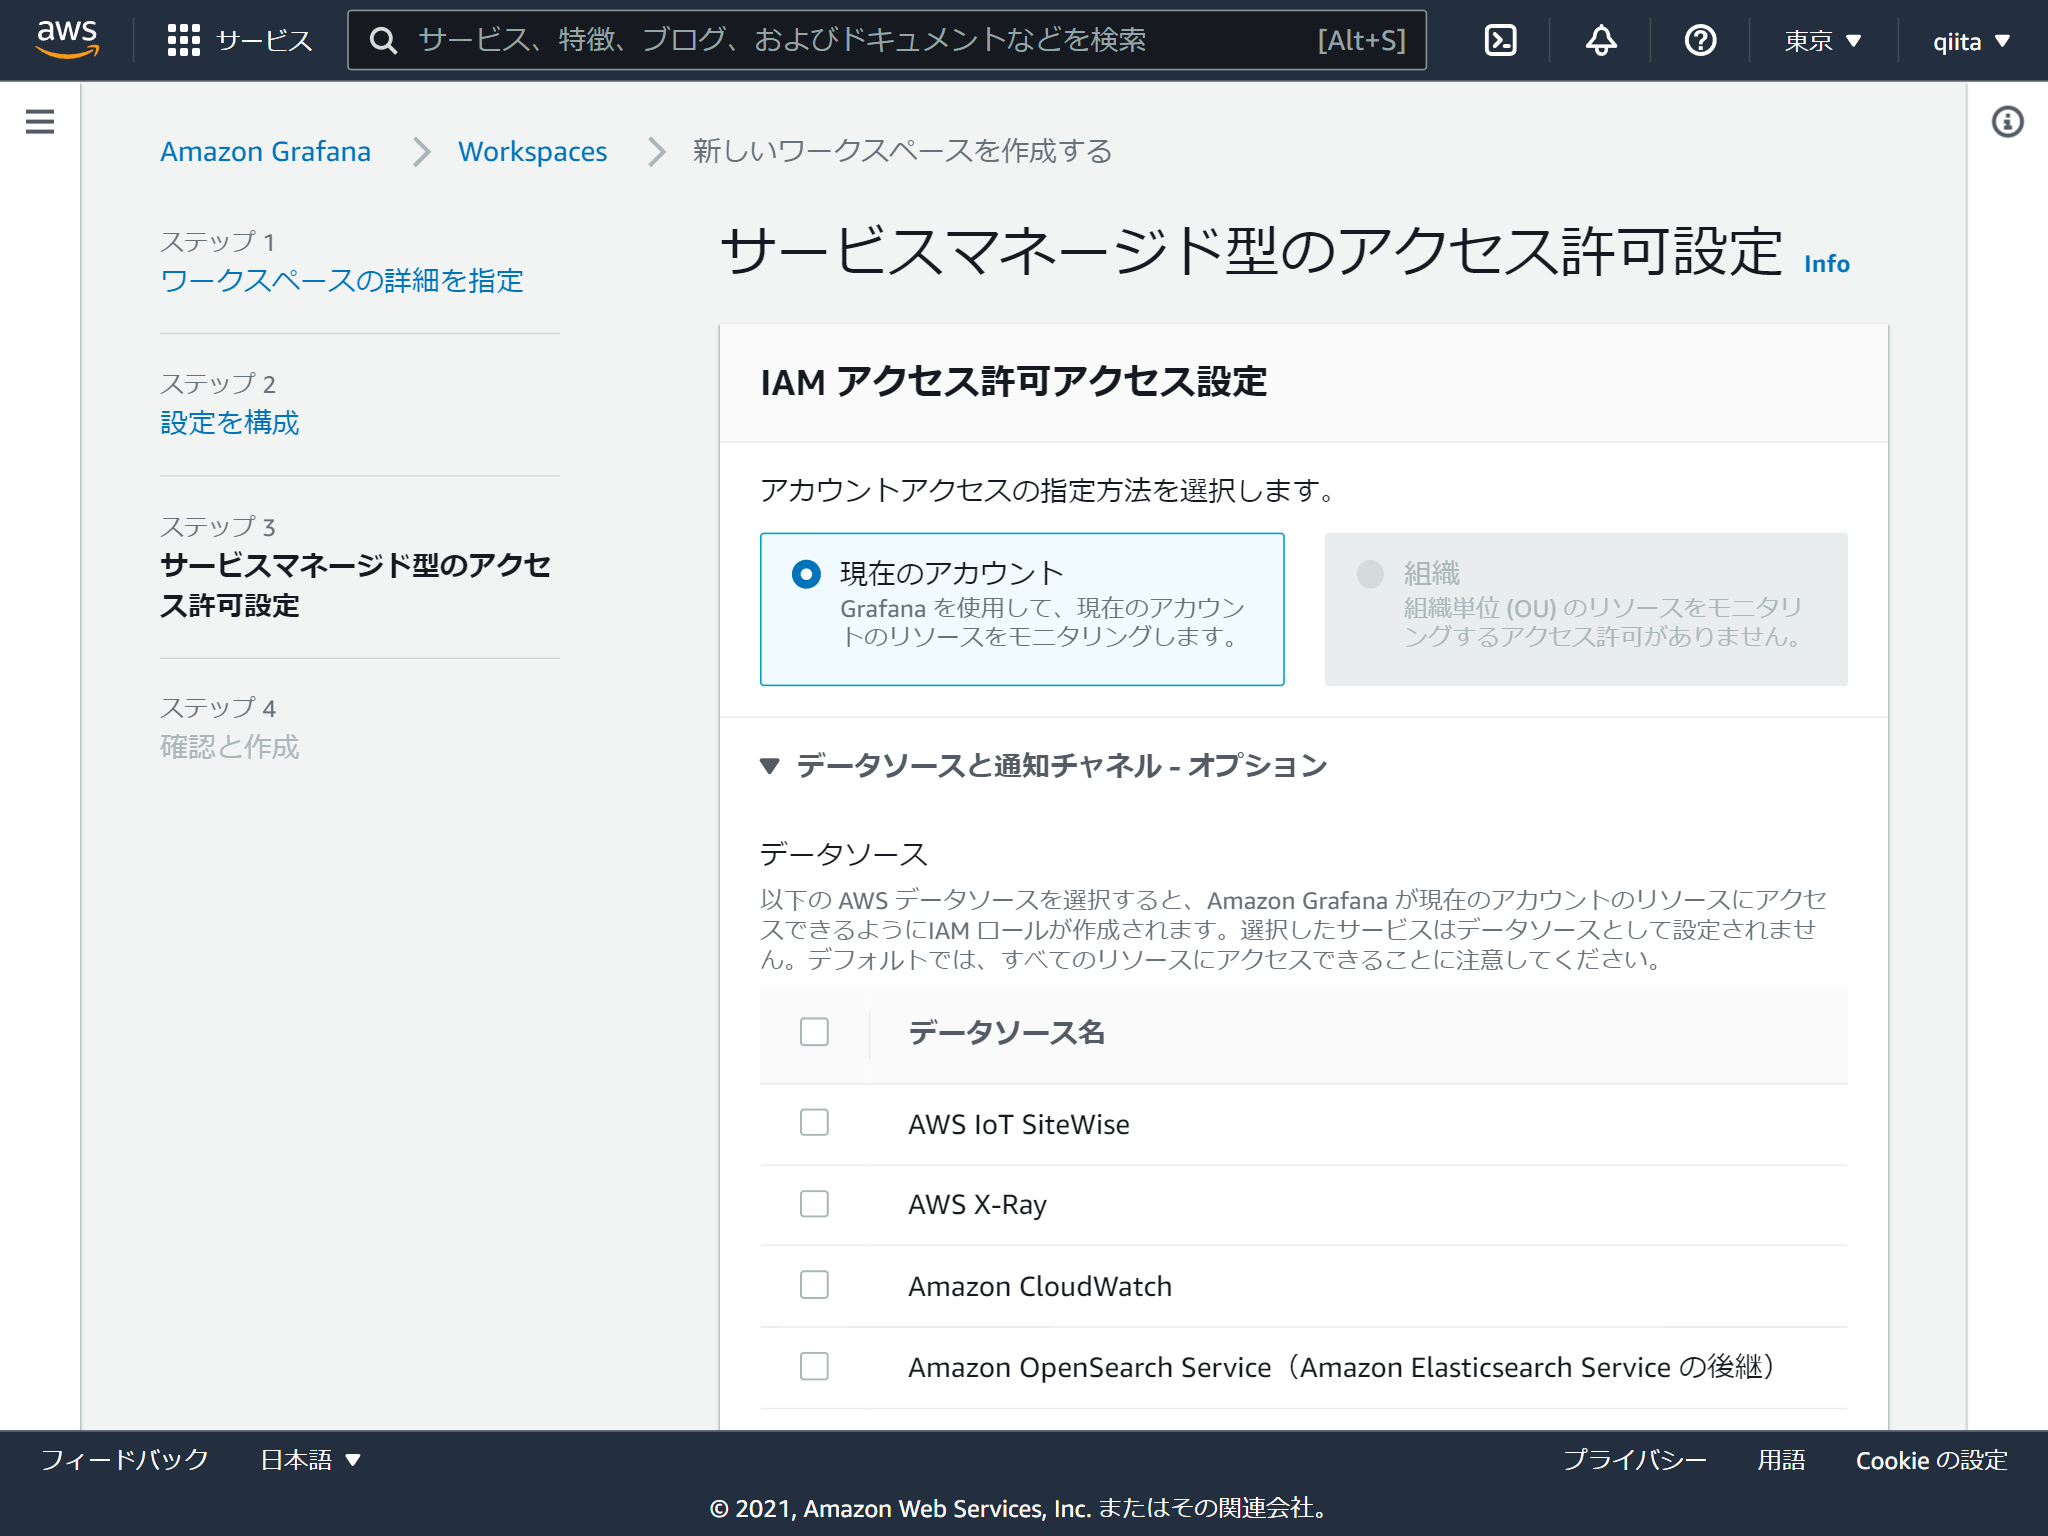
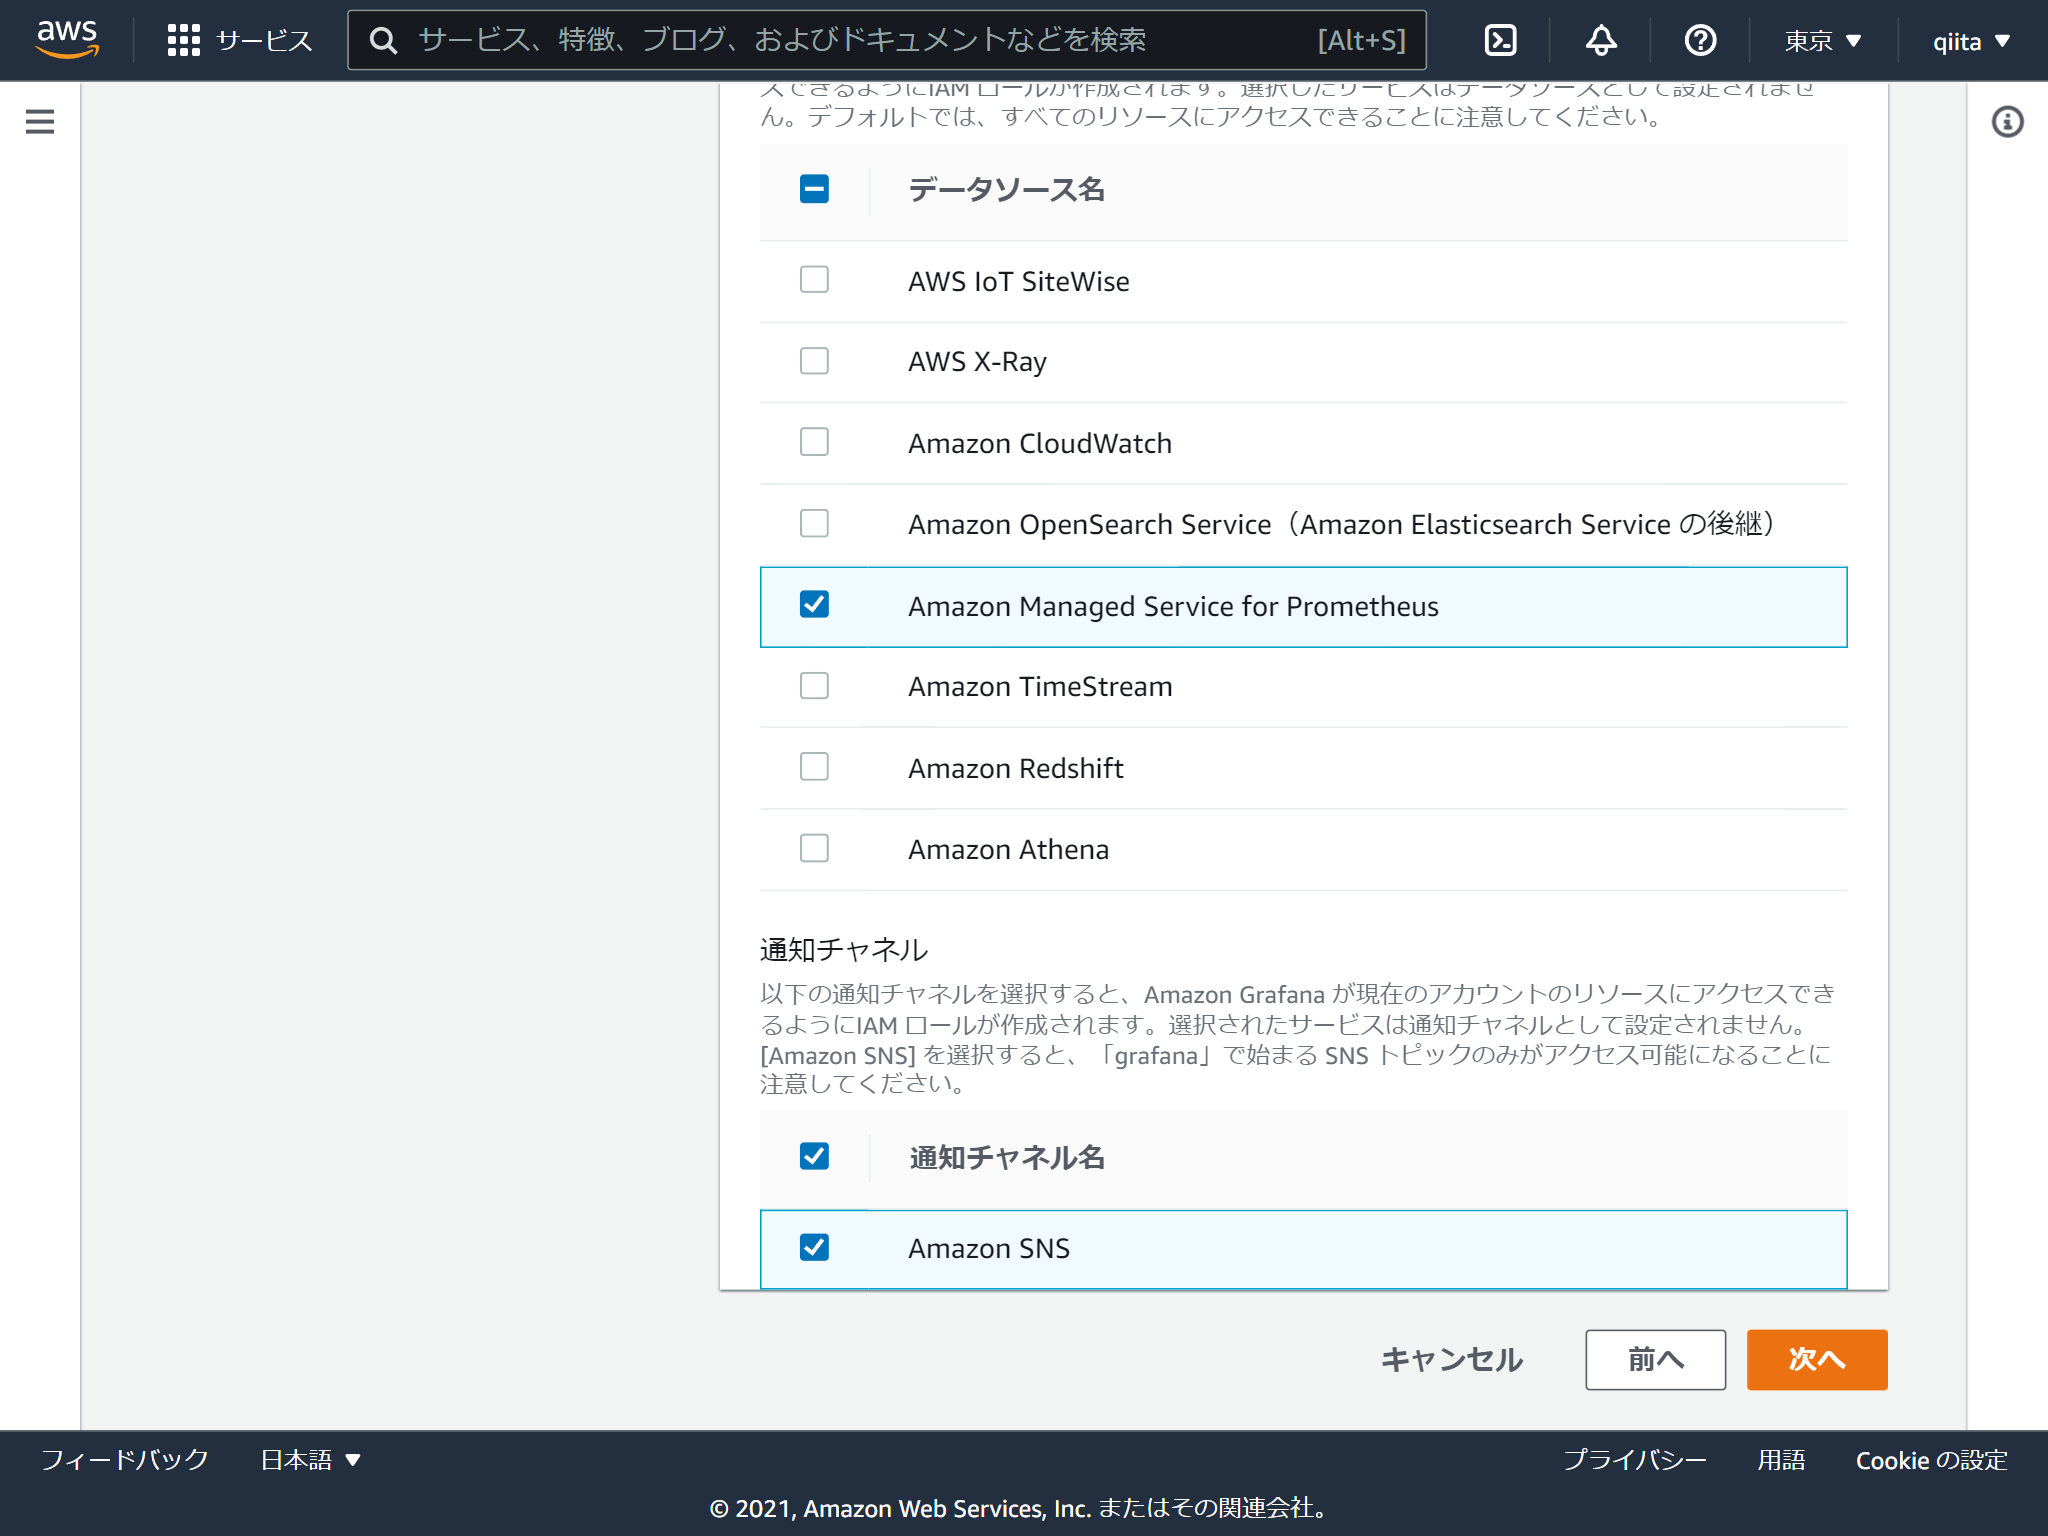
GrafanaがアクセスするAWSのリソースを選択します。 あとからも変更できます。
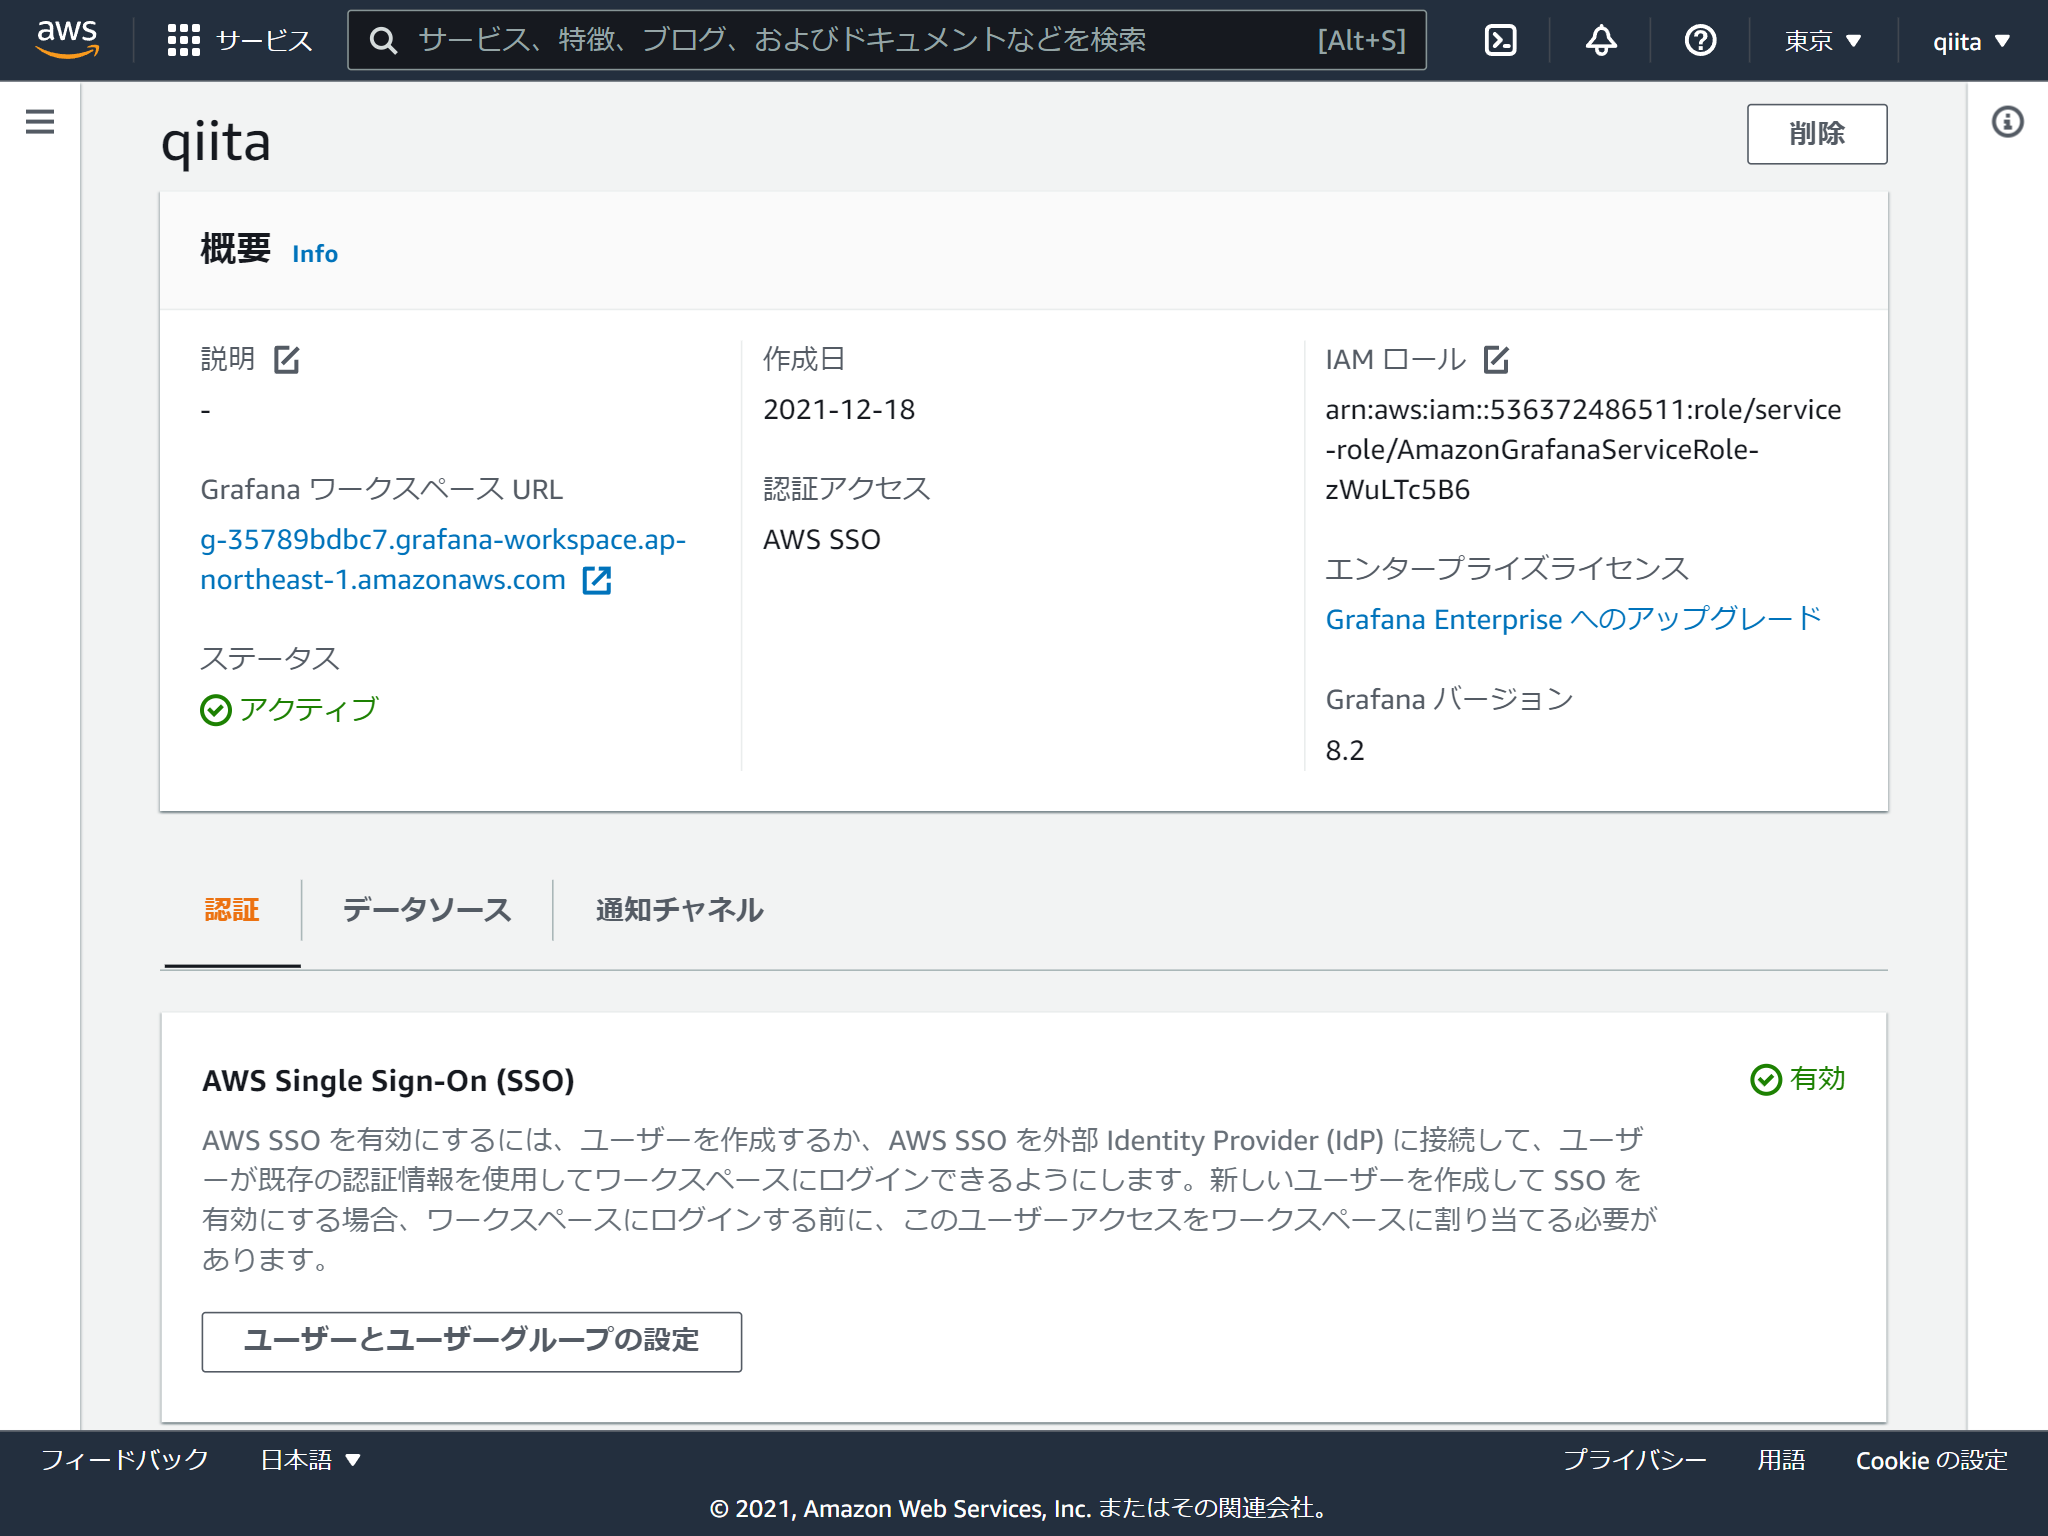
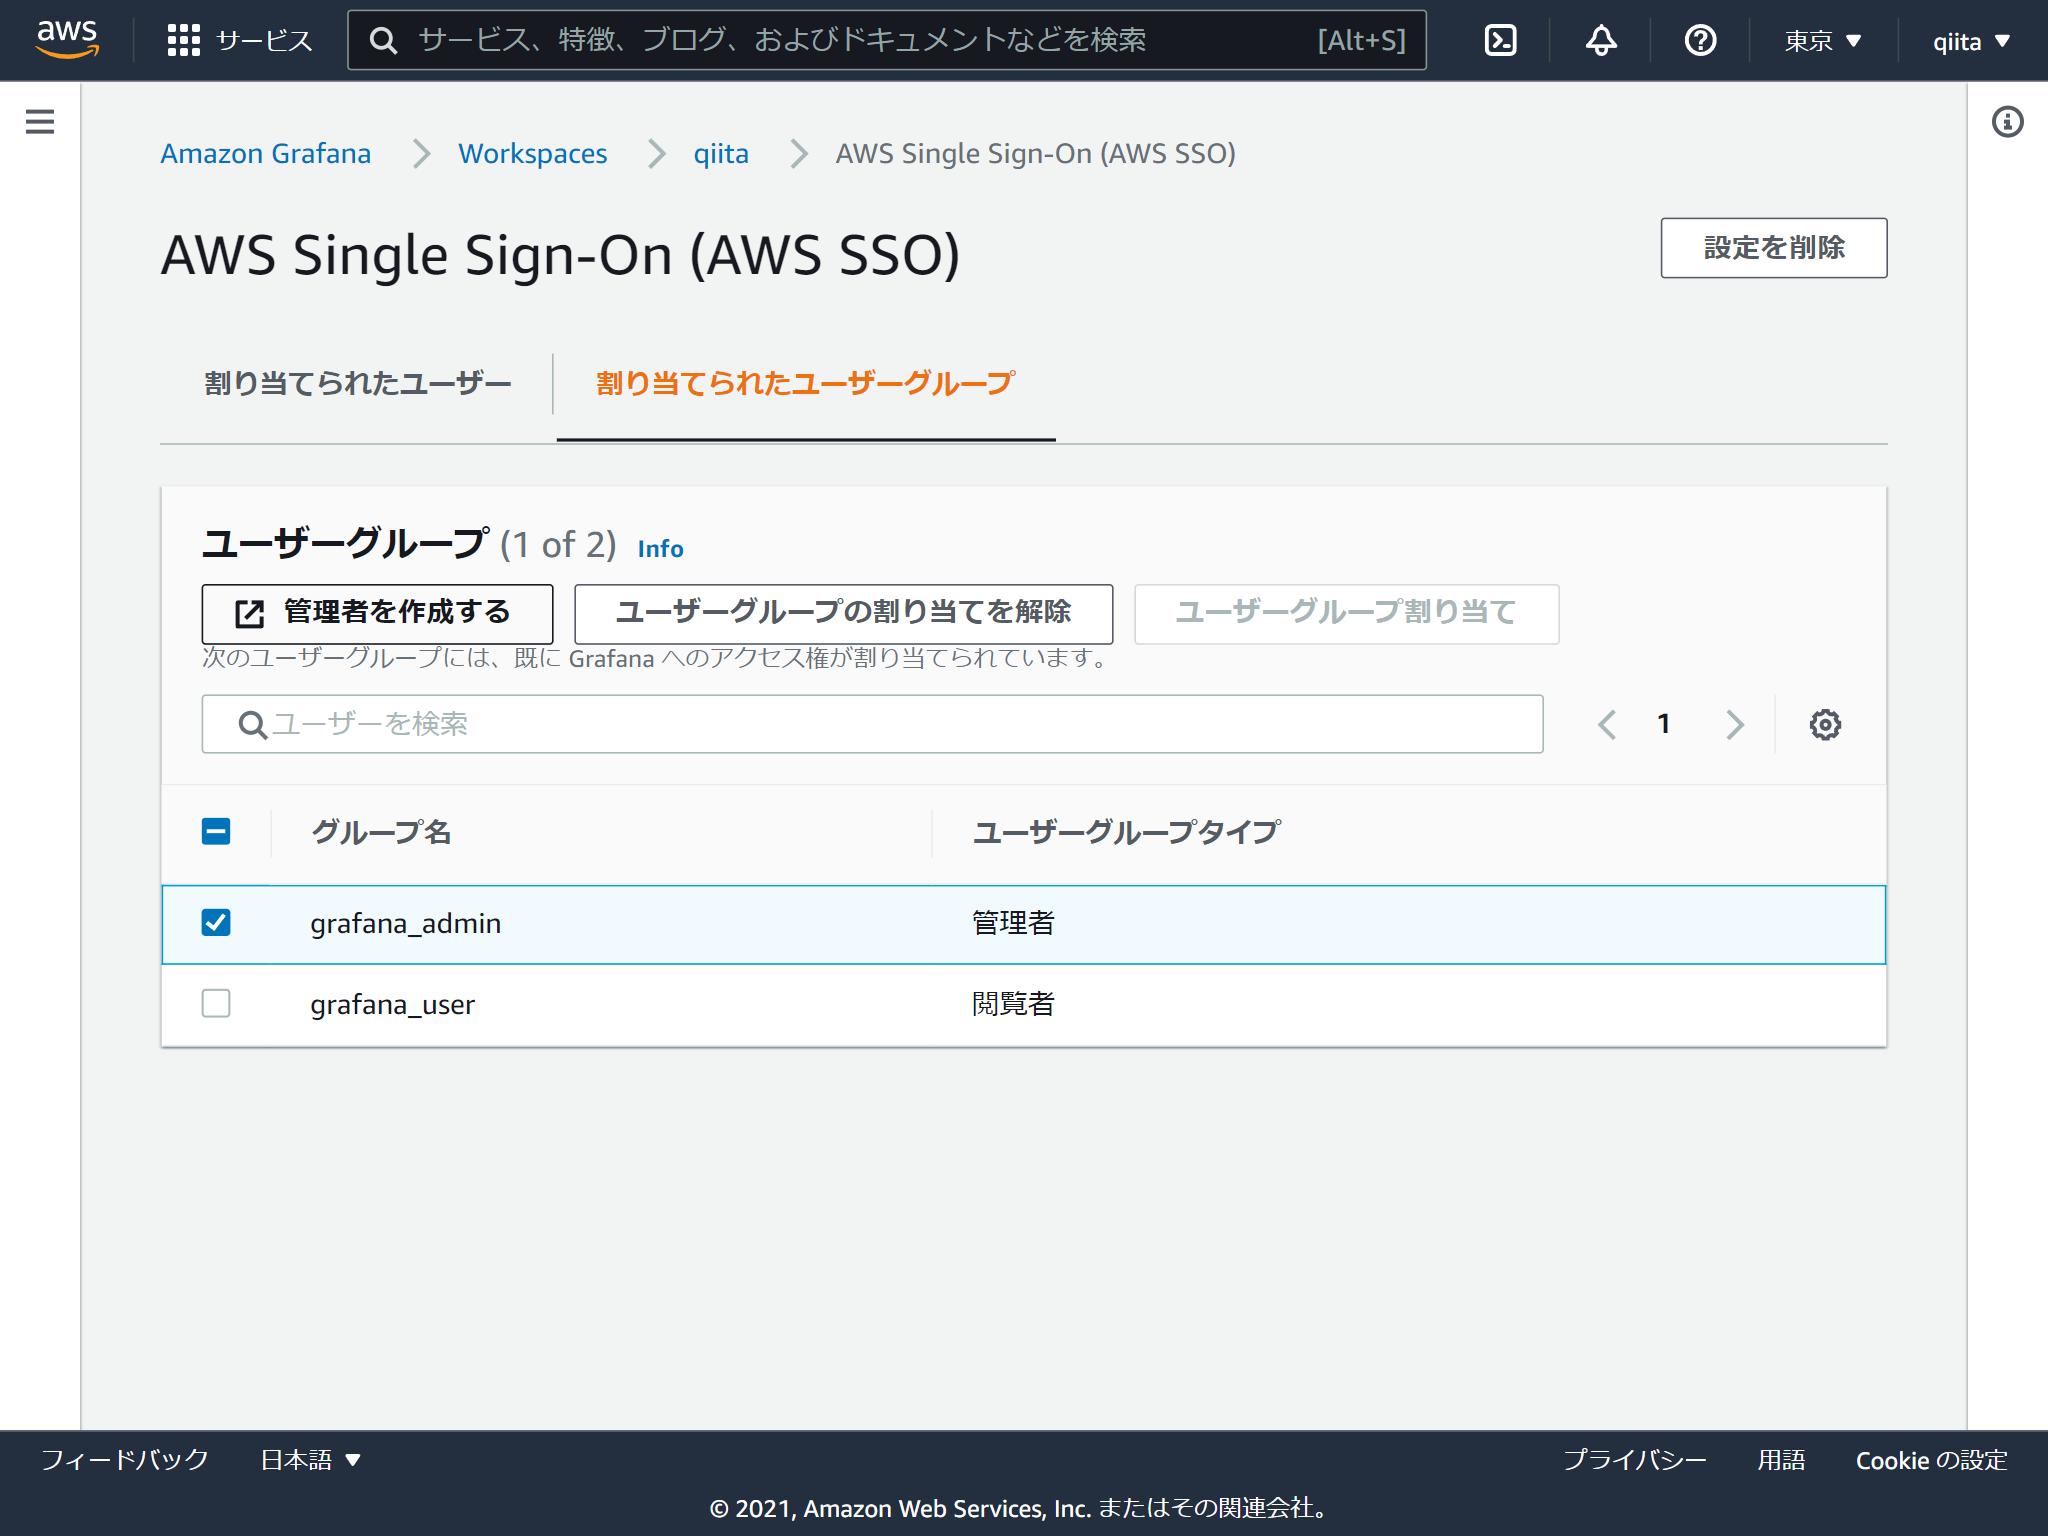
これで作成は完了です。 続いてログインするユーザーを追加します。「ユーザーとユーザーグループの設定」をクリック
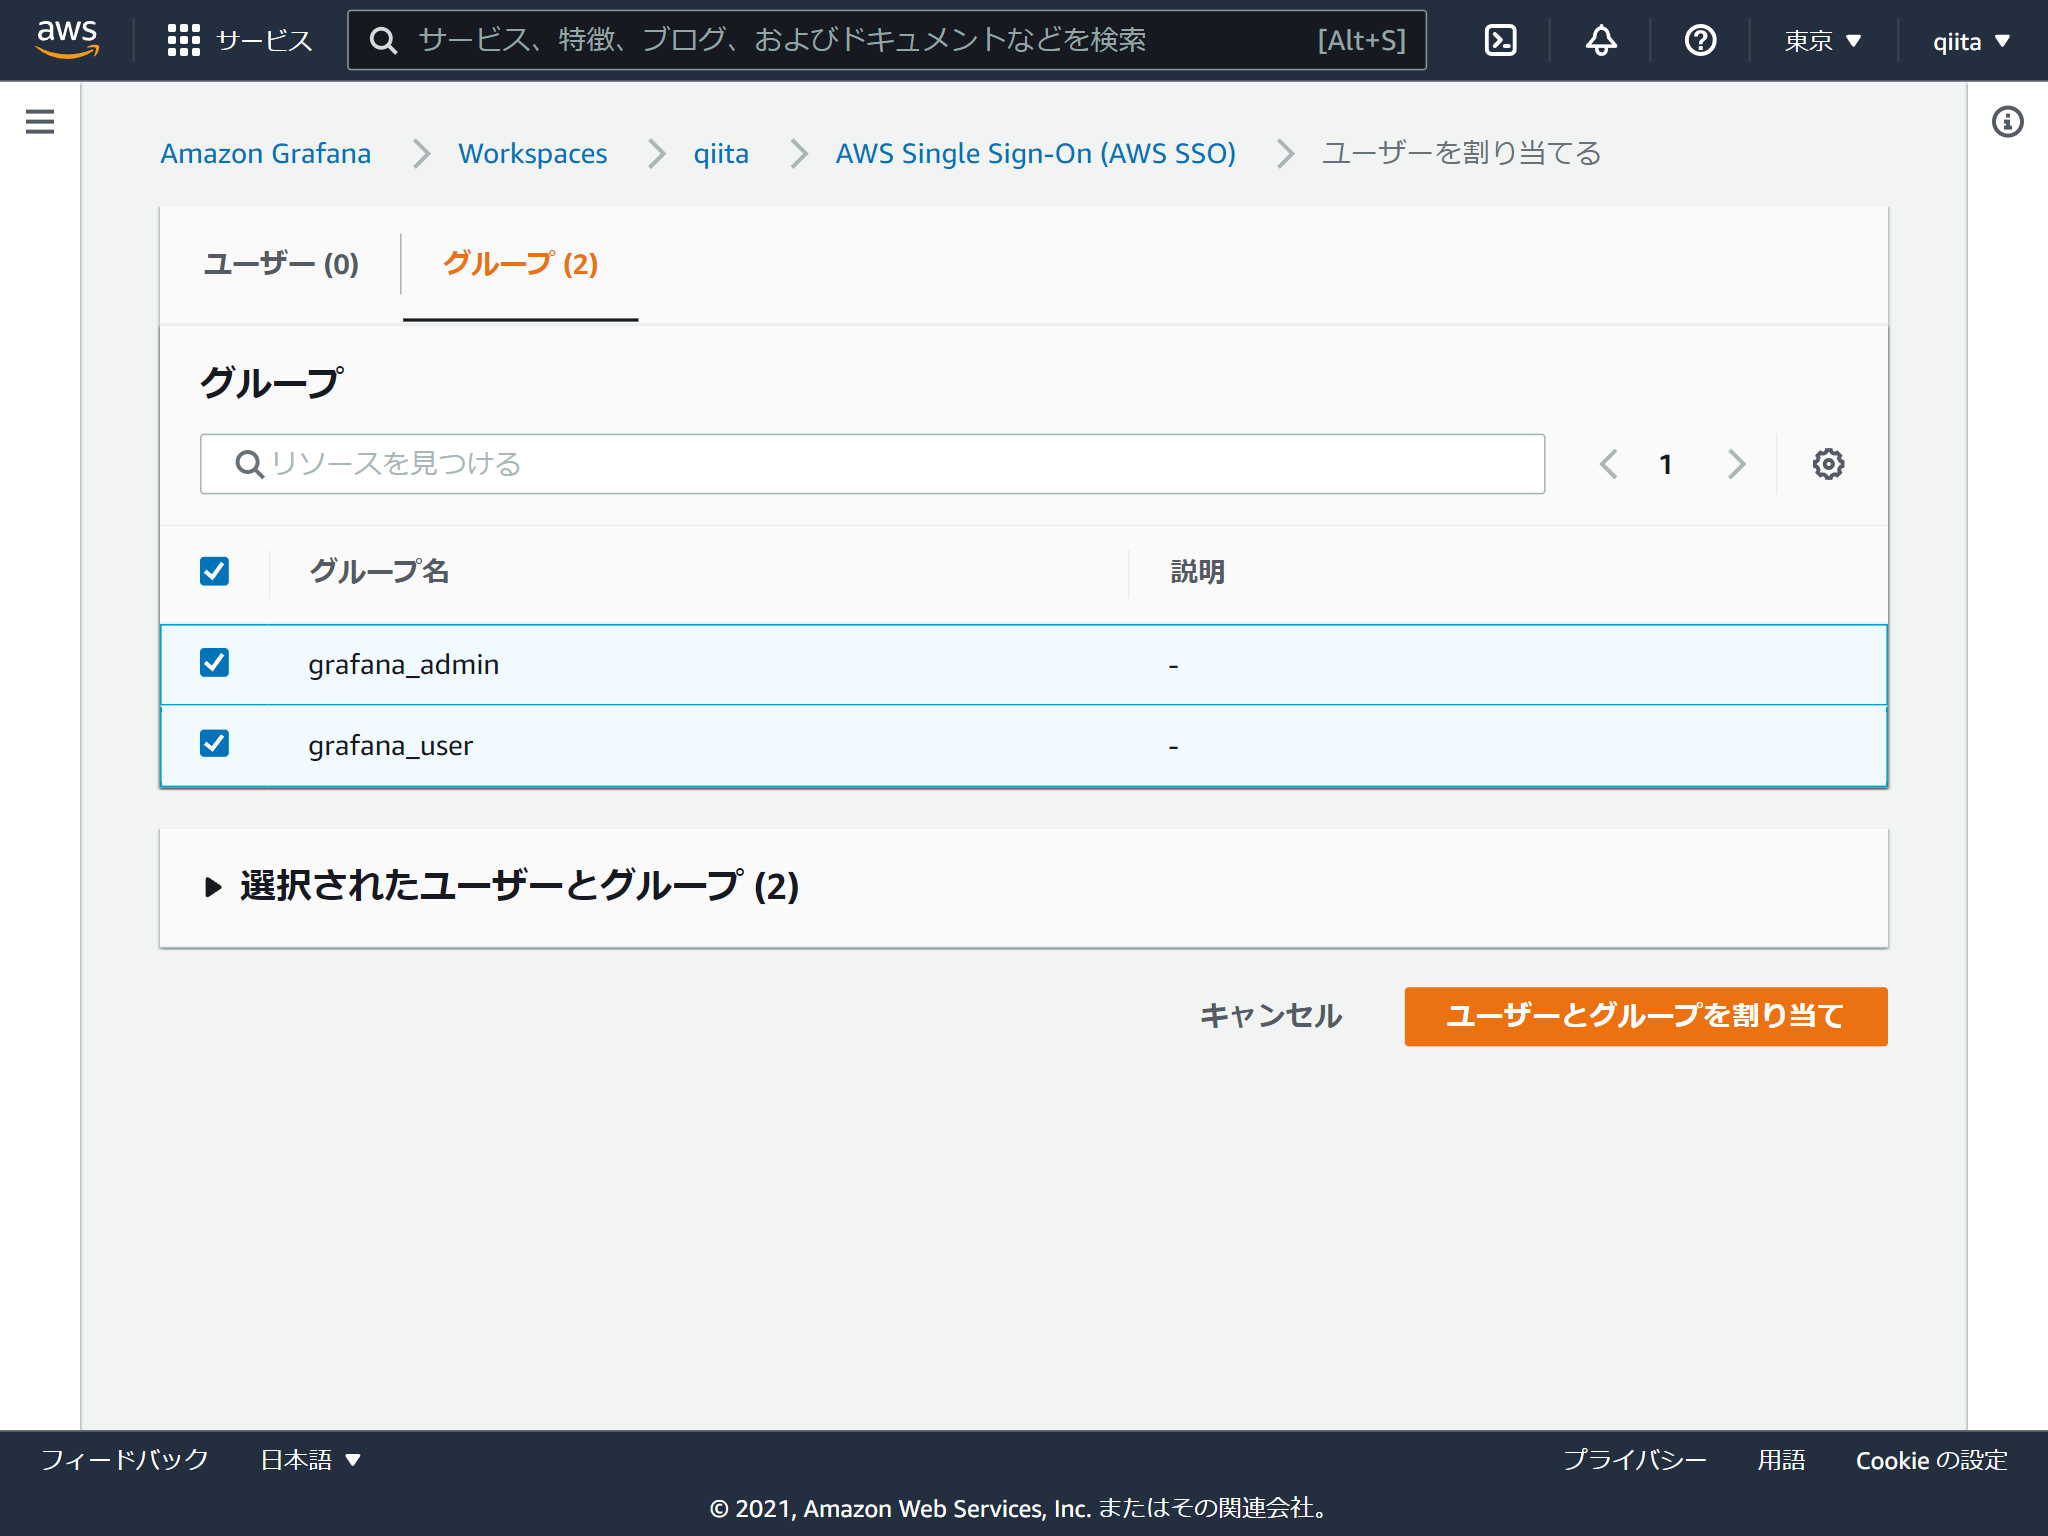
今回はAWS SSOで作成したグループを追加します。
権限は閲覧者と管理者の2つあります。デフォルトが閲覧者で管理者に変更する場合はチェックを入れて「管理者を作成する」をクリックします。(閲覧者に戻す方法はないのかな?)
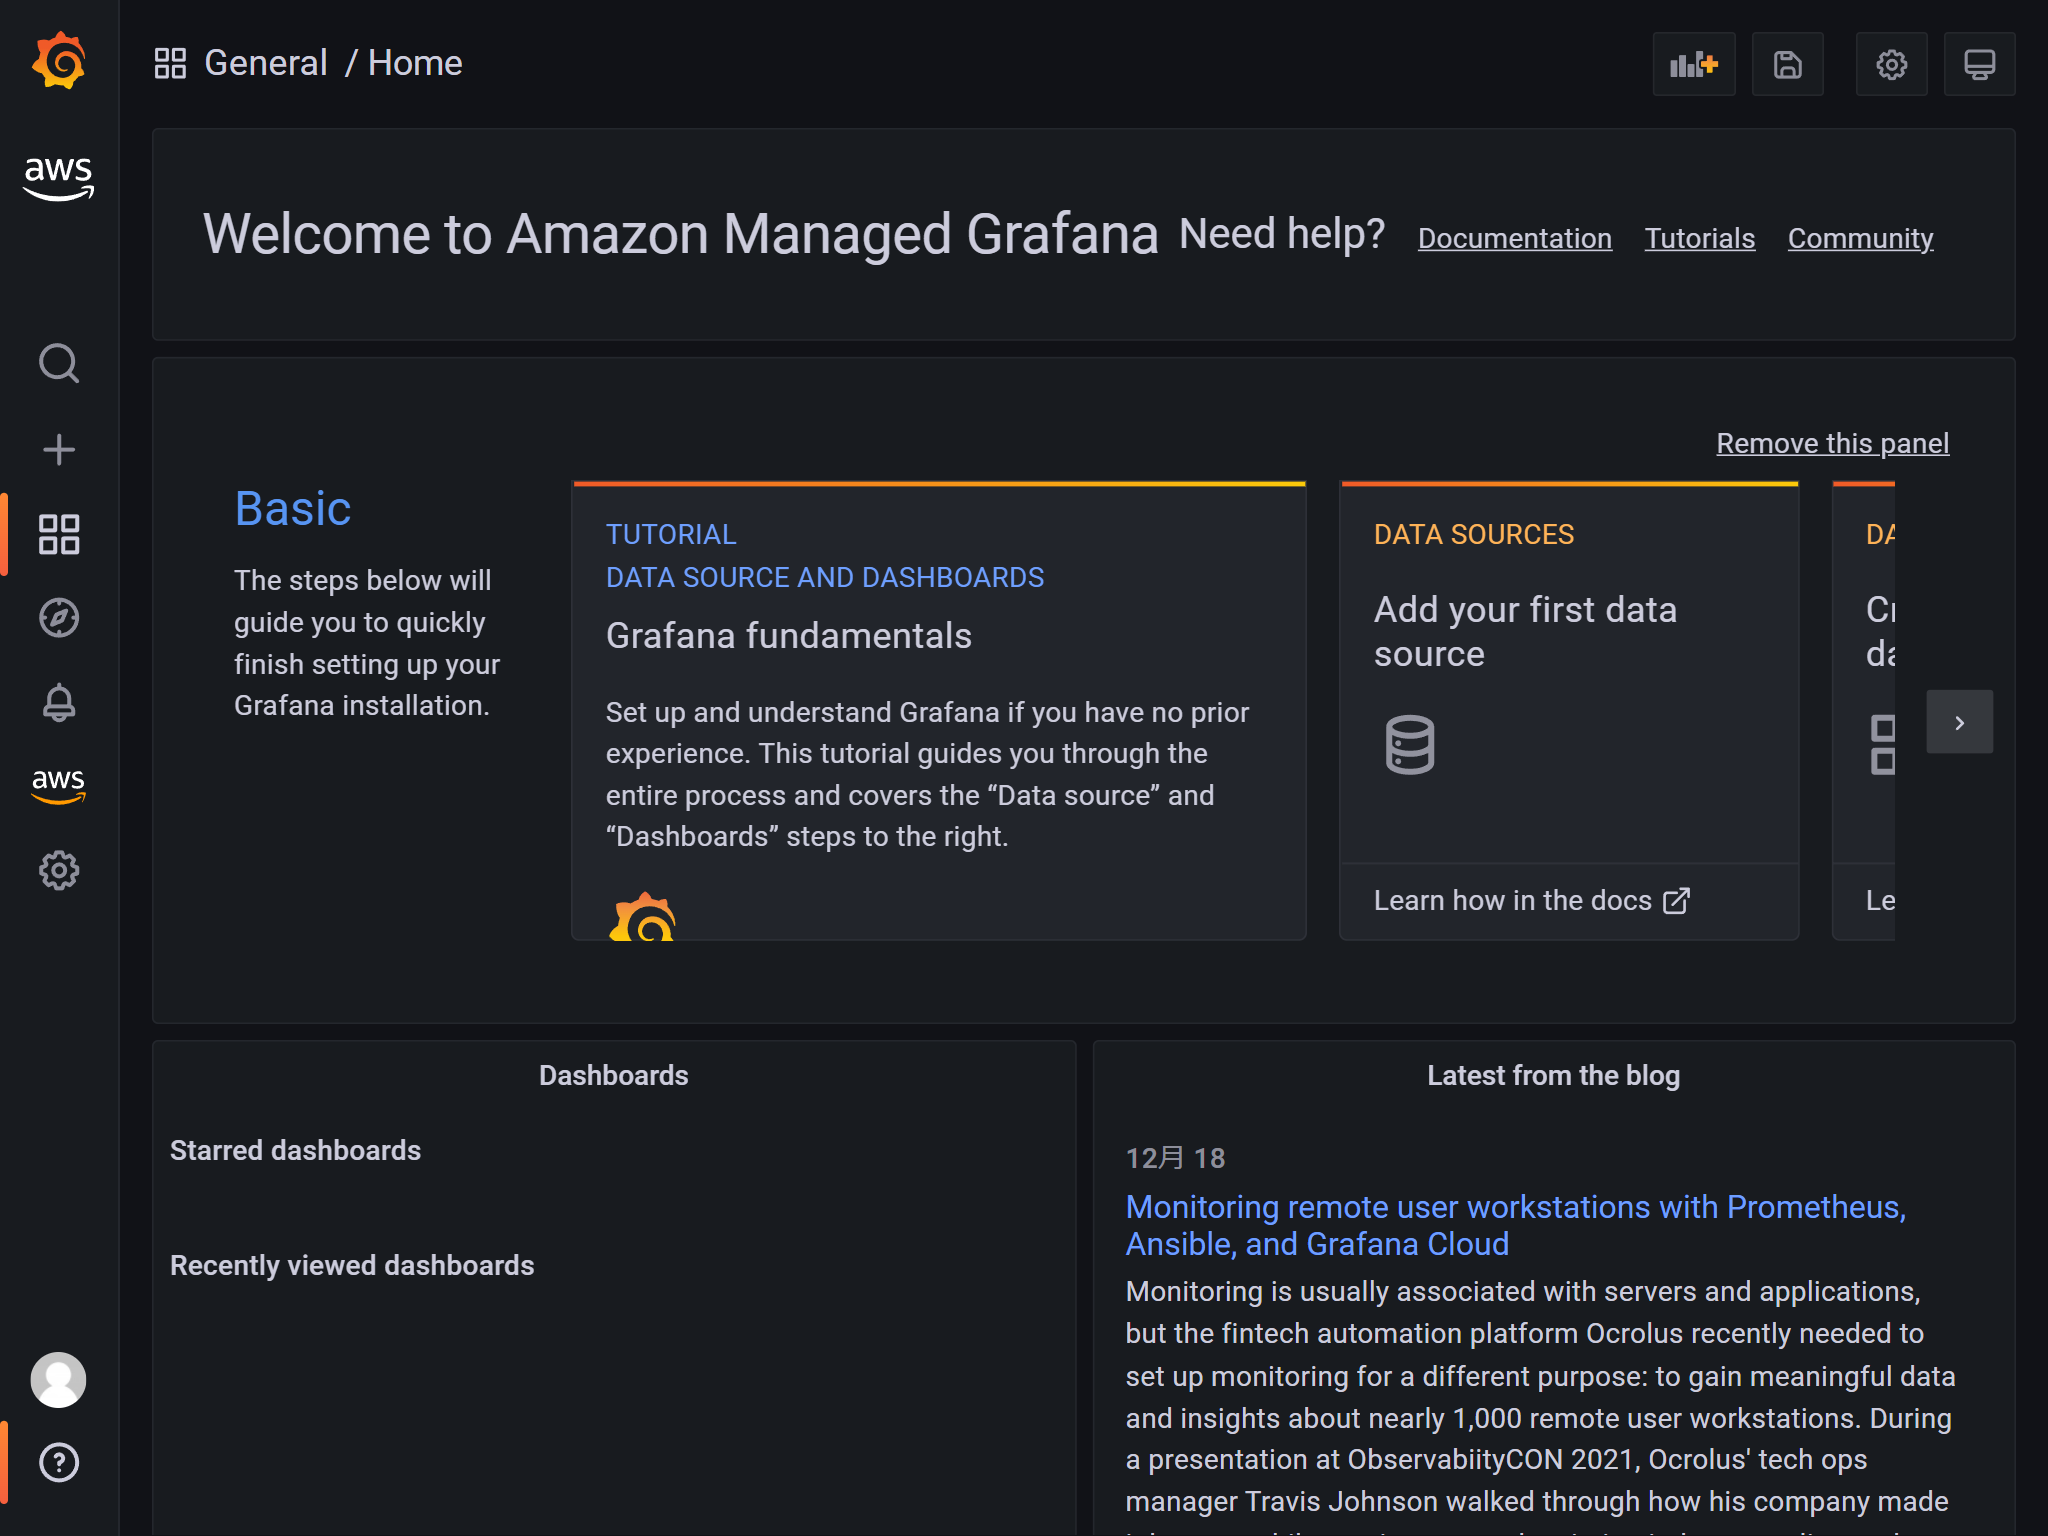
マネジメントコンソールに表示されるワークスペースURLからアクセスします。設定したAWS SSOのユーザーでログインするとGrafanaの画面が表示されます。メニューにAWSのアイコンがありますね。
データソースにAmazon Managed Service for Prometheusを追加します。 AWSアイコンからデータソースをたどると追加できます。
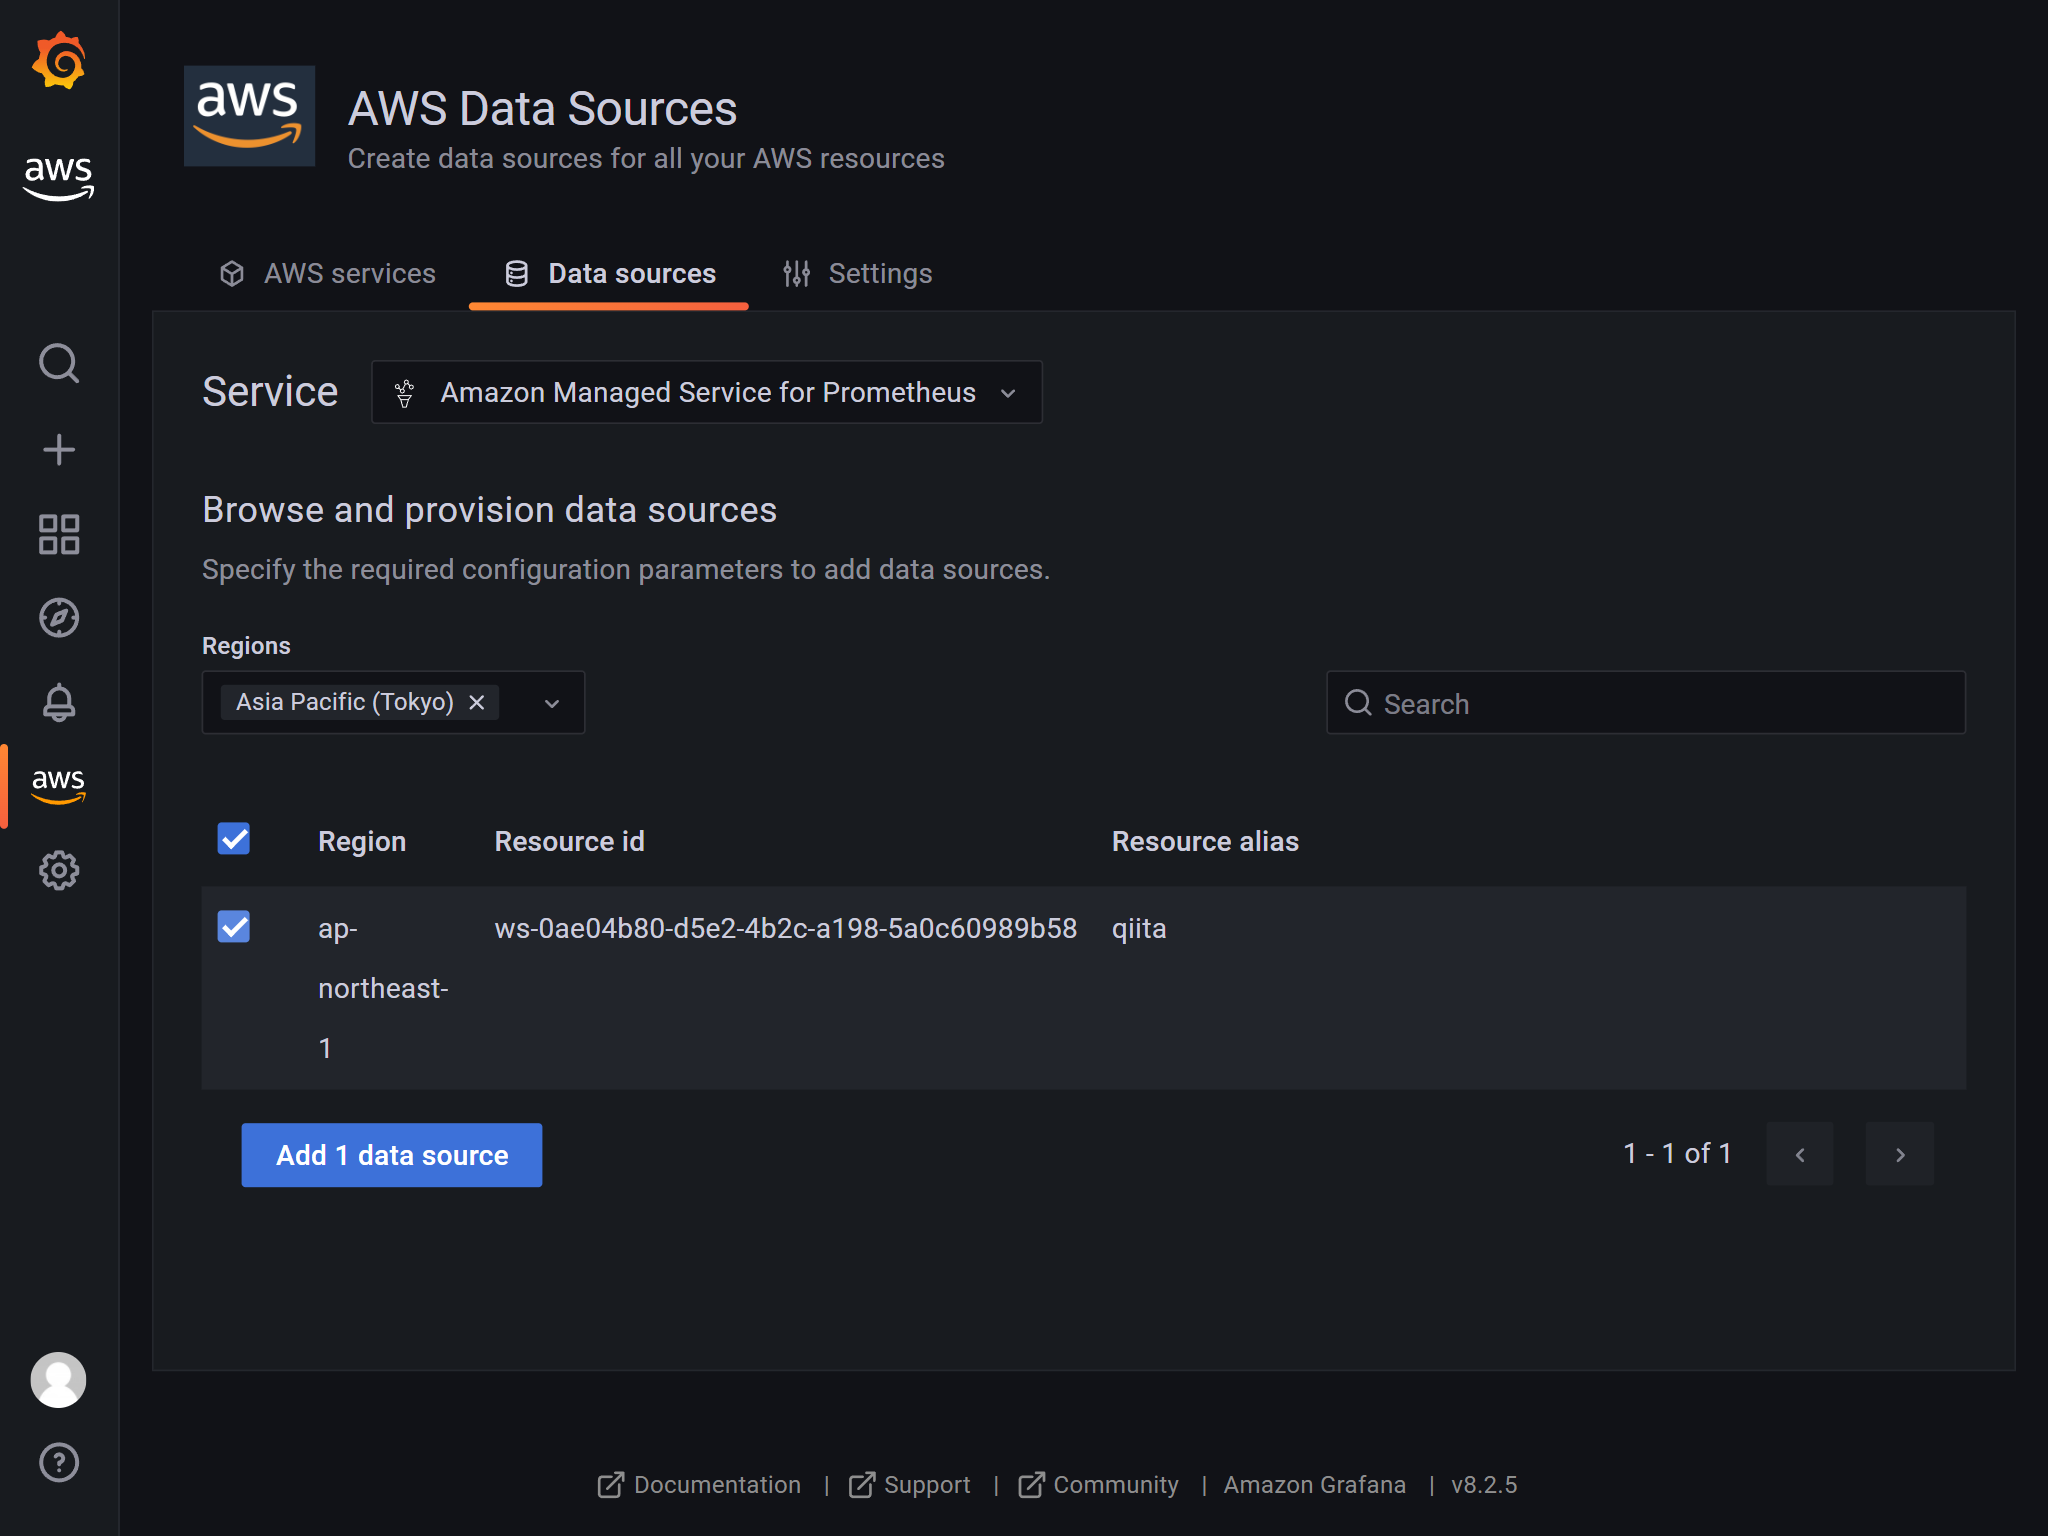
ここまでできれば通常のGrafana同様です。
過去にQiitaに投稿した内容のアーカイブです。
M5StackのUnitV2をみて、手元のラズパイZeroでも何かできないかと思って調整してみました。
調べてみるとTensorflow Liteが動くようなので、サンプルの画像分類を試してみました。 ※ラズパイZero(ARMv6)向けのWheelパッケージは用意されていませんので、自前で作成する必要があります。手順は後ろに載せています
git clone https://github.com/tensorflow/examples --depth 1
cd examples/lite/examples/image_classification/raspberry_pi/
bash download.sh /tmp
python3 classify_picamera.py   --model /tmp/mobilenet_v1_1.0_224_quant.tflite   --labels /tmp/labels_mobilenet_quant_v1_224.txt
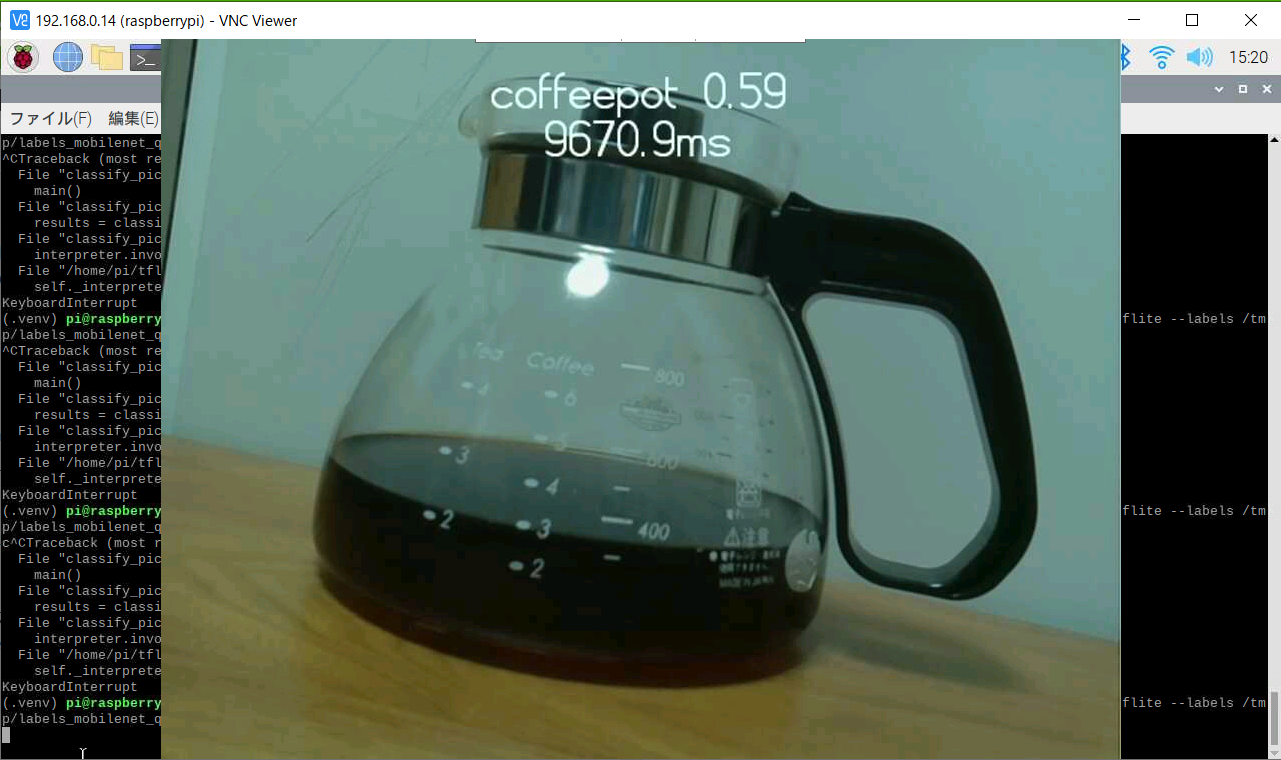
動作はするのですが、1回の推論に10秒近くかかります。。遅い。。
使用するモデルを軽いものに変えてみます。 ここの中からMobilenet_V1_1.0_128_quantに変更してみます。
cd /tmp/
wget https://storage.googleapis.com/download.tensorflow.org/models/mobilenet_v1_2018_08_02/mobilenet_v1_1.0_128_quant.tgz
tar zxvf mobilenet_v1_1.0_128_quant.tgz
ラベルは見つからなかったのでサンプルに含まれるものを使いまわしましょう
python3 classify_picamera.py --model /tmp/mobilenet_v1_1.0_128_quant.tflite --labels /tmp/labels_mobilenet_quant_v1_224.txt

3.5秒ぐらいなので、まあまあ早くなりました。
残念ながらラズパイZero(ARMv6)向けのWheelパッケージは用意されていません。 ラズパイ2以降のARMv7用は用意されています。 https://www.tensorflow.org/lite/guide/python
ただ、自分でビルドする手順は用意されていましたので、それに沿ってやってみました。
ここは好みですが、ホスト環境を汚さずビルドしたかったので、Docker内で行おうと思いました。 ただ、ビルドにDokcerを使用する仕組みだったので、Dockerの中でDockerが起動可能な「Docker in Docker」の形で行いました。
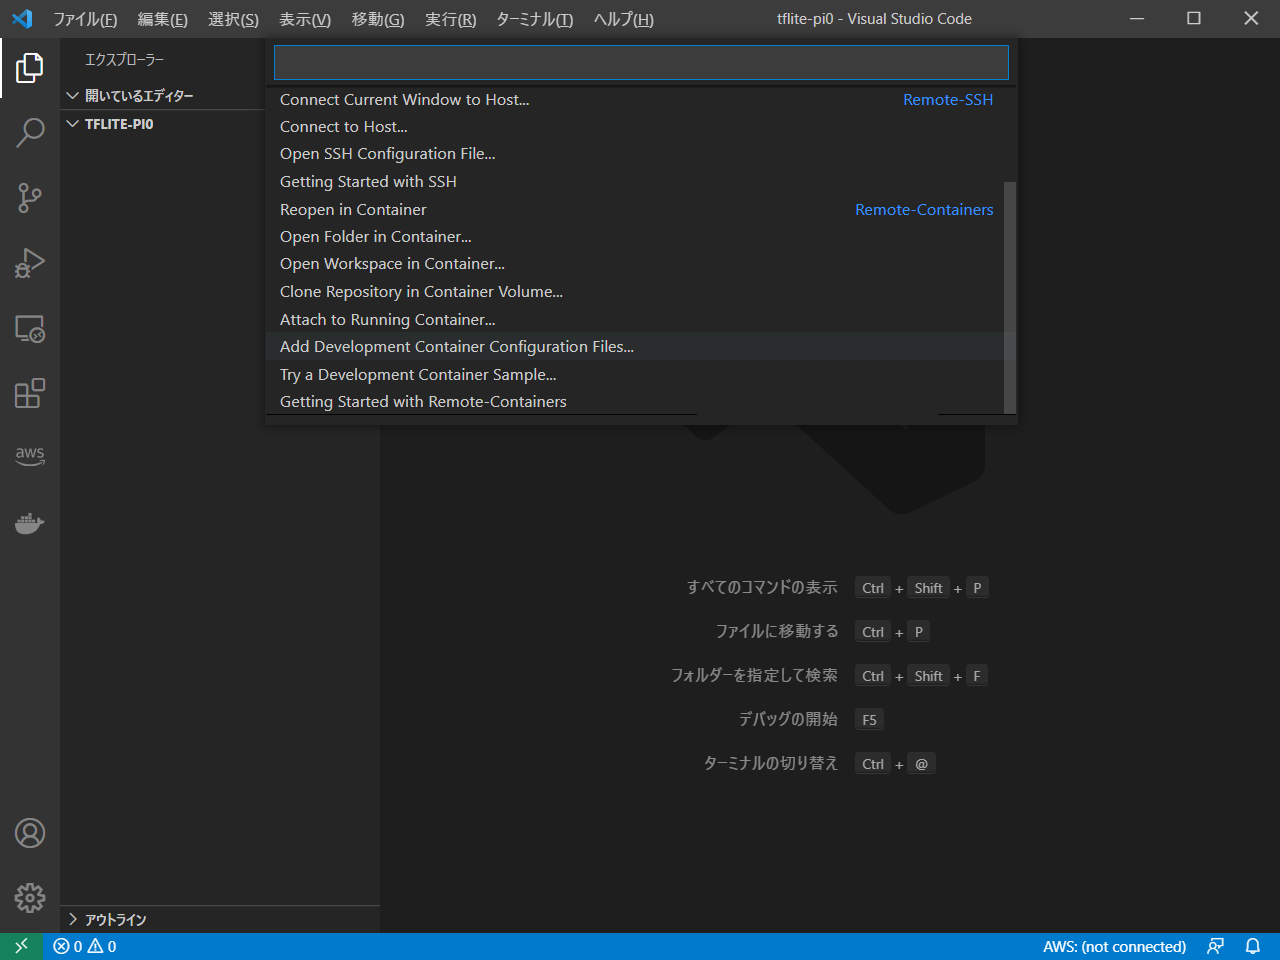
vscodeを起動し、左下の「リモートウィンドウを開きます」ボタンから始めます
「Add Development Container Configuration Files...」を選択
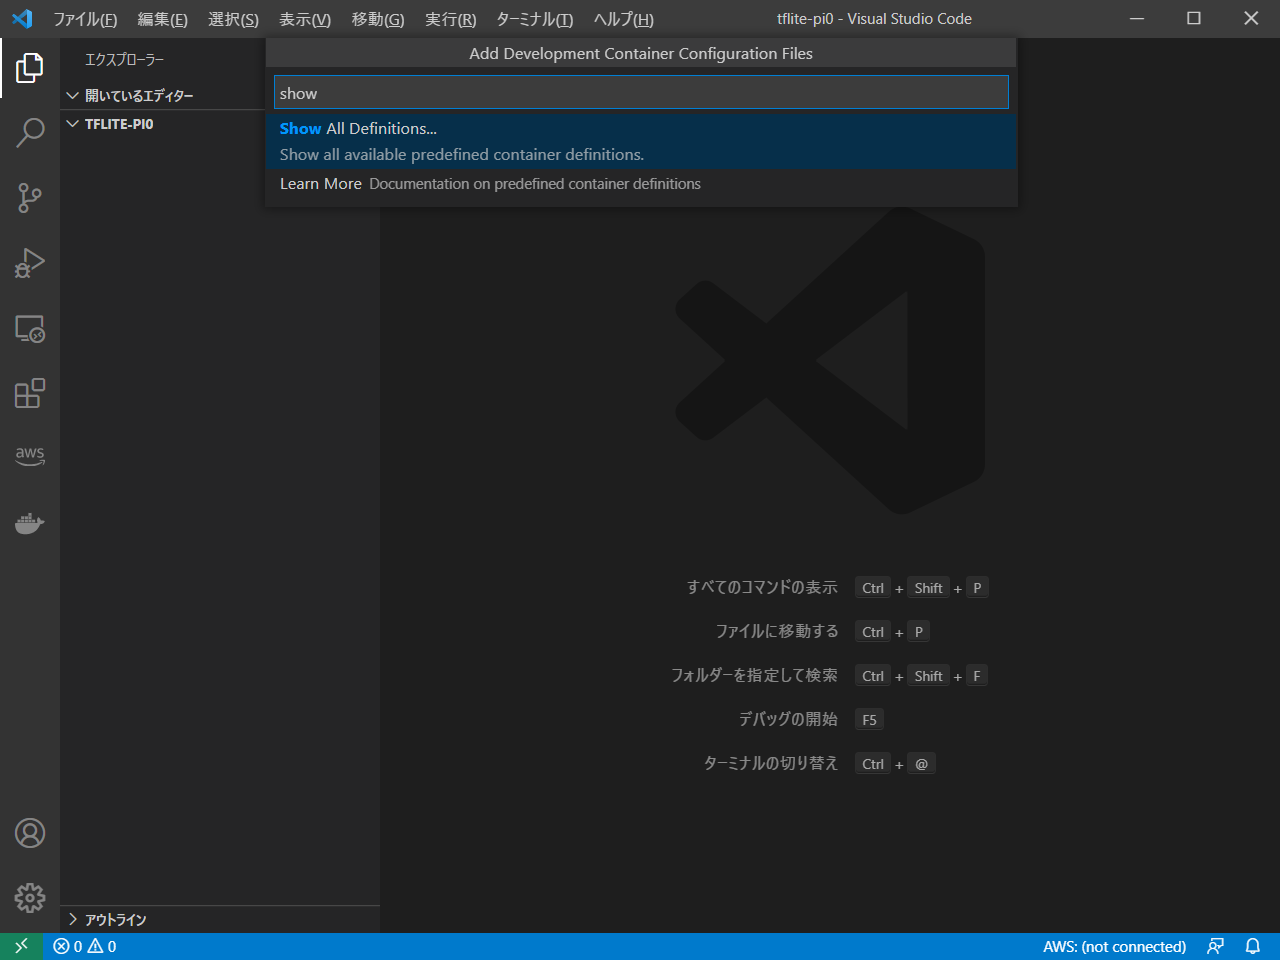
「Show All Definitions...」を選択
「Docker in Docker」を選択
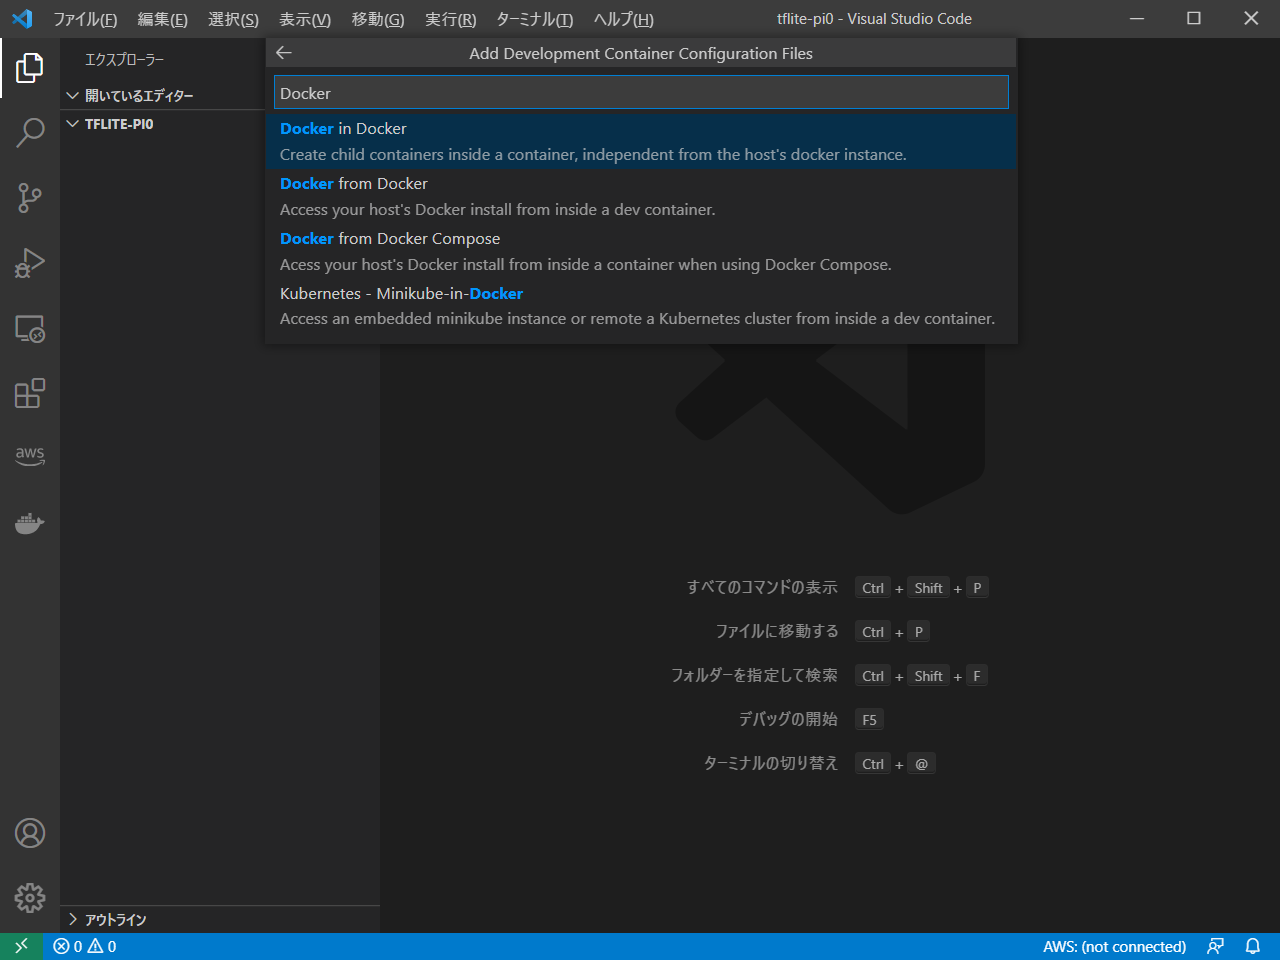
これで設定ファイルができました
「Reopen in Container」を選択
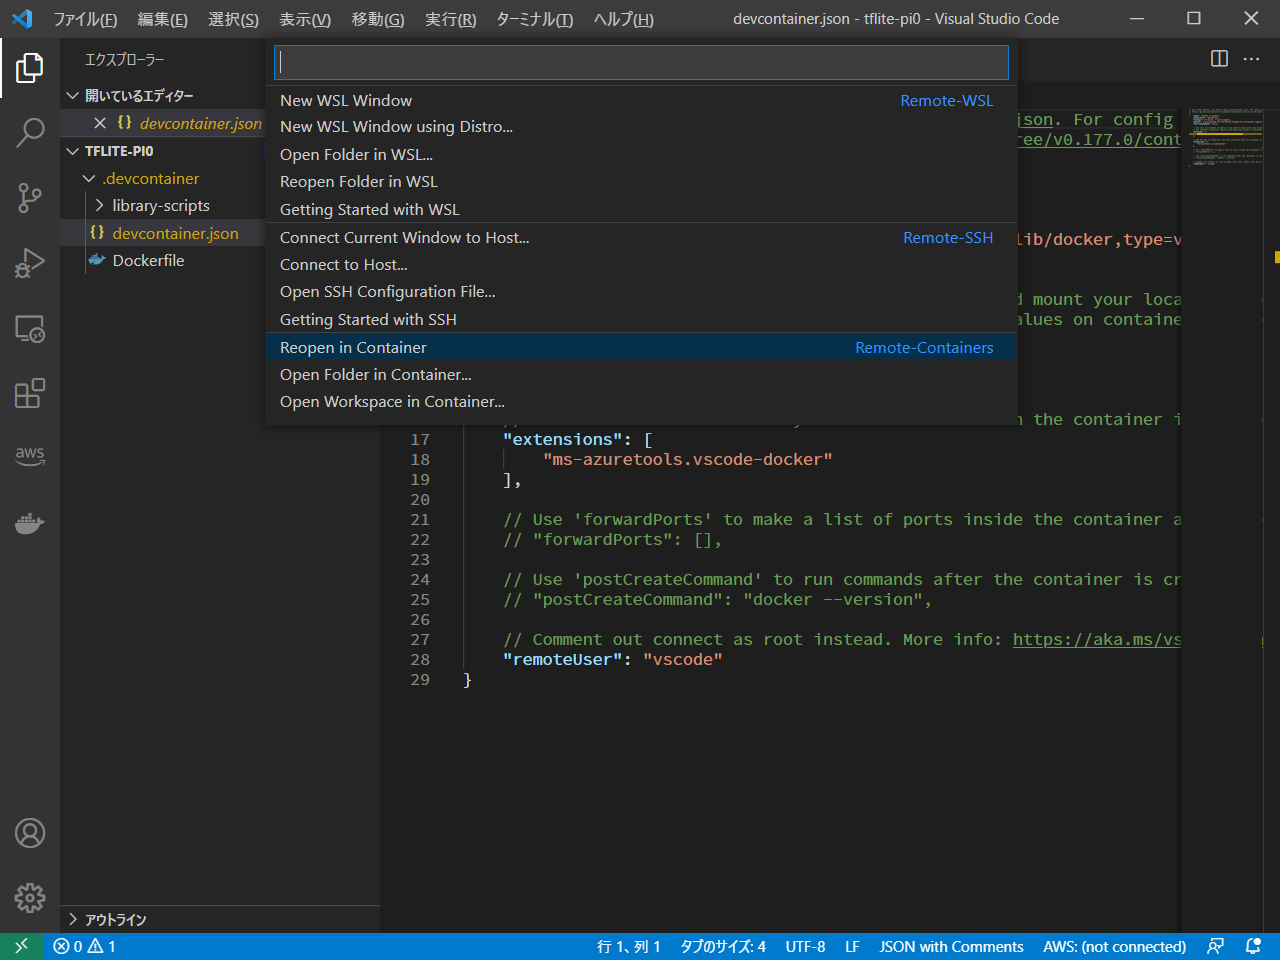
ここから先はコンテナ内での作業になります。
公式の手順はこちらです。 https://www.tensorflow.org/lite/guide/build_cmake https://www.tensorflow.org/lite/guide/build_cmake_pip
cd # 作業は/root配下で行いました
sudo apt-get update
sudo apt-get install cmake -y
git clone https://github.com/tensorflow/tensorflow.git tensorflow_src
cd tensorflow_src/
tensorflow/tools/ci_build/ci_build.sh PI-PYTHON37 tensorflow/lite/tools/pip_package/build_pip_package_with_cmake.sh rpi0 # 最後のrpi0が重要です
これでWheelパッケージが作成されます 出力先はこちらです
~/tensorflow_src $ ls -l tensorflow/lite/tools/pip_package/gen/tflite_pip/python3.7/dist/
total 2776
-rw-r--r-- 1 vscode vscode 1414958 Jun  6 05:39 tflite_runtime-2.6.0-cp37-cp37m-linux_armv6l.whl
-rw-r--r-- 1 vscode vscode 1422521 Jun  6 05:39 tflite-runtime-2.6.0.linux_armv6l.tar.gz
~/tensorflow_src $
sudo apt-get update
sudo apt install libatlas-base-dev -y
pip install tflite_runtime-2.6.0-cp37-cp37m-linux_armv6l.whl
過去にQiitaに投稿した内容のアーカイブです。
前回の続きです。 Greengrass側で動作するPythonプログラムからAWS IoT Coreへメッセージをパブリッシュできました。
公式ドキュメントがまだ整ってないのでちょっと大変でした。 https://docs.aws.amazon.com/greengrass/v2/developerguide/interprocess-communication.html#ipc-iot-core-mqtt
ハード:Raspberry Pi 4 OS:Raspberry Pi OS(32bit)
$ tree
.
├── artifacts
│   └── com.example.HelloWorld
│       └── 1.0.0
│           ├── hello_world.py
│           └── ipc_utils.py
└── recipes
    └── com.example.HelloWorld-1.0.0.yaml
これは公式ドキュメントにも記載があります。
## Copyright Amazon.com, Inc. or its affiliates. All Rights Reserved.
## SPDX-License-Identifier: Apache-2.0

import os

from awscrt.io import (
    ClientBootstrap,
    DefaultHostResolver,
    EventLoopGroup,
    SocketDomain,
    SocketOptions,
)
from awsiot.eventstreamrpc import Connection, LifecycleHandler, MessageAmendment

TIMEOUT = 10


class IPCUtils:
    def connect(self):
        elg = EventLoopGroup()
        resolver = DefaultHostResolver(elg)
        bootstrap = ClientBootstrap(elg, resolver)
        socket_options = SocketOptions()
        socket_options.domain = SocketDomain.Local
        amender = MessageAmendment.create_static_authtoken_amender(os.getenv("SVCUID"))
        hostname = os.getenv("AWS_GG_NUCLEUS_DOMAIN_SOCKET_FILEPATH_FOR_COMPONENT")
        connection = Connection(
            host_name=hostname,
            port=8033,
            bootstrap=bootstrap,
            socket_options=socket_options,
            connect_message_amender=amender,
        )
        self.lifecycle_handler = LifecycleHandler()
        connect_future = connection.connect(self.lifecycle_handler)
        connect_future.result(TIMEOUT)
        return connection
Javaのサンプルを参考に、頑張ってみました。
import awsiot.greengrasscoreipc.client as client
import awsiot.greengrasscoreipc.model as model
from ipc_utils import IPCUtils
import json

print("Start Lambda !!!")

ipc_utils = IPCUtils()
connection = ipc_utils.connect()
ipc_client = client.GreengrassCoreIPCClient(connection)

message = {"hello": "world"}
message = json.dumps(message).encode('utf-8')

request = ipc_client.new_publish_to_iot_core()

publishMessage = model.PublishToIoTCoreRequest(topic_name='test/topic', qos='1', payload=message)

future = request.activate(publishMessage)
result = future.result(timeout=10.0)

print("Finish Lambda !!!")
レシピの書き方が大苦戦。。
accessControlのところはaws.greengrass.ipc.mqttproxy、
operationsがaws.greengrass#PublishToIoTCore、
resourcesがトピック名です。
Greengrass 1.0のころのサブスクリプションのイメージですね。
---
RecipeFormatVersion: '2020-01-25'
ComponentName: com.example.HelloWorld
ComponentVersion: '1.0.0'
ComponentDescription: A component that publishes messages.
ComponentPublisher: Amazon
ComponentConfiguration:
  DefaultConfiguration:
    accessControl:
      aws.greengrass.ipc.mqttproxy:
        "com.example.HelloWorld:pubsub:1":
          policyDescription: Allows access to publish to test/topic.
          operations:
            - "aws.greengrass#PublishToIoTCore"
          resources:
            - "test/topic"
Manifests:
  - Lifecycle:
      Install:
        Timeout: 1000
        Script: pip3 install awsiotsdk
      Run: |
        python3 {artifacts:path}/hello_world.py
Greengrass 2.0の特徴で、「Lambdaにデプロイせずにローカルでデプロイできる」機能があります。
sudo /greengrass/v2/bin/greengrass-cli \
    --ggcRootPath=/greengrass/v2 \
    deployment create \
    --recipeDir recipes \
    --artifactDir artifacts \
    --merge "com.example.HelloWorld=1.0.0"
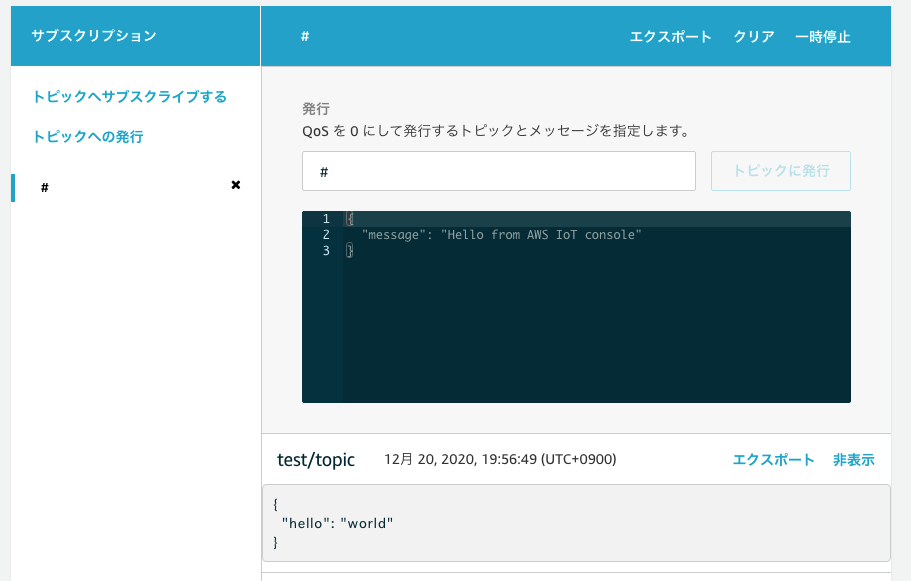
おめでとうございます!!!