RPortとは
Self-hosted open source remote management solution for Windows & Linux. Intuitive, easy to use inventory management, remote access, script execution, VPN replacement, and much more.
Windows & Linux 用のセルフホスティング型オープンソース・リモートマネジメント・ソリューション。直感的で使いやすいインベントリ管理、リモートアクセス、スクリプトの実行、VPNの代替など、さまざまな機能を提供します。
公式サイトより
RPortサーバーのセットアップ
公式のインストール手順を参考に行いました。
サーバー用VMを作成
PS C:\> multipass launch lts --name rport-serverシェルへ接続
PS C:\> multipass shell rport-server
IPアドレスの確認 ※ここから先はubuntu上で実行します。
ubuntu@rport-server:~$ ip addr show eth0- 出力
2: eth0: <BROADCAST,MULTICAST,UP,LOWER_UP> mtu 1500 qdisc mq state UP group default qlen 1000
    link/ether 52:54:00:92:1a:b5 brd ff:ff:ff:ff:ff:ff
    inet 172.26.244.96/20 brd 172.26.255.255 scope global dynamic eth0
       valid_lft 78412sec preferred_lft 78412sec
    inet6 fe80::5054:ff:fe92:1ab5/64 scope link
       valid_lft forever preferred_lft forever
サーバーのインストール
ubuntu@rport-server:~$ cd /tmp/
ubuntu@rport-server:/tmp$ curl -o rportd-installer.sh https://get.rport.io
ubuntu@rport-server:/tmp$ sudo bash rportd-installer.sh --fqdn 172.26.244.96 --no-2fa
--fqdn 172.26.244.96:IPアドレスを指定--no-2fa:多要素認証を無効化注意テスト用なので多要素認証を無効化しています。プロダクション用途では正しく設定しましょう。
- 出力
[*] FQDN 172.26.244.96 seems to be privat or local.
[*] Installing Dependencies ... be patient.
[-] The following packages will be installed: pwgen apache2-utils unzip curl sqlite3 netcat certbot
[*] Dependencies installed.
[*] UFW firewall detected. Adding rules now.
[-] Allowing API Port 443
Rules updated
Rules updated (v6)
[-] Allowing Client Port 80
Rules updated
Rules updated (v6)
[-] Allowing Tunnel Port Range 20000-30000
Rules updated
Rules updated (v6)
[-] Downloading https://download.rport.io/rportd/stable/latest.php?arch=x86_64
rportd
rportd.example.conf
Service installed
[-] Service file /etc/systemd/system/rportd.service created
version 0.8.0
------------------------------------------------------------------------------
[*] The RPort server has been installed from the latest stable release.

[*] Name of your RPort server: 172.26.244.96 You can change it later.
[*] Skipping Let's encrypt because ACME supports only publicly resolvable hostnames.
[*] Creating self-signed certificate for 172.26.244.96
Generating RSA private key, 2048 bit long modulus (2 primes)
.......................................+++++
...............................................................................+++++
e is 65537 (0x010001)
[-] Certificate Authority created in /etc/rport/ssl/ca/export/172.26.244.96-ca-root-cert.crt. Import this file into OS and/or browser.
[*] Read https://kb.rport.io/ carefully.
Generating RSA private key, 2048 bit long modulus (2 primes)
.+++++
.................................................+++++
e is 65537 (0x010001)
Signature ok
subject=C = GB, ST = London, L = London, O = Global Security, OU = IT Department, CN = 172.26.244.96
Getting CA Private Key

[-] SSL key and self-signed certificate created.
[-] Configuration file /etc/rport/rportd.conf written.
[-] RPort Database /var/lib/rport/user-auth.db created.
[-] Client auth file /var/lib/rport/client-auth.json written.
[*] Two factor authentication NOT installed.
[*] The RPort Frontend has been installed from the latest stable release.
[-] Downloading https://github.com/novnc/noVNC/archive/refs/tags/v1.3.0.zip
[*] NoVNC Addon installed to /var/lib/rport/noVNC-1.3.0
[*] Going to install the Guacamole Proxy Daemon for RPort using Debian/Ubuntu Packages
[-] Downloading rport-guacamole_1.4.0_ubuntu_focal_x86_64.deb
[-] Installing rport-guacamole_1.4.0_ubuntu_focal_x86_64.deb via apt-get
############################################################################################################################################################
[*] Guacamole Proxy Daemon for RPort installed.
[-] Guacamole Proxy Daemon registered in /etc/rport/rportd.conf
What's next
Status of your RPort server: Running :-)
------------------------------------------------------------------------------
 TATAA!!  All finished

 ----> Let's get started <----
 Point your browser to https://172.26.244.96:443
 Login with:
    User     = admin
    Password = tiivaiF9i


------------------------------------------------------------------------------
ubuntu@rport-server:/tmp$ヒント以上で、サーバー側のセットアップは完了です。
RPortサーバーの管理画面をチェック
インストール完了時に出力されるアドレスにアクセスします。
ブラウザのNET::ERR_CERT_AUTHORITY_INVALID警告が出力されますが、気にせず進みます。
- ログイン画面
初期ユーザーとパスワードはインストール完了時に出力されます。
- ホーム画面
ログイン後に表示されるホーム画面(ダッシュボード画面)です。 クライアントが未登録のため、クライアント登録手順が表示されます。
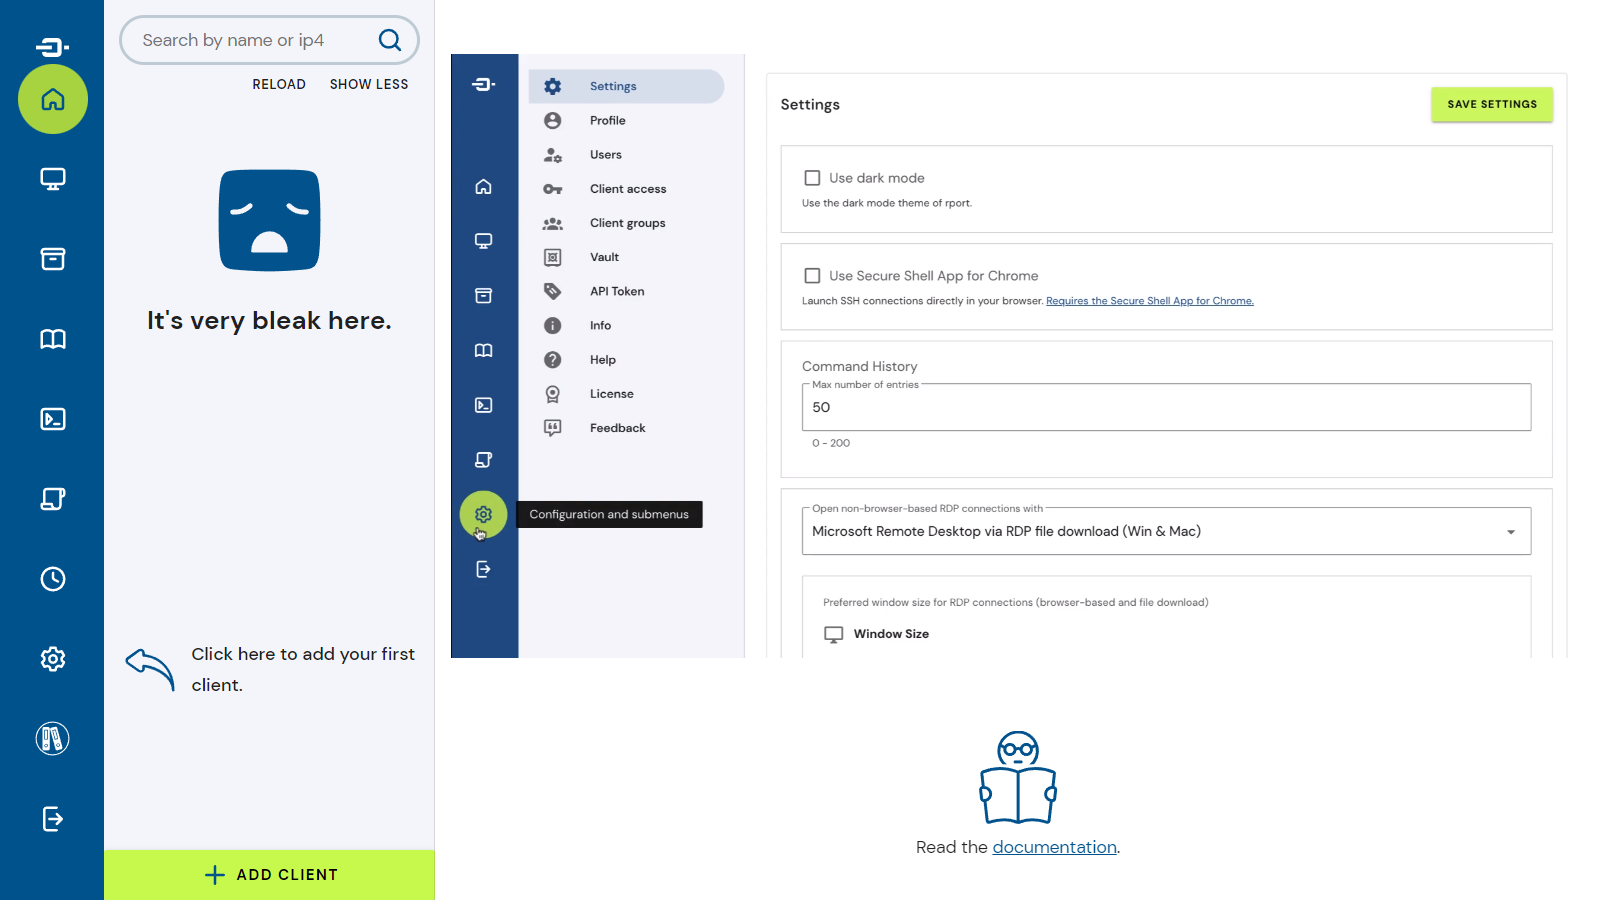
クライアントが無いと始まらないので、次の手順で登録しましょう。
RPortクライアントのセットアップ
インストール用スクリプトの取得
Setting画面を表示します。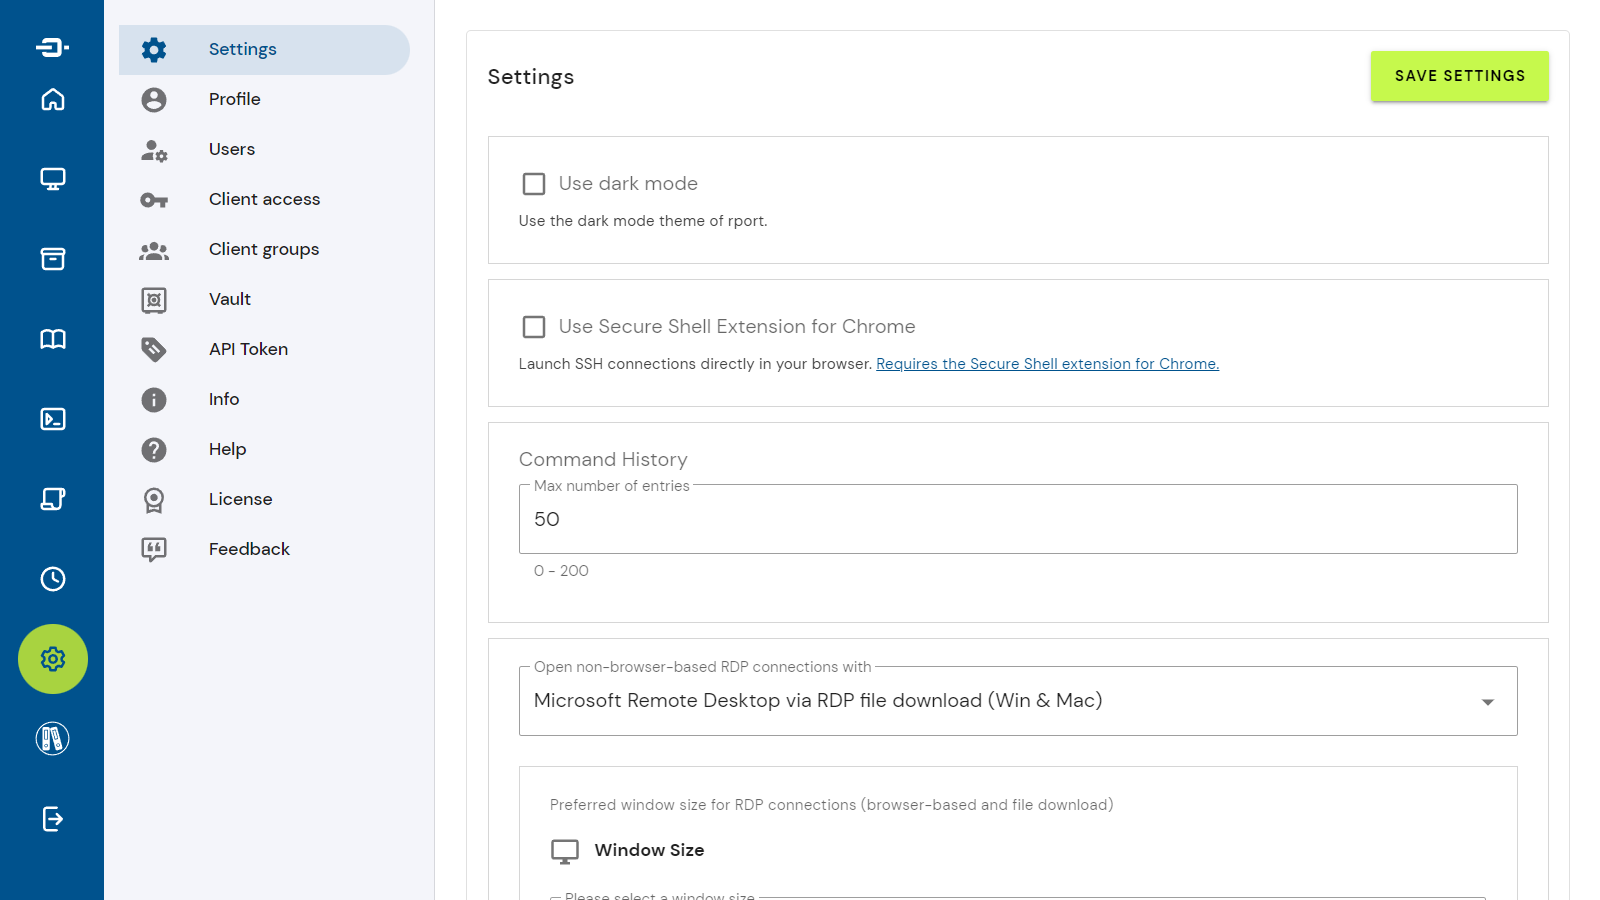
Client accessを選択します。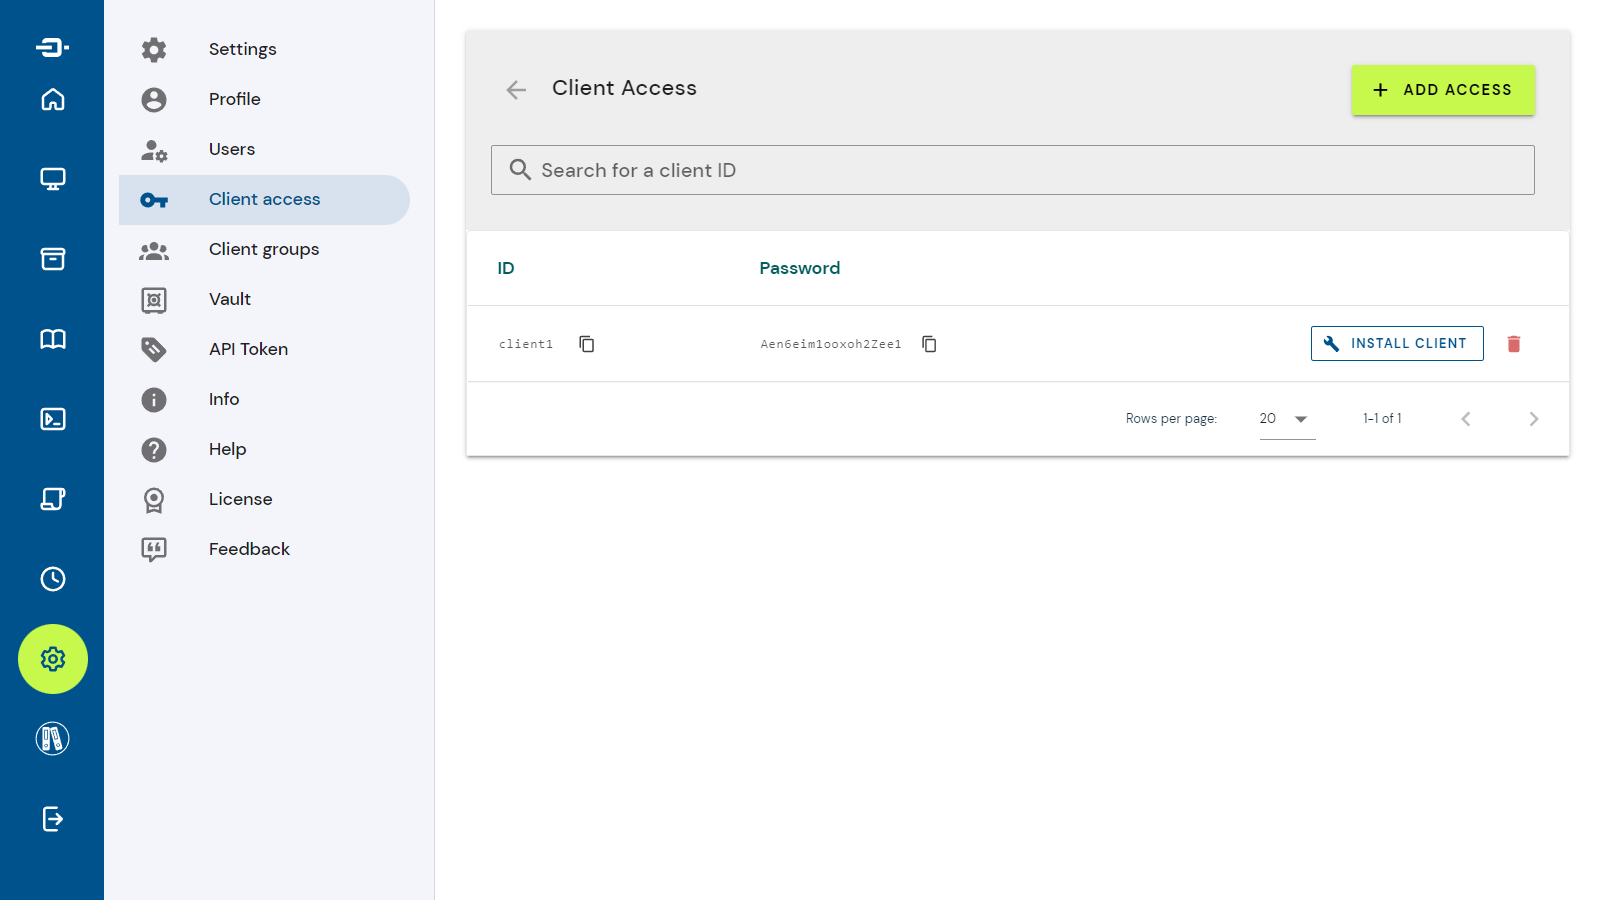
ADD ACCESSボタンをクリックします。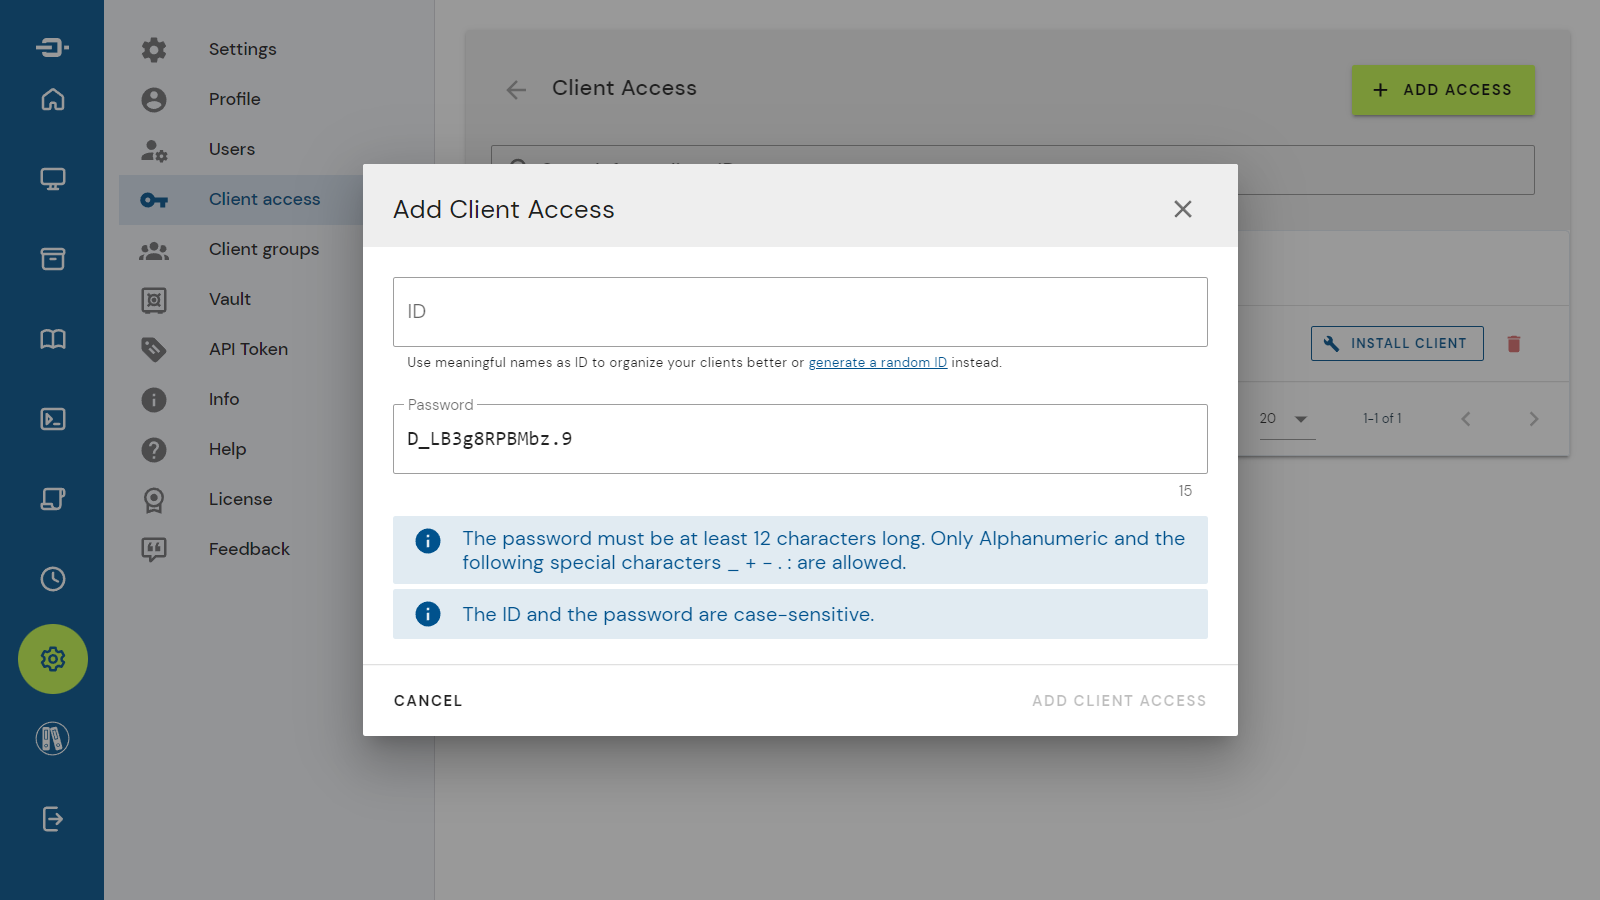
IDに任意の文字列を入力(または
generate a random IDをクリック)し、ADD CLIENT ACCESSボタンをクリックします。
インストール用スクリプトが表示されます。(後で使用します。)
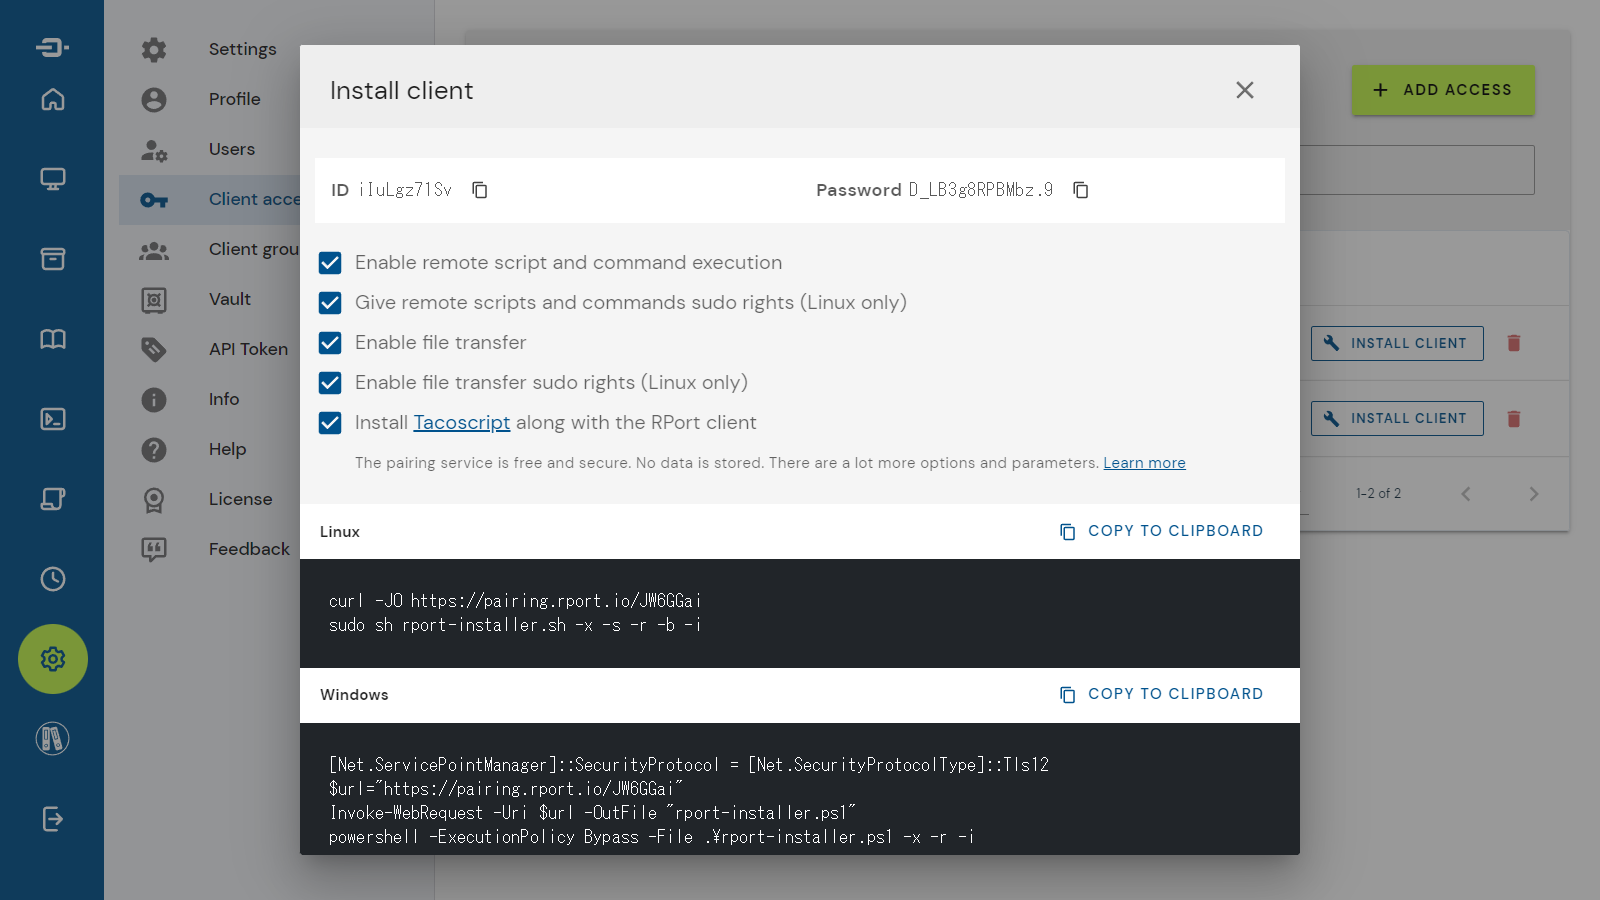
簡単にインストールができるようにスクリプトが生成されます。
クライアントのインストール
クライアン用VMを作成
注記新しいPower Shell端末を起動して実行します
PS C:\> multipass launch lts --name rport-clientシェルへ接続
PS C:\> multipass shell rport-clientインストールスクリプトを実行 ※ここから先はubuntu上で実行します。
先程取得したクライアントのインストールスクリプトを実行します。
ubuntu@rport-client:/tmp$ curl -JO https://pairing.rport.io/xT3EhxR
ubuntu@rport-client:/tmp$ sudo sh rport-installer.sh -x -s -r -b -i- 出力
Installing rport client
Detected Linux Distribution: Ubuntu 20.04.4 LTS
Success: http://172.26.244.96:80 is reachable. All good.
Success: rport installed to /usr/local/bin/rport
Success: RPort 0.8.0 installed to /usr/local/bin/rport
Success: /etc/rport/rport.conf created.
Preparing /etc/rport/rport.conf
Using /etc/machine-id as rport client id
Enabling Network monitoring
Interpreter 'bash' found in '/usr/bin/bash'
Interpreter 'python3' found in '/usr/bin/python3'
Interpreter 'perl' found in '/usr/bin/perl'
Success: RPort will run as user rport
Installing systemd service for rport
Service installed
A /etc/sudoers.d/rport-update-status has been created. Please review and change to your needs.
A /etc/sudoers.d/rport-all-cmd has been created. Please review and change to your needs.
tacoscript
Tacoscript installed taco version Version: 0.2.0
Build time: 2021-12-07T13:47:06Z
Git commit: b4afb1f8a26ae537f58f3cdfb47b45730a024c18

#
#  Installation of rport finished.
#
#  This client is now connected to
#
#  Look at /etc/rport/rport.conf and explore all options.
#  Logs are written to /var/log/rport/rport.log.
#
#  READ THE DOCS ON https://kb.rport.io/
#
# +++++++++++++++++++++++++++++++++++++++++++++++++++++++++++++++++++++++++++++++++++++++++
#  Give us a star on https://github.com/cloudradar-monitoring/rport
# +++++++++++++++++++++++++++++++++++++++++++++++++++++++++++++++++++++++++++++++++++++++++
#

Thanks for using
  _____  _____           _
 |  __ \|  __ \         | |
 | |__) | |__) |__  _ __| |_
 |  _  /|  ___/ _ \| '__| __|
 | | \ \| |  | (_) | |  | |_
 |_|  \_\_|   \___/|_|   \__|
クライアントのインストールが完了すると、管理画面に表示されます。
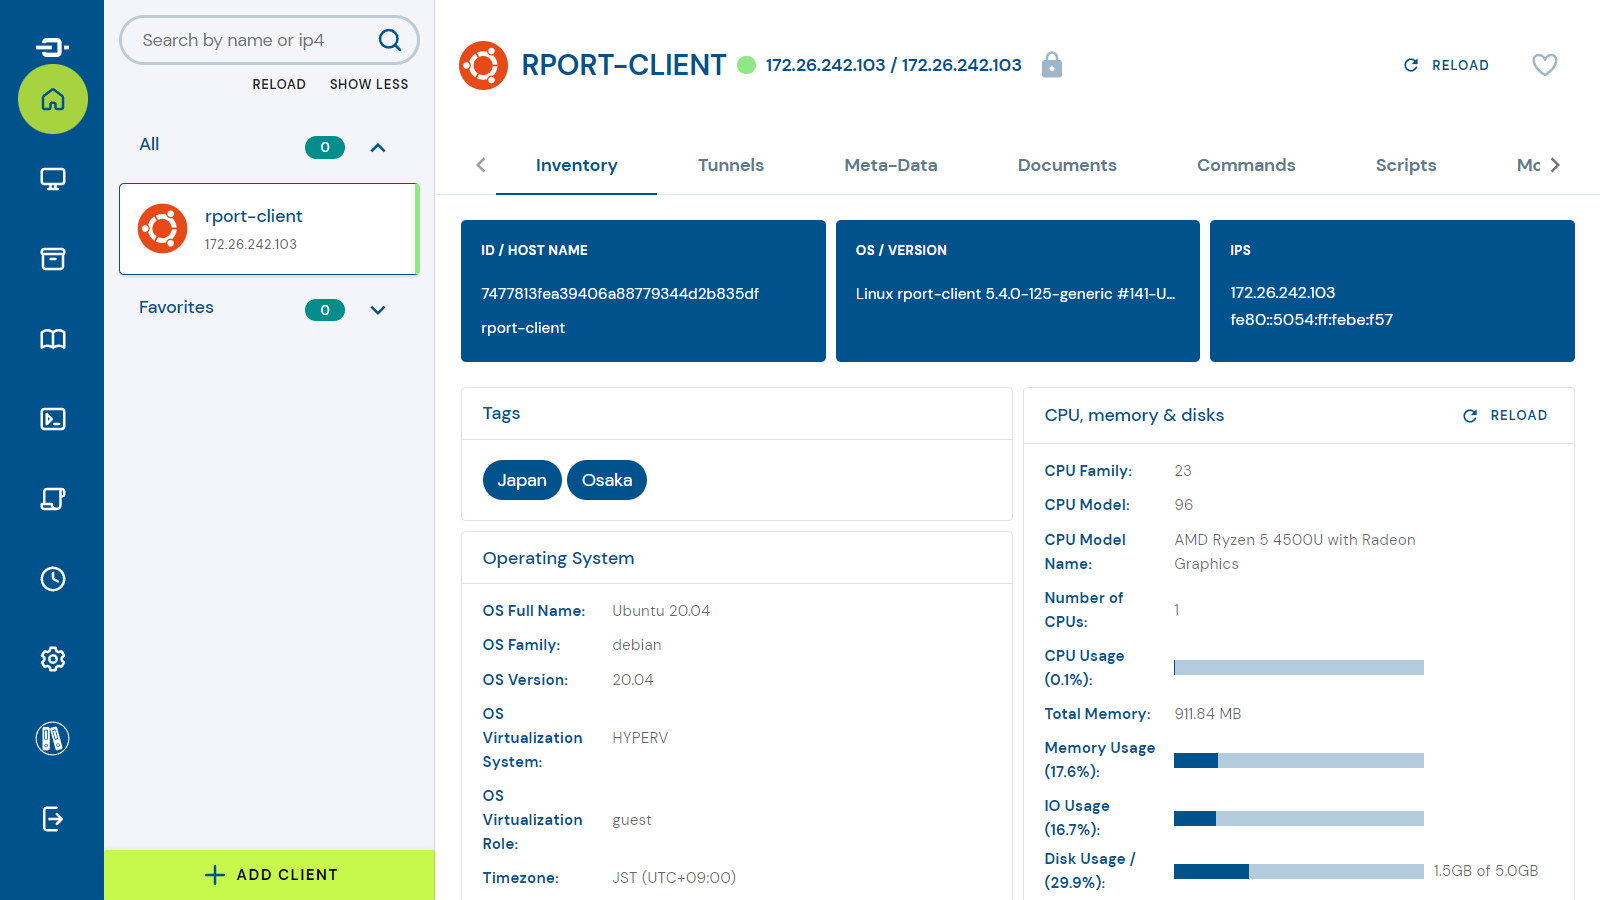 ヒント
ヒント以上で、クライアント側のセットアップは完了です。
機能のチェック:SSHでのリモートアクセス
SSH鍵の作成
クライアントにSSHで接続する際に使用する鍵を生成します。
SSH鍵の作成
ubuntu@rport-client:/tmp$ ssh-keygen -t rsa -b 4096 -C "moritalous"- ウィザードに回答(すべて未入力でエンター)
Generating public/private rsa key pair.
Enter file in which to save the key (/home/ubuntu/.ssh/id_rsa):
Enter passphrase (empty for no passphrase):
Enter same passphrase again:- 出力
Your identification has been saved in /home/ubuntu/.ssh/id_rsa
Your public key has been saved in /home/ubuntu/.ssh/id_rsa.pub
The key fingerprint is:
SHA256:MAU7vFeiRONZWoGnvvQk9w5QJjv1k5TOurceUl8ZXh0 moritalous
The key's randomart image is:
+---[RSA 4096]----+
|      +o=.     E |
|     +.O.  .    o|
|      %o= +   . o|
|     ..% B . . + |
|     .* S B   +  |
|      ++oo o .   |
|     . *+.. .    |
|      . .+o.     |
|        .++.     |
+----[SHA256]-----+
ubuntu@rport-client:/tmp$
作成した公開鍵を
authorized_keysに登録cat ~/.ssh/id_rsa.pub >> ~/.ssh/authorized_keys作成した秘密鍵をWindows側にコピー
※このコマンドはPower Shellで実行します。
PS C:\> multipass transfer rport-client:/home/ubuntu/.ssh/id_rsa $env:USERPROFILE/id_rsa
SSHトンネルを作成
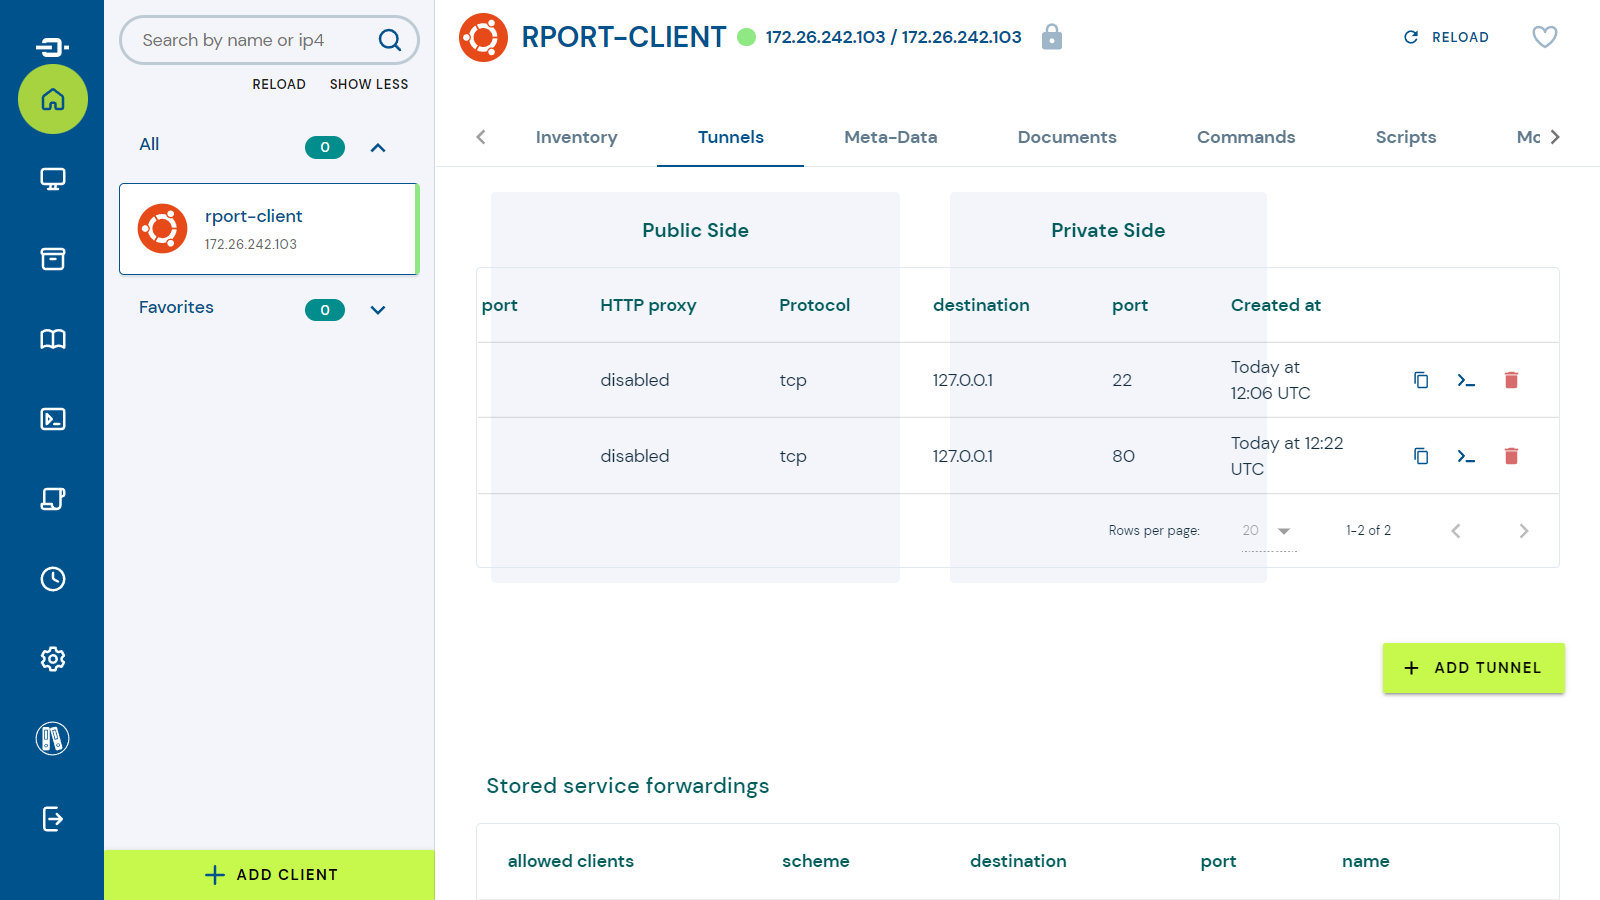
管理画面を使用し、SSHトンネルを開始します。
管理画面でクライアントを選択し、
Tunnelsタブをクリックします。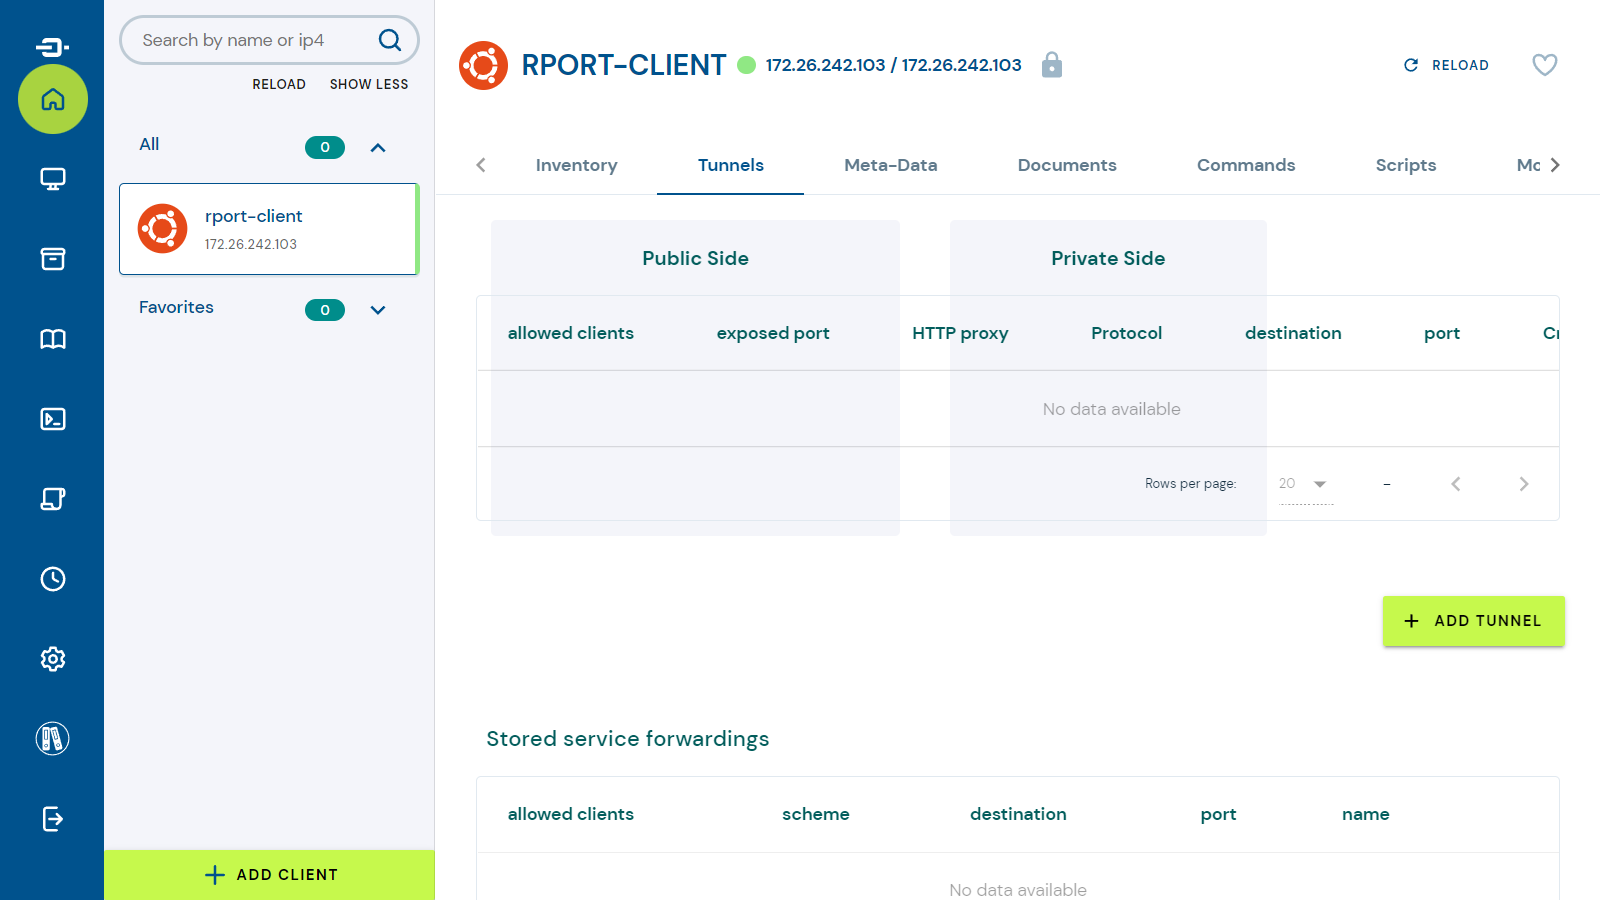
ADD TUNNELボタンをクリックします。
特に設定は変更せず、
ADD TUNNELボタンをクリックします。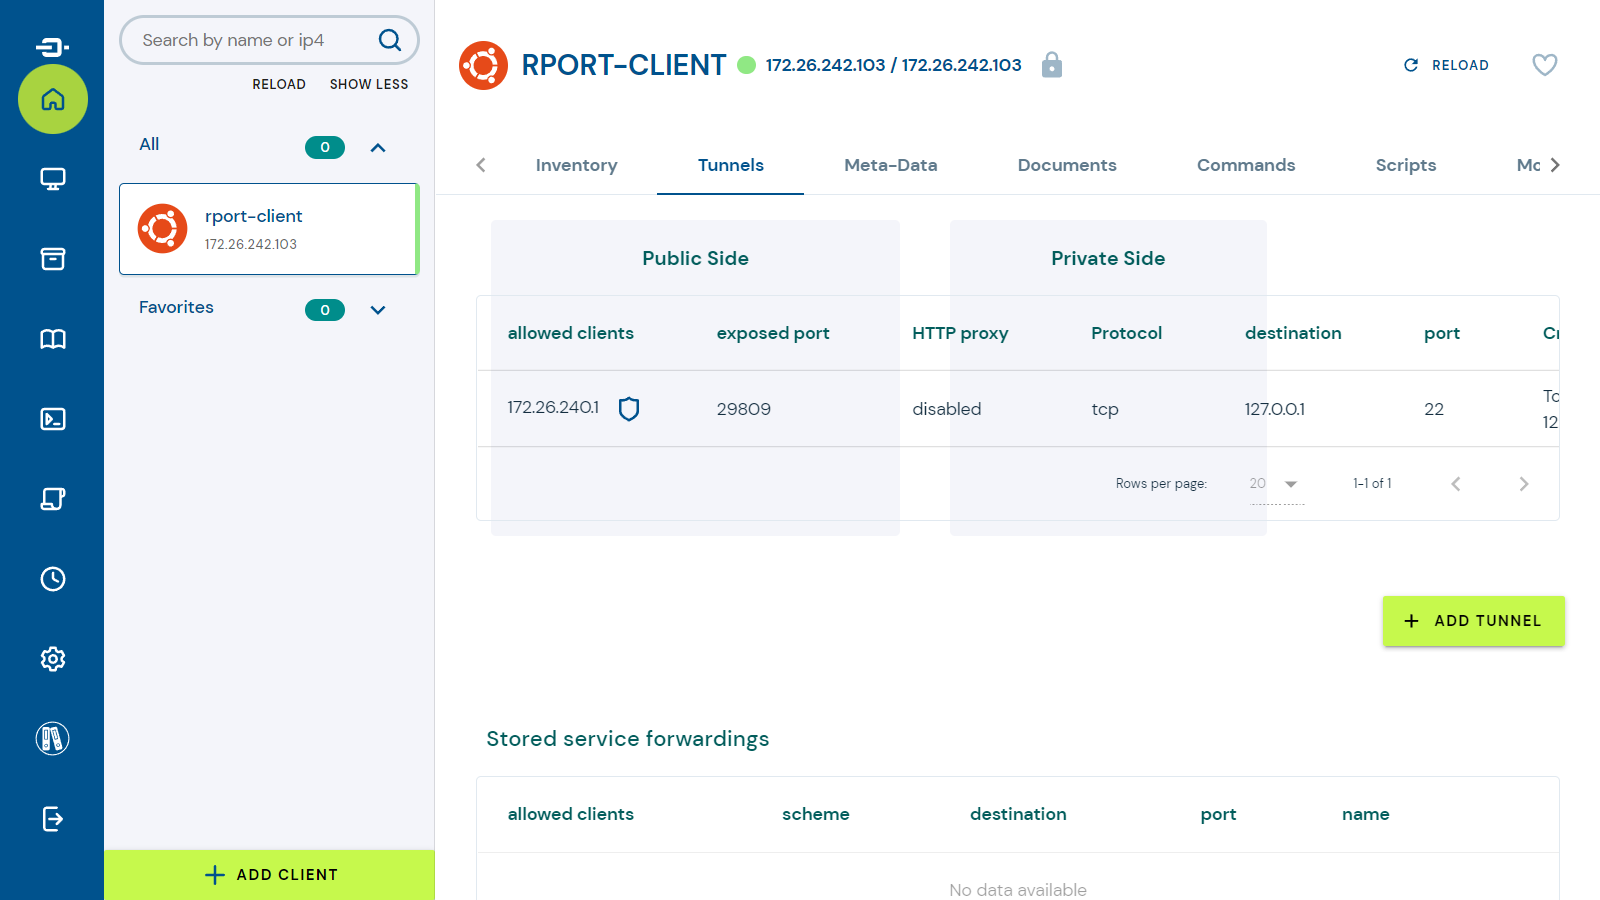
リストの一番右にあるコピーアイコンをクリックすることで、SSH接続先がコピーされます。
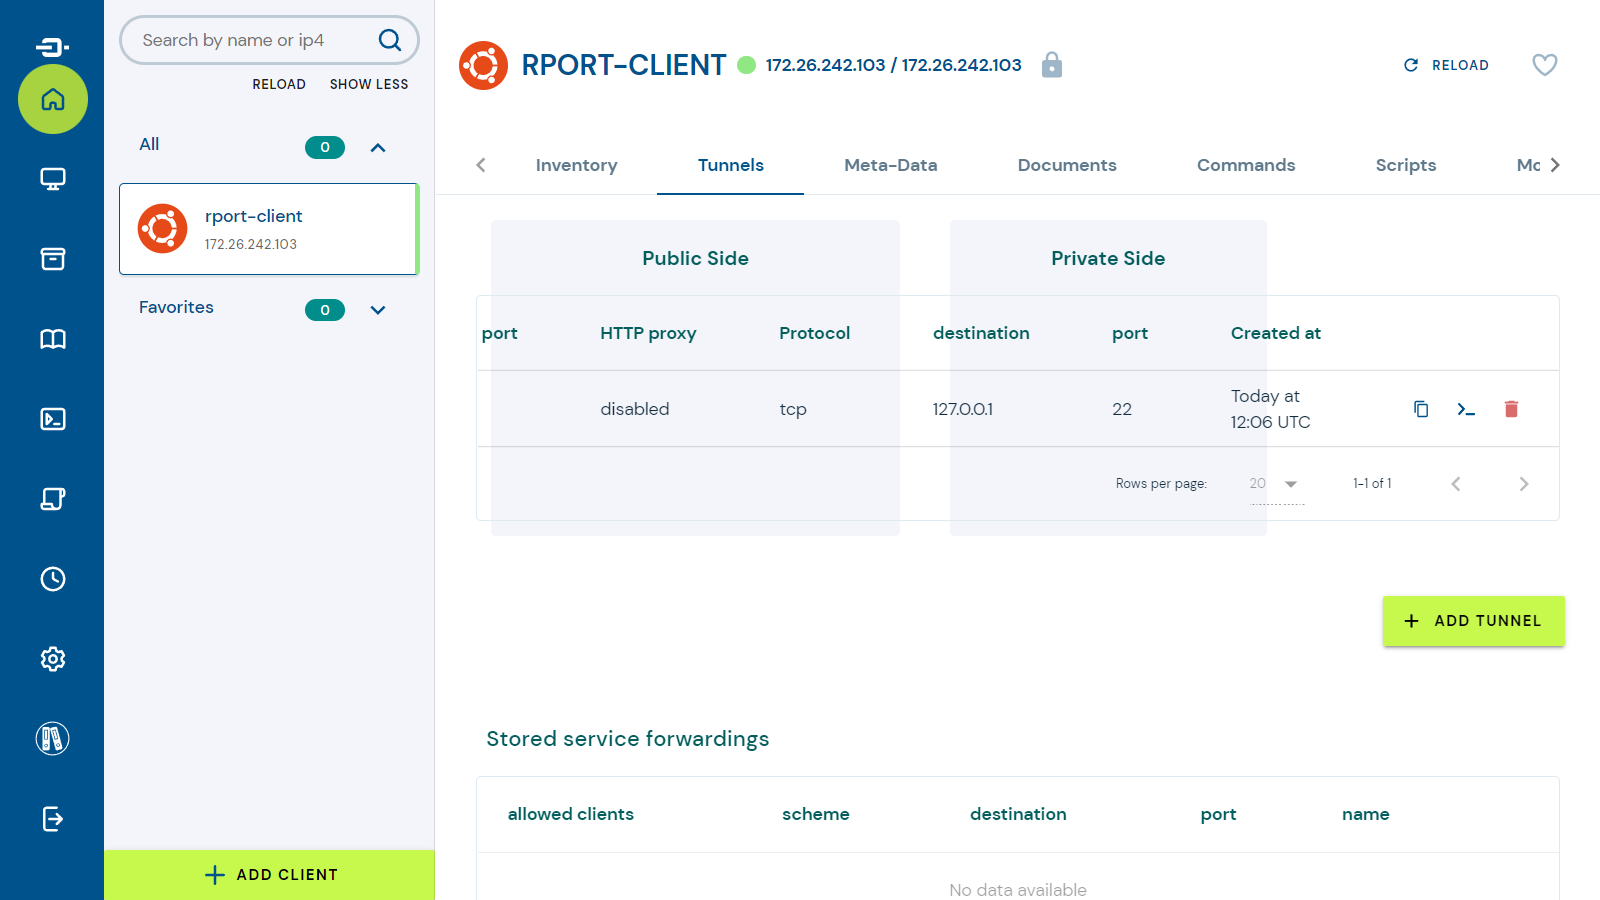 注記
注記私の環境では
ssh 172.26.244.96 -p 29809でした。
トンネルを使用したSSH接続
新しいPowerShellのウィンドウを立ち上げ、SSH接続を開始します。
PS C:\> ssh [email protected] -p 29809 -i $env:USERPROFILE/id_rsa
ユーザー名の指定(ubuntu)と接続鍵の指定(-i $env:USERPROFILE/id_rsa)を追加しています。
Welcome to Ubuntu 20.04.4 LTS (GNU/Linux 5.4.0-125-generic x86_64)

 * Documentation:  https://help.ubuntu.com
 * Management:     https://landscape.canonical.com
 * Support:        https://ubuntu.com/advantage

  System information as of Sat Sep 10 21:11:59 JST 2022

  System load:  0.02              Processes:             106
  Usage of /:   29.6% of 4.67GB   Users logged in:       1
  Memory usage: 25%               IPv4 address for eth0: 172.26.242.103
  Swap usage:   0%

 * Super-optimized for small spaces - read how we shrank the memory
   footprint of MicroK8s to make it the smallest full K8s around.

   https://ubuntu.com/blog/microk8s-memory-optimisation

0 updates can be applied immediately.


The list of available updates is more than a week old.
To check for new updates run: sudo apt update
New release '22.04.1 LTS' available.
Run 'do-release-upgrade' to upgrade to it.


Last login: Sat Sep 10 21:10:15 2022 from 127.0.0.1
ubuntu@rport-client:~$
SSHトンネル接続が成功しました。
機能のチェック:HTTPのリモートアクセス
リモート接続はSSHだけではありません。HTTPやRDP、VNC接続も可能です。 HTTP接続を試してみます。
Nginxのインストール
クライアント側にWebサーバーとしてNginxをインストールします。
Nginxのインストール
ubuntu@rport-client:~$ sudo apt update
ubuntu@rport-client:~$ sudo apt install -y nginx
Nginx起動確認
ubuntu@rport-client:~$ curl localhost- 出力
<!DOCTYPE html>
<html>
<head>
<title>Welcome to nginx!</title>
<style>
    body {
        width: 35em;
        margin: 0 auto;
        font-family: Tahoma, Verdana, Arial, sans-serif;
    }
</style>
</head>
<body>
<h1>Welcome to nginx!</h1>
<p>If you see this page, the nginx web server is successfully installed and
working. Further configuration is required.</p>

<p>For online documentation and support please refer to
<a href="http://nginx.org/">nginx.org</a>.<br/>
Commercial support is available at
<a href="http://nginx.com/">nginx.com</a>.</p>

<p><em>Thank you for using nginx.</em></p>
</body>
</html>
Webサーバーが起動していることが確認できました。
HTTPトンネルを作成
作成方法はSSHと同様です。
TunnelsタブのADD TUNNELボタンをクリックします。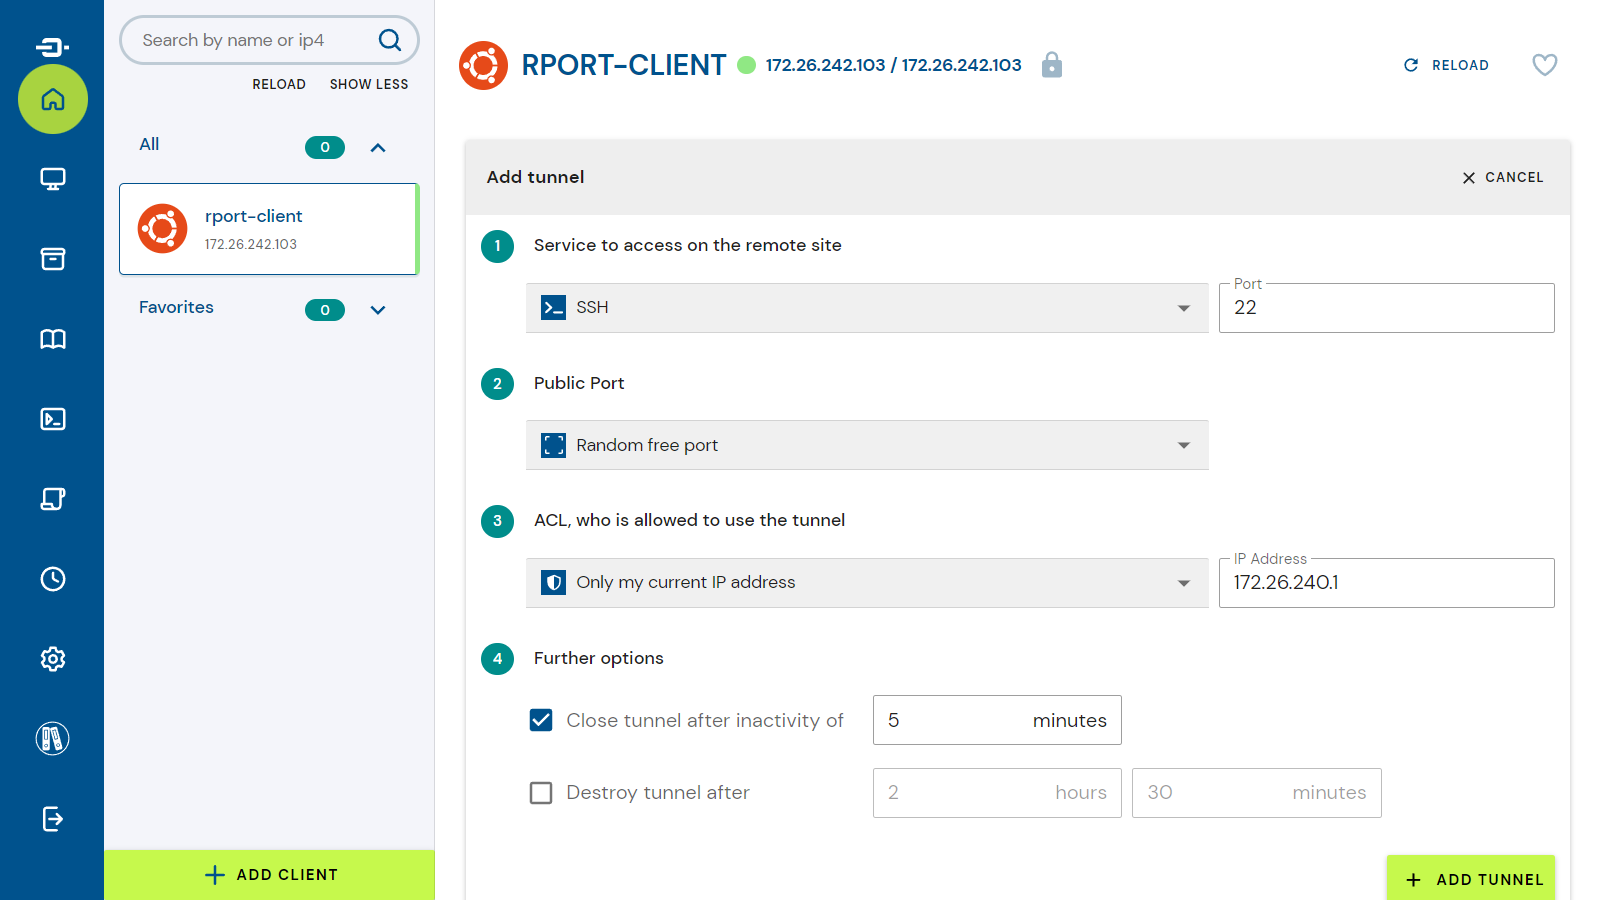
Service to access on the remote siteの選択をHTTPに変更し、ADD TUNNELボタンをクリックします。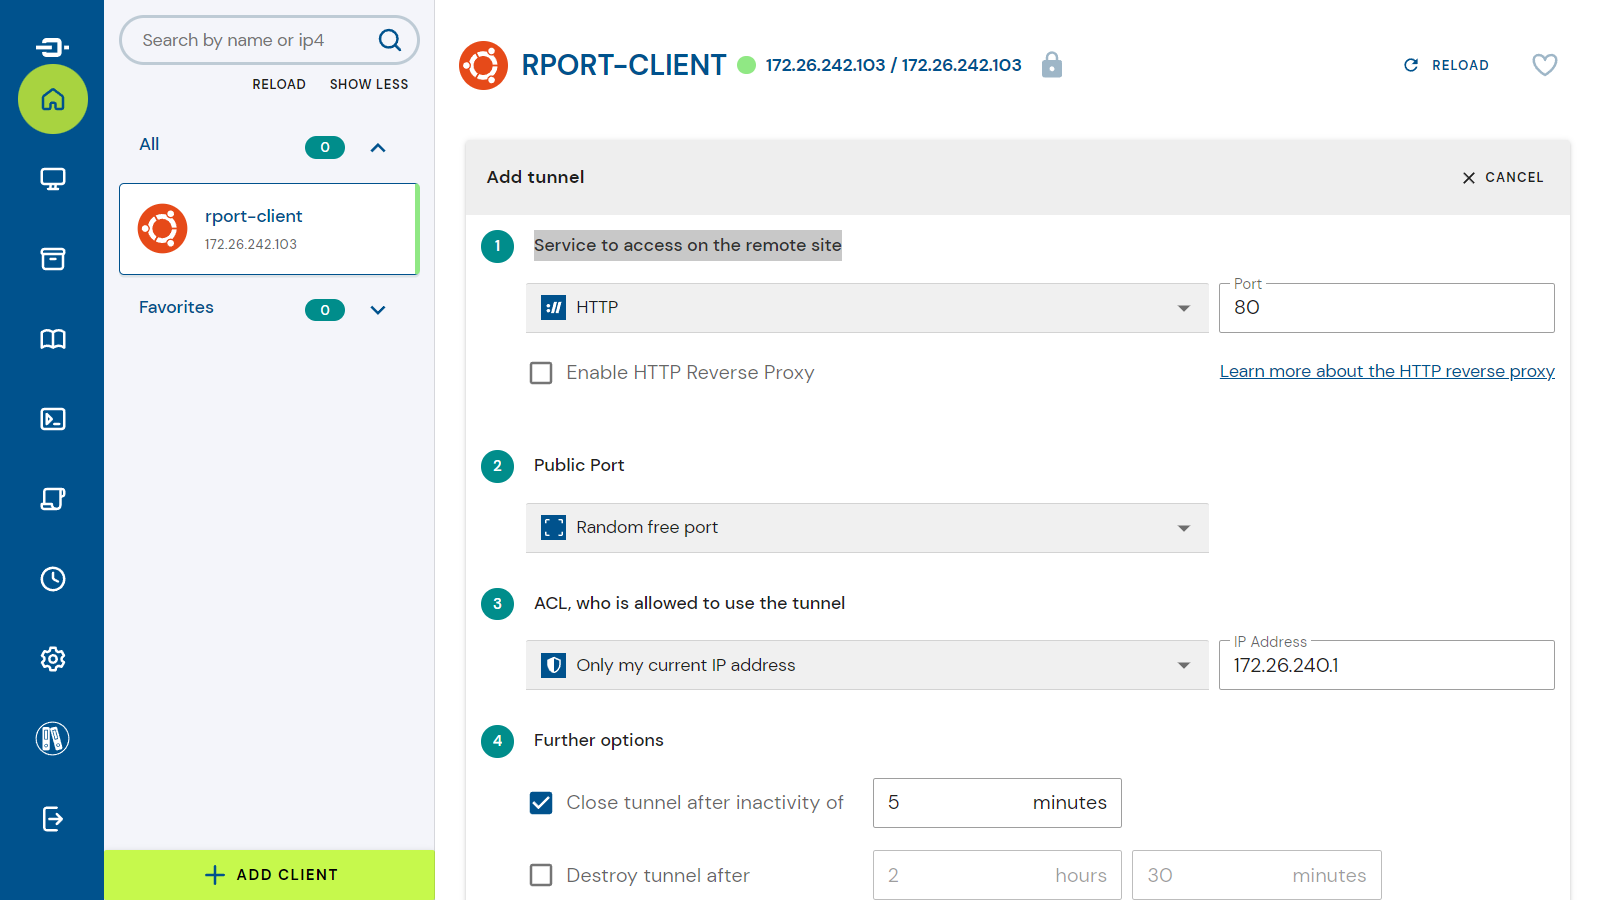 注記
注記選択肢としては以下のものがあります。
- SSH
- Remote Desktop (RDP)
- VNC
- HTTP
- HTTPs
- Any Service
- Service Fowarding

SSHの際と同様に、コピーボタンから接続先がコピーできます。
 注記
注記http://172.26.244.96:29273でした。
ブラウザでの表示
RPortサーバーのIPアドレスへの接続ですが、トンネルされてクライアントのHTMLが返却されます。
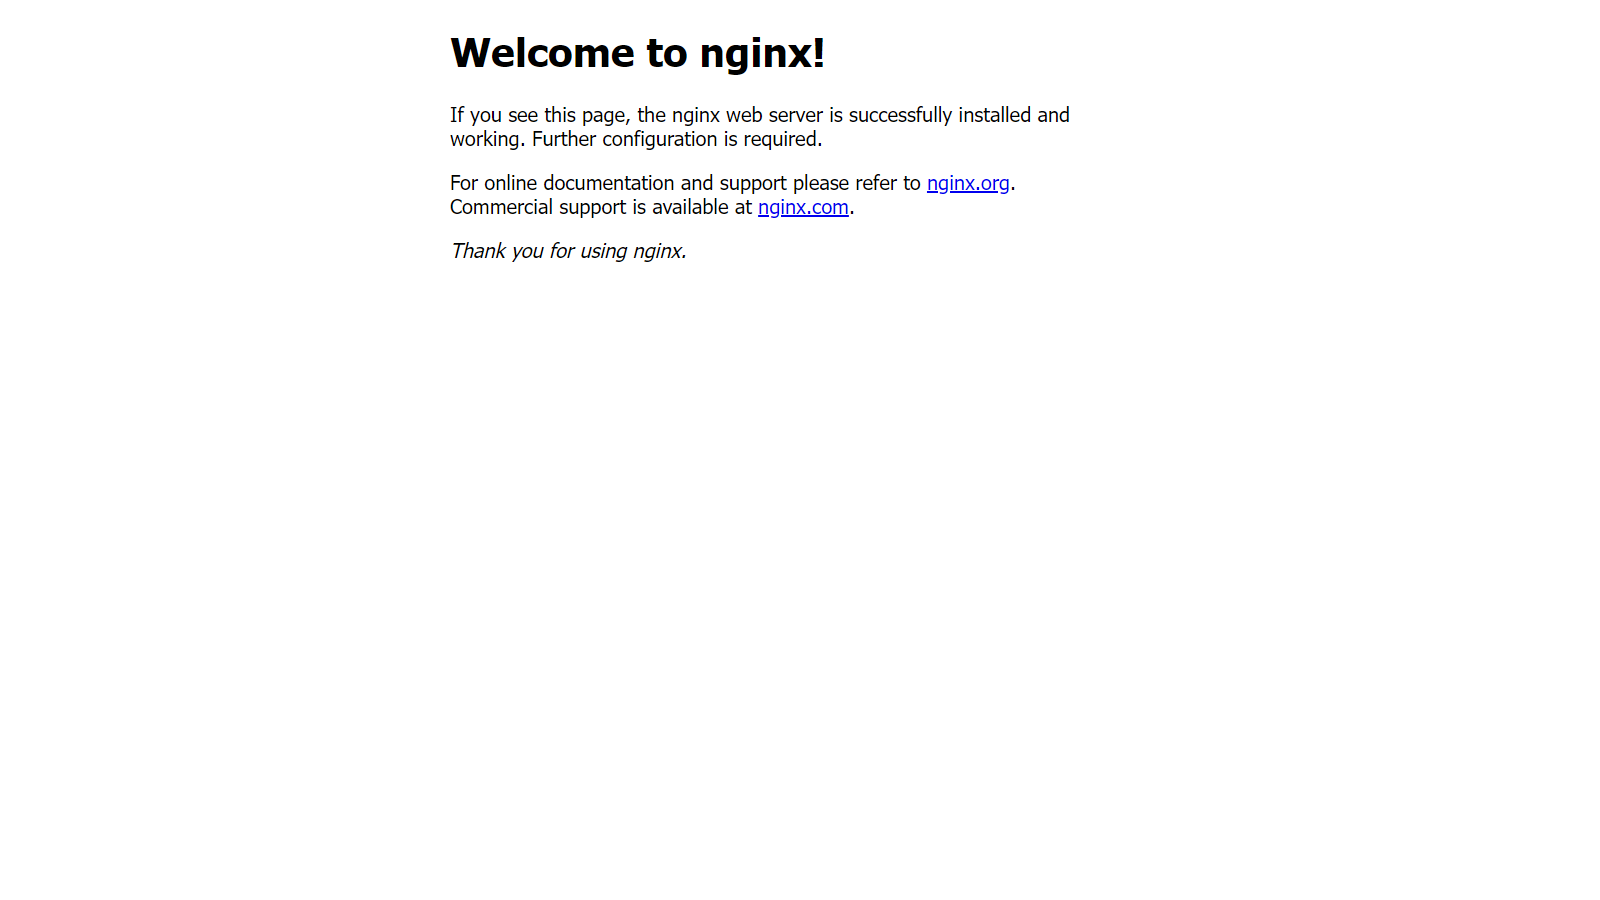
HTTPでもトンネル接続が成功しました。
機能のチェック:リモートコマンド
トンネル接続以外の機能として、コマンドの実行が可能です。
Commandsタブを表示します。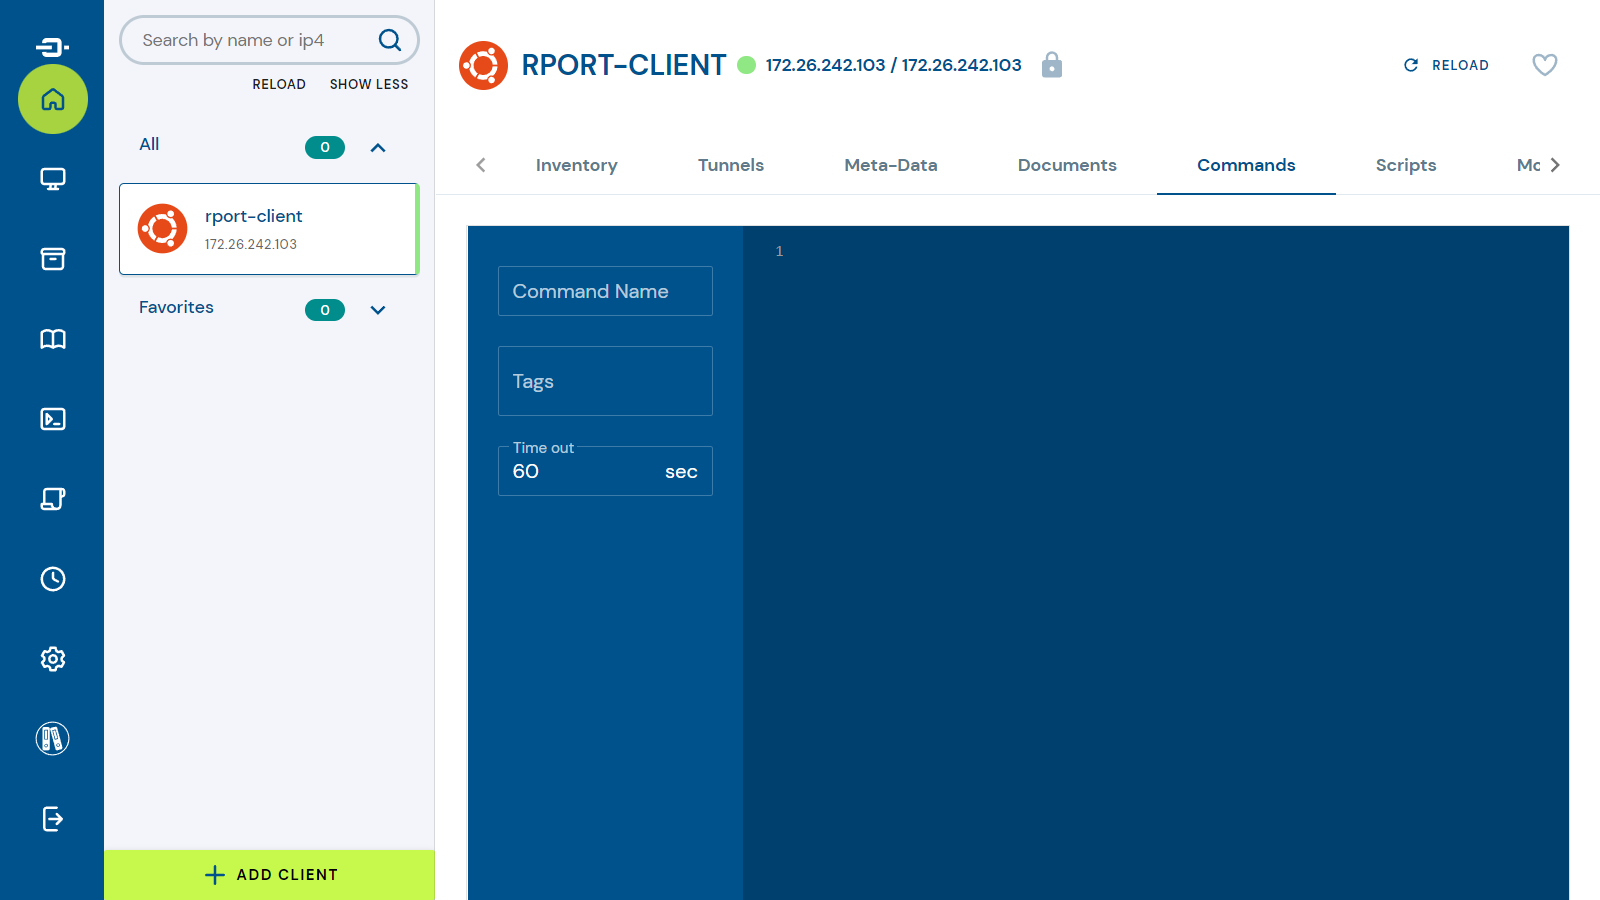
コマンドを入力します。
注記複数行での実行も可能です。
- 例
cd
pwd
mkdir -p abc
ls -lEXECUTEボタンをクリックします。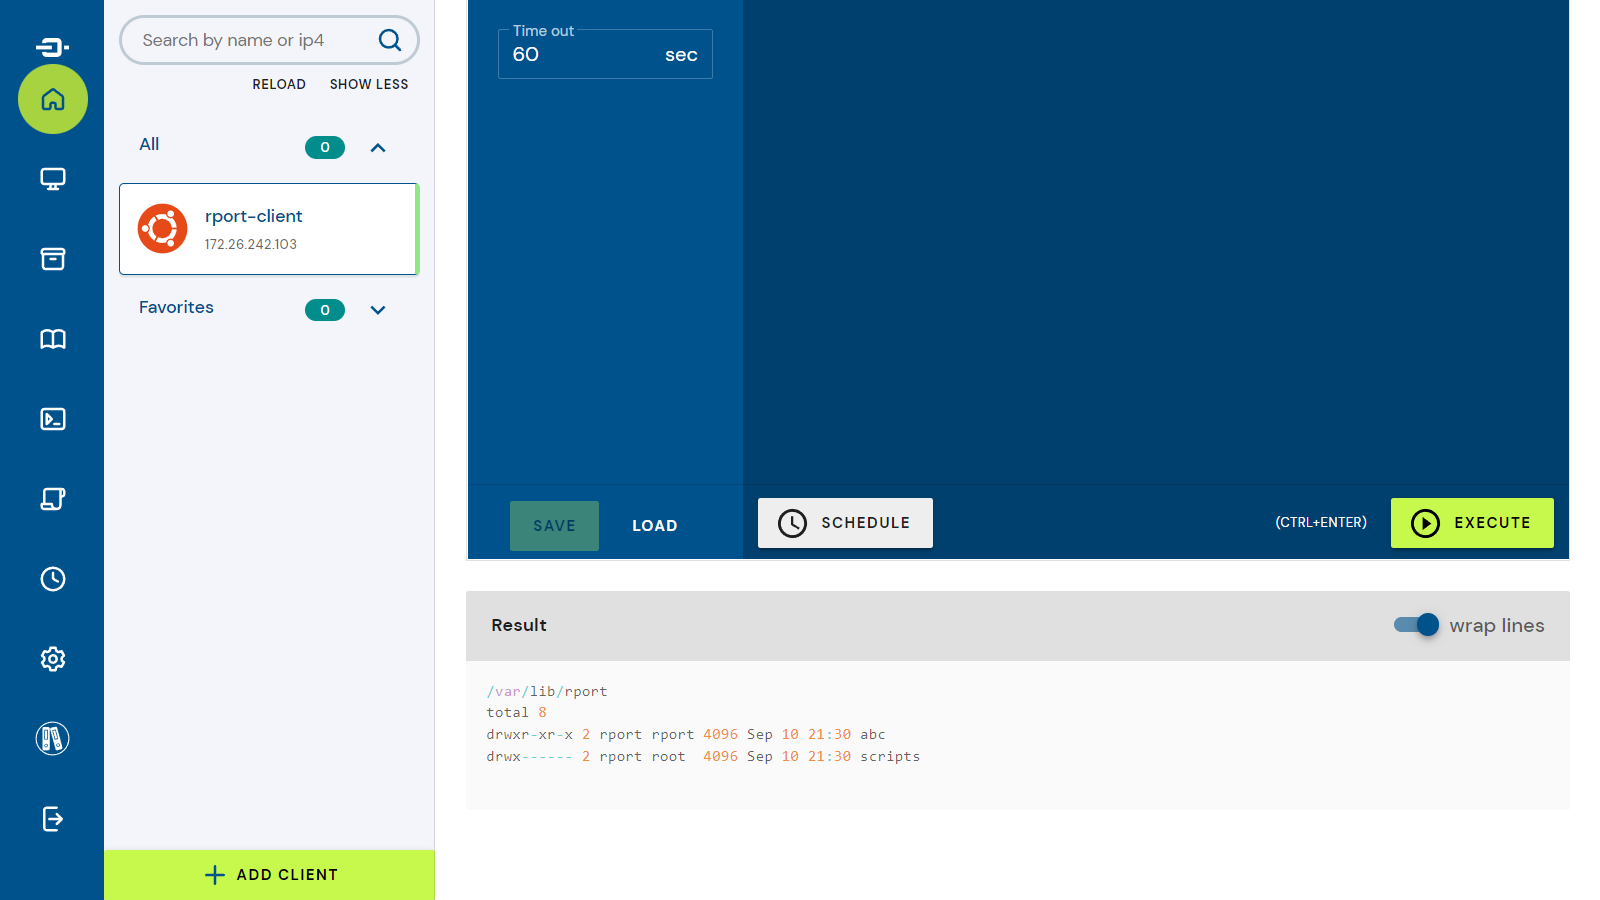 注記
注記コマンドの実行ができました。わざわざSSH接続するまでもないコマンドを簡単に実行できます。
以上、RPortの使用レポートでした。