7. 2 つ目の EC2 インスタンスの作成 / 8. 2 つ目の EC2 インスタンスを ELB に登録
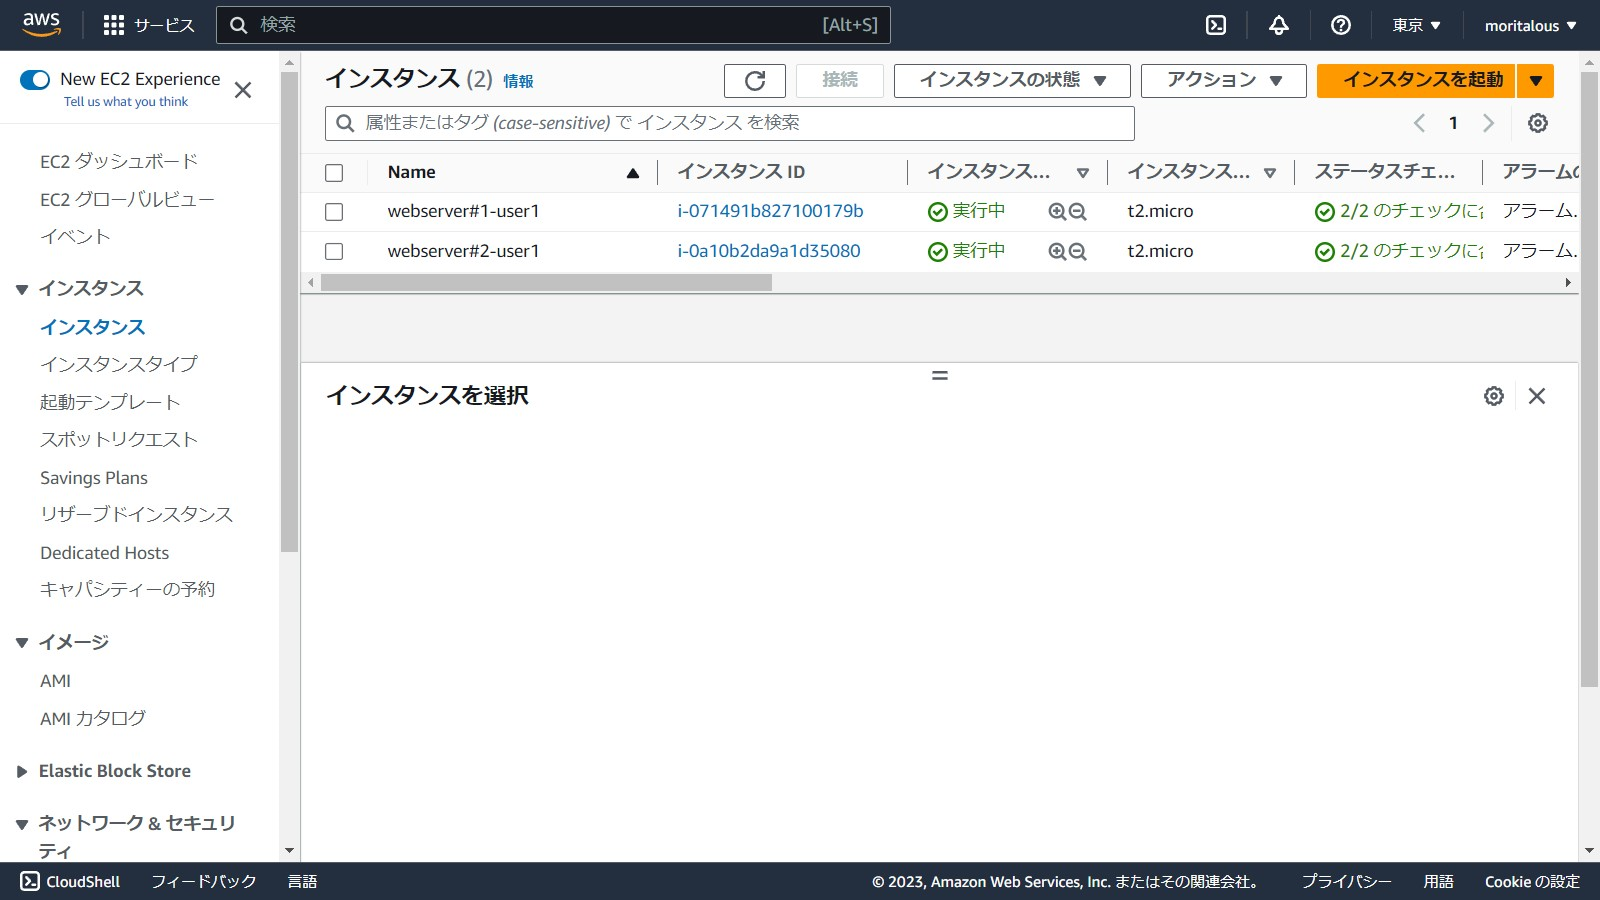
2つ目のEC2を追加します。

参照元:8. 2 つ目の EC2 インスタンスを ELB に登録
インスタンスの追加
AMI IDをマネジメントコンソールで確認します。
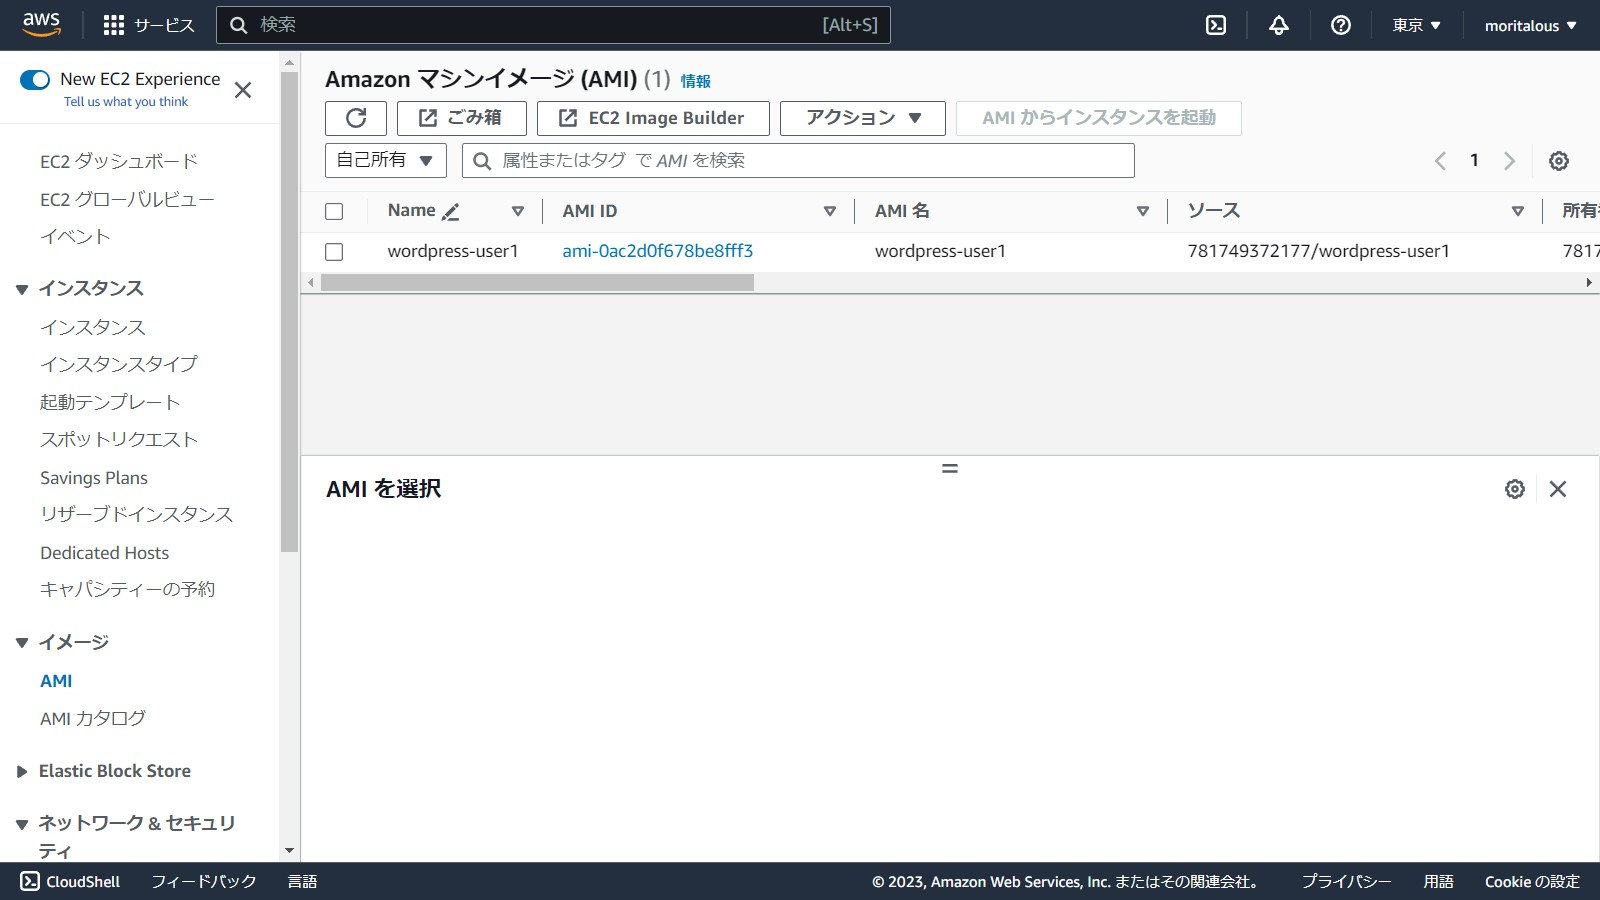
AMIIDをパラメーターで指定するように変更していきましょう。
Parameters:
  UserName:
    Type: String
    Description: User Name
    Default: user1
  InstanceType:
    Type: String
    Description: Instance Type
    AllowedValues:
      - t2.micro
      - t2.medium
    Default: t2.micro
  DBAdminUser:
    Description: DB Admin User
    Type: String
  DBAdminPassword:
    Description: DB Admin Password
    Type: String
    MinLength: 8
    NoEcho: true
  AmiId:
    Type: String
    Description: AMI ID
すでに作成したEC2インスタンスの設定を真似て作成しましょう。 1つ目のEC2異なる設定は
- 論理名
- AMI ID
- サブネット(パブリックサブネット-1cを指定)
- インスタンス名
  EC2Instance2:
    Type: AWS::EC2::Instance
    Properties:
      ImageId: !Ref AmiId
      InstanceType: !Ref InstanceType
      EbsOptimized: false
      BlockDeviceMappings:
        - DeviceName: /dev/xvda
          Ebs:
            Encrypted: false
            DeleteOnTermination: true
            Iops: 3000
            VolumeSize: 16
            VolumeType: gp3
      NetworkInterfaces:
        - SubnetId: !Ref PublicSubnet2
          AssociatePublicIpAddress: true
          DeviceIndex: "0"
          GroupSet:
            - !Ref Ec2SecurityGroup
      PrivateDnsNameOptions:
        HostnameType: ip-name
        EnableResourceNameDnsARecord: false
        EnableResourceNameDnsAAAARecord: false
      Tags:
        - Key: Name
          Value: !Sub webserver#2-${UserName}
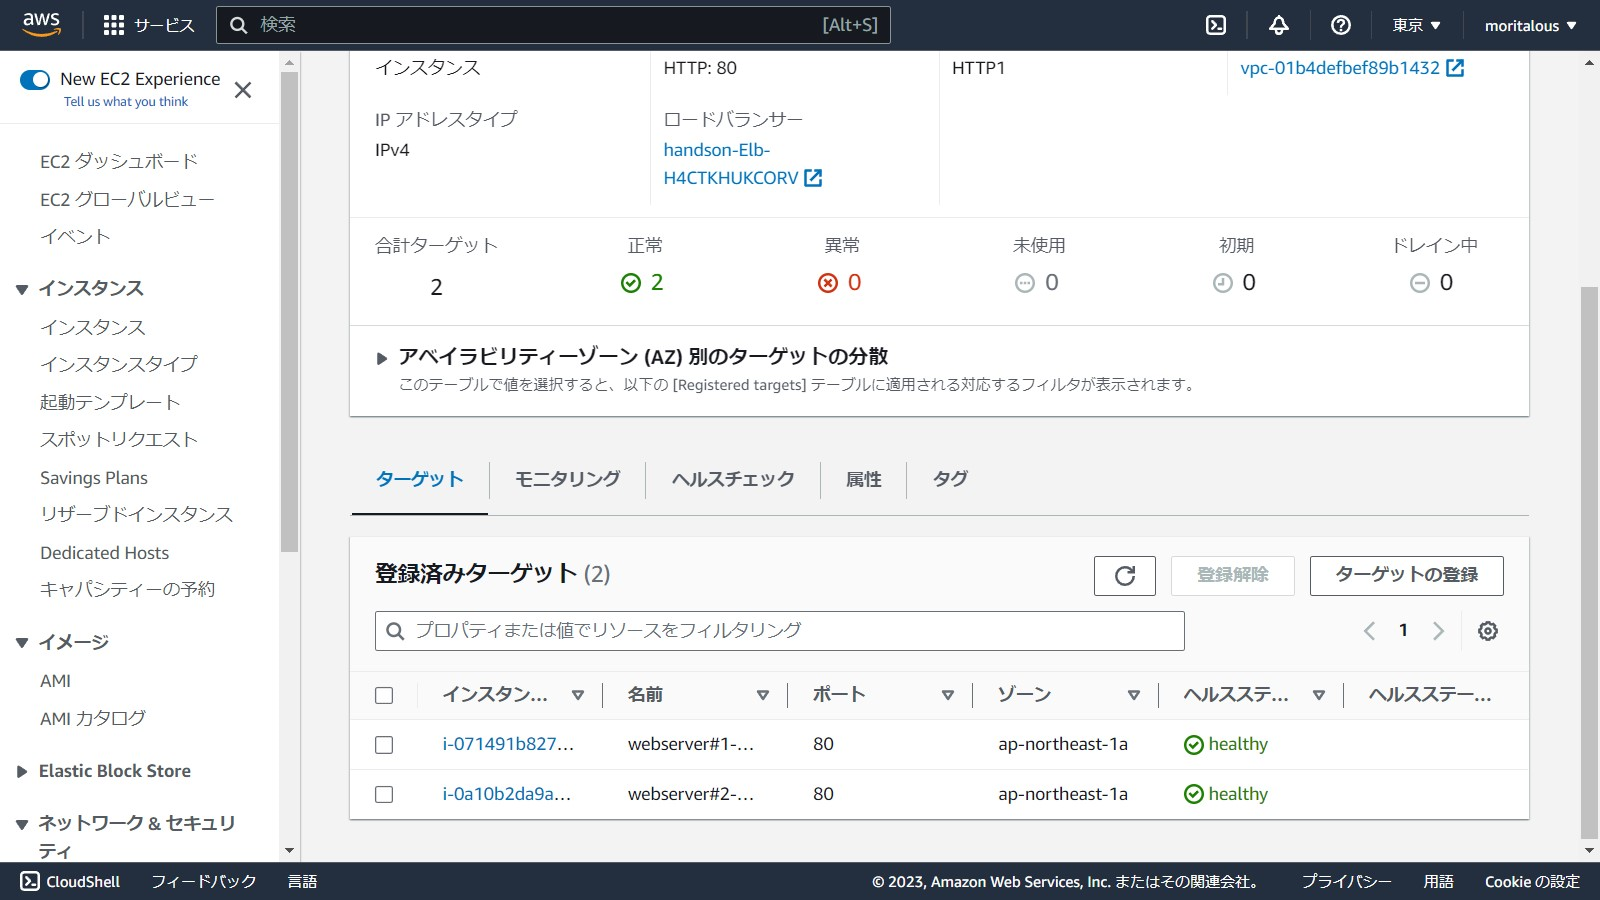
ELBのターゲットグループの変更
ELBのターゲットグループに作成したEC2を追加します。(1行追加するのみです)
  ElbTargetGroup:
    Type: AWS::ElasticLoadBalancingV2::TargetGroup
    Properties:
      TargetType: instance
      Protocol: HTTP
      Port: 80
      VpcId: !Ref VPC
      ProtocolVersion: HTTP1
      HealthCheckEnabled: true
      HealthCheckProtocol: HTTP
      HealthCheckPath: /wp-includes/images/blank.gif
      Targets:
        - Id: !Ref EC2Instance
        - Id: !Ref EC2Instance2
テンプレートファイル