Apple Watchは高くて手が届きませんが、Xiaomi Mi Smart Band 6なら約5,000円。 買っちゃいました。
https://www.mi.com/jp/product/mi-smart-band-6/
測定できるのは
- 心拍数
- 歩数
- 睡眠
- ストレス
などです。
Android用のZepp LifeアプリがGoogle Fitに対応しており、設定することでGoogle Fitアプリでも測定した値を確認できます。
Google Fitに貯めたデータは、REST APIが公開されているため、簡単に取得できました。
https://developers.google.com/fit
ポイントはOAuthによる認証とGoogle API Clientの使い方です。
GCPプロジェクトの作成とAPIの有効化
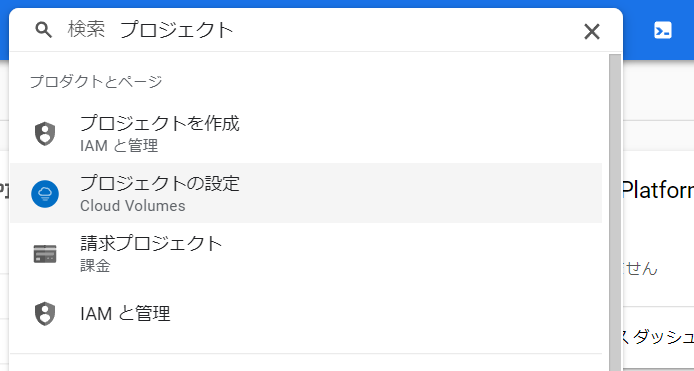
Google FitのAPIを使用するにはGCPのアカウントとプロジェクトが必要になります。GCPの管理画面上部検索欄に「プロジェクト」と入力し、プロジェクトを作成を選択します。
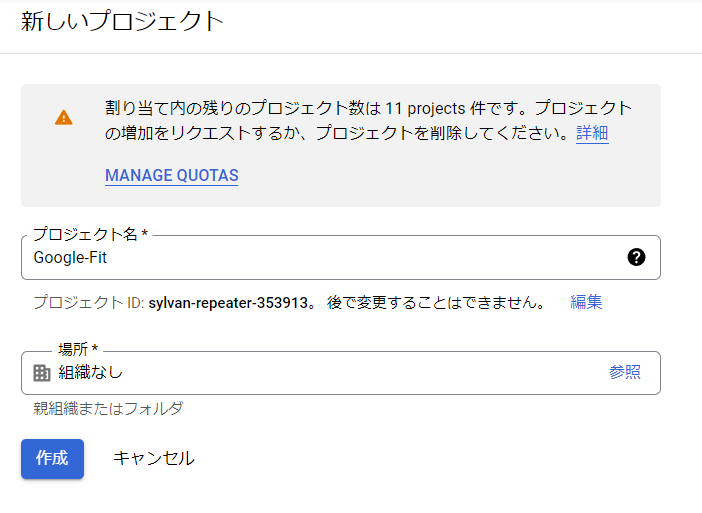
- 名前をつけてプロジェクトを作成します。
- プロジェクトを作成したら、次はGoogle FitのAPIを有効化します。検索欄に「API」と入力しAPIとサービスを選択します。

- 画面上部のAPIとサービスの有効化をクリックし、「fit」と検索します。Google FitのAPIは「Fitness API」という名前で登録されています。

- Fitness APIを選択し、APIを有効化し、有効化後に管理画面へ遷移します。
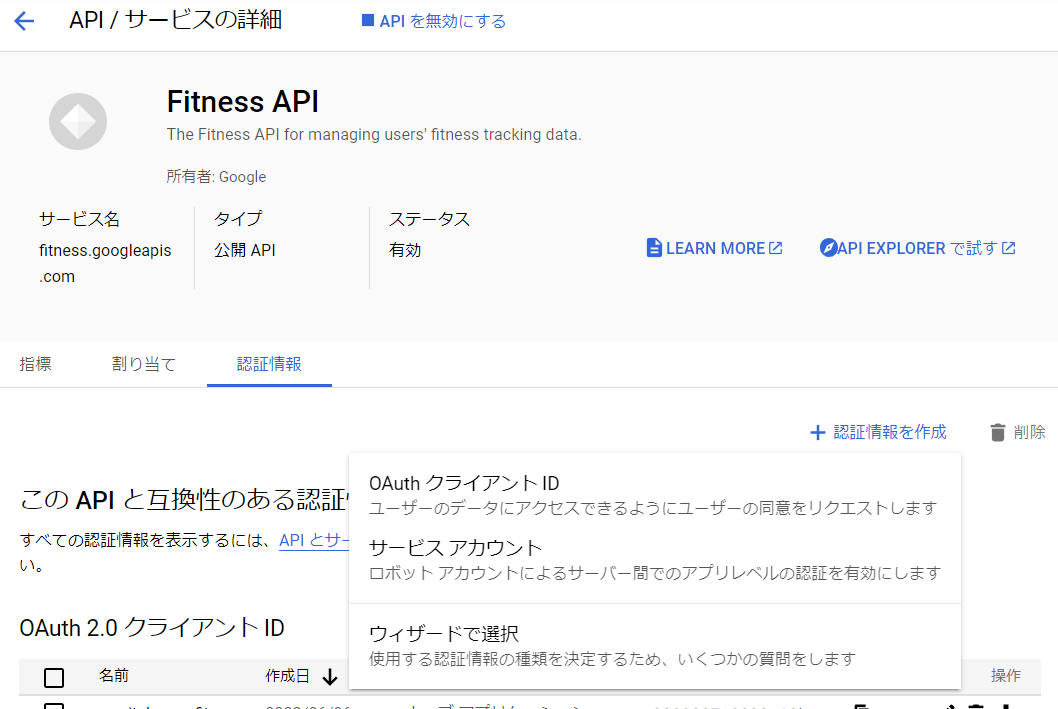
- Fitness APIの管理画面で認証情報タブを選択し、認証情報を作成ボタンをクリック、OAuthクライアントIDを選択します。

- 以下の値を入力し、保存します。
| 項目 | 値 |
|---|---|
| アプリケーションの種類 | ウェブアプリケーション |
| 名前 | My-GoogleFit-API |
| 承認済みの JavaScript 生成元 | 未指定のまま |
| 承認済みのリダイレクト URI | http://localhost:8080/ |
登録ができたらJSONファイルをダウンロードします。
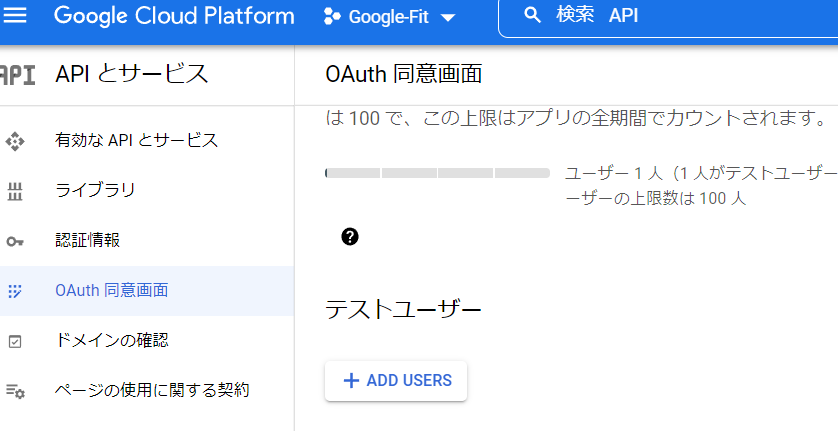
- テストユーザーを追加します。左メニューのOAuth同意画面の項目にあるテストユーザーにGoogle Fit情報を取得するユーザーのメールアドレスを登録します。
以上で、GCPの設定は完了です。
GCPにプロジェクトが作成できました。
Pythonプログラムの作成
OAuthで認証をして、APIを呼び出します。 いずれもライブラリーが用意されているので、とても簡単です。
ライブラリーを導入
- requirements.txt
google-api-python-client
google-auth
google-auth-oauthlib
pandas
matplotlib
pip install -r requirements.txt
Pythonプログラム
- Import文
import datetime
import json
import os

import matplotlib.pyplot as plt
import pandas as pd
from google.auth.transport.requests import Request
from google.oauth2.credentials import Credentials
from google_auth_oauthlib.flow import InstalledAppFlow
from googleapiclient.discovery import build
- OAuth認証
CREDENTIALS_JSON = 'token.json'
SCOPES = ['https://www.googleapis.com/auth/fitness.heart_rate.read']


def get_credentials():

    credentials = None

    if os.path.exists(CREDENTIALS_JSON):
        credentials = Credentials.from_authorized_user_file(
            CREDENTIALS_JSON, SCOPES)

    if not credentials or not credentials.valid:
        if credentials and credentials.expired and credentials.refresh_token:
            credentials.refresh(Request())
        else:
            flow = InstalledAppFlow.from_client_secrets_file(
                'client_secrets.json', scopes=SCOPES)
            flow.run_local_server(prompt='consent')

            credentials = flow.credentials

            with open(CREDENTIALS_JSON, 'w') as token:
                token.write(credentials.to_json())

    return credentials
run_local_serverのパラメーターにprompt='consent'を指定しないと、二度目以降同意画面が出ず、リフレッシュトークンが取得できないです。(ハマりました)
- Google FitのAPIを呼び出しデータを取得
def request_fit_data(start: int, end: int, filename: str = None):

    response = None

    with build('fitness', 'v1', credentials=get_credentials()) as service:

        body = {
            'aggregateBy': {
                'dataTypeName': 'com.google.heart_rate.bpm'
            },
            'startTimeMillis': start,
            'endTimeMillis': end
        }

        response = service.users().dataset().aggregate(userId='me', body=body).execute()

    if filename is not None:
        with open(filename, 'w') as f:
            json.dump(response, f, indent=4)

    return response
リクエストをビルドして、executeします。
ライブラリーを使わずREST APIを呼び出す場合はhttps://www.googleapis.com/fitness/v1/users/userId/dataset:aggregateへのリクエストを行いますが、これが、service.users().dataset().aggregate(userId='me', body=body)となるわけです。
取得したデータをグラフにしてみました。
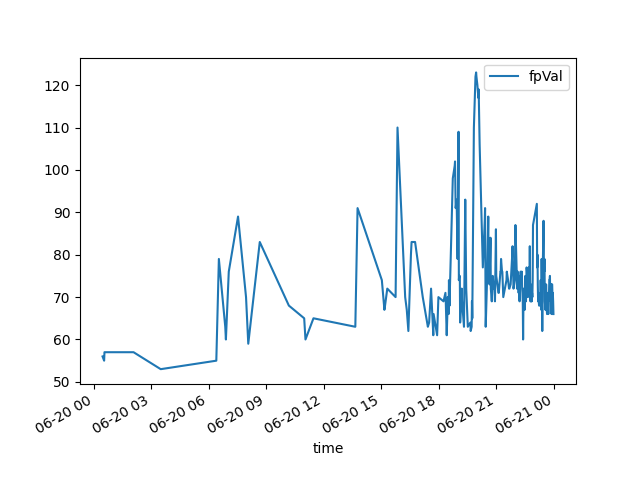
健康です。
コード全文はGistにアップロードしてます。
https://gist.github.com/moritalous/de32b9172ed317ec63290608ec480a12