AWSではIoT CoreをはじめDevice Mangementなど関連サービスが多数提供されています。IoT系サービスを試してみる場合、IoTという特性上クラウド側の準備の他にデバイス側も準備する必要があり、かなり手間がかかってしまいます。デバイス側の手間を削減するため、AWSがデバイス側のソフトウェアとしてAWS IoT Device ClientをOSSで公開していますので、これを使って簡単にPoCを始めることができます。
- IoT Device ClientがOSSで公開されている
- Dockerfileが用意されており、簡単にセットアップが可能
- IoT Device Clientを使用することで、IoT系のサービスとしてどのようなものが提供されているか把握ができる
AWS IoT Device Clientとは
The AWS IoT Device Client is free, open-source, modular software written in C++ that you can compile and install on your Embedded Linux based IoT devices to access AWS IoT Core, AWS IoT Device Management, and AWS IoT Device Defender features by default. It serves as a reference implementation for your IoT devices to work with AWS IoT services, with operational best practices baked in – using it is the easiest way to create a proof-of-concept (PoC) for your IoT project. What’s more, since it is open-source, you can modify it to fit your business needs, or optimize it when you wish to scale up from a PoC to production.
出典:AWS IoT Device ClientのGitHubリポジトリ
AWS IoT Device Clientは、C++で書かれた無料のオープンソースモジュラーソフトウェアで、コンパイルしてEmbedded LinuxベースのIoTデバイスにインストールすると、AWS IoT Core, AWS IoT Device Management, AWS IoT Device Defenderの機能にデフォルトでアクセスすることができます。IoTデバイスがAWS IoTサービスと連携するためのリファレンス実装として、運用のベストプラクティスが組み込まれており、IoTプロジェクトの概念実証(PoC)を行う最も簡単な方法として利用することができます。さらに、オープンソースであるため、ビジネスニーズに合わせて変更したり、PoCから本番にスケールアップする際に最適化したりすることが可能です。
翻訳:DeepL
環境の準備
WSL2(Ubuntu 20.04)上で試しました。他のLinux環境でも同様と思います。
Dockerイメージをビルド
2022/9/23にDocker上で構築するためのDockerfileがコミットされました。
2022/9/25時点では、Dockerfileは問題ないのですが、他のコミットに問題があるようでビルドがうまくいきません。そのため
- Dockerfileは
mainブランチから取得 - その他のソースは
v1.7タグから取得
という方法で実施しました。
- コンテナイメージのビルド
git clone https://github.com/awslabs/aws-iot-device-client.git
cp -r aws-iot-device-client/.github/docker-images/base-images ./
cd aws-iot-device-client/
git checkout -b v1.7

docker build . --file ../base-images/ubuntu/Dockerfile -t device-client:ubuntu
Dockerfileはベースイメージごとに3種類(ubuntu、amazonlinux、ubi8)用意されています。
ベースイメージを変更する場合は、--fileオプションで指定するDockerfileを変更します。
- Amazon Linuxの場合
docker build . --file ../base-images/amazonlinux/Dockerfile -t device-client:amazonlinux
- ubi8
docker build . --file ../base-images/ubi8/Dockerfile -t device-client:ubi8
ubi8はRed Hat Universal Base Image 8というものだそうです。
https://catalog.redhat.com/software/containers/ubi8/ubi/5c359854d70cc534b3a3784e
ベースイメージを変えても、あまりコンテナイメージのサイズは変わりませんでした。(というか、全部でかい)
docker images | grep device-client
device-client    ubi8             a72516f16f86   9 hours ago    3.57GB
device-client    amazonlinux      7388d571d9a3   9 hours ago    3.46GB
device-client    ubuntu           93d08b9ee632   9 hours ago    3.13GB
IoT Device Clinntを起動する
ヘルプを表示してみましょう。
docker run -it --rm device-client:ubuntu --help
出力
        AWS IoT Device Client BINARY

For more documentation, see https://github.com/awslabs/aws-iot-device-client

Available sub-commands:

--help:                                                                 Get more help on commands
--version:                                                              Output current version
--export-default-settings <JSON-File-Location>:                         Export default settings for the AWS IoT Device Client binary to the specified file and exit program
--config-file <JSON-File-Location>:                                     Take settings defined in the specified JSON file and start the binary
--log-level <[DEBUG, INFO, WARN, ERROR]>:                               Specify the log level for the AWS IoT Device Client
--log-type <[STDOUT, FILE]>:                                            Specify the logger implementation to use.
--log-file <File-Location>:                                             Write logs to specified log file when using the file logger.
--enable-sdk-logging                                                    Enable SDK Logging.
--sdk-log-level <[Trace, Debug, Info, Warn, Error, Fatal]>:             Specify the log level for the SDK
--sdk-log-file <File-Location>:                                         Write SDK logs to specified log file.
--enable-jobs [true|false]:                                             Enables/Disables Jobs feature
--enable-tunneling [true|false]:                                        Enables/Disables Tunneling feature
--enable-device-defender [true|false]:                                  Enables/Disables Device Defender feature
--enable-fleet-provisioning [true|false]:                               Enables/Disables Fleet Provisioning feature
--enable-pub-sub [true|false]:                                          Enables/Disables Pub/Sub Sample feature
--enable-sample-shadow [true|false]:                                    Enables/Disables Sample Shadow feature
--enable-config-shadow [true|false]:                                    Enables/Disables Config Shadow feature
--enable-secure-element [true|false]:                                           Enables/Disables Secure Element Configuration
--endpoint <endpoint-value>:                                            Use Specified Endpoint
--cert <Cert-Location>:                                                 Use Specified Cert file
--key <Key-Location>:                                                   Use Specified Key file
--root-ca <Root-CA-Location>:                                           Use Specified Root-CA file
--thing-name <thing-name-value/client-id-value>:                        Use Specified Thing Name (Also used as Client ID)
--jobs-handler-dir <Jobs-handler-directory>:                            Use specified directory to find job handlers
--tunneling-region <region>:                                            Use Specified AWS Region for Secure Tunneling
--tunneling-service <service>:                                          Connect secure tunnel to specific service
--tunneling-disable-notification:                                       Disable MQTT new tunnel notification for Secure Tunneling
--device-defender-interval <interval>:                                  Positive integer to publish Device Defender metrics
--fleet-provisioning-template-name <template-name>:                     Use specified Fleet Provisioning template name
--fleet-provisioning-template-parameters <template-parameters>:         Use specified Fleet Provisioning template parameters. A JSON object specified as an escaped string
--csr-file <csr-file-path>:                                             Use specified CSR file to generate a certificate by keeping user private key secure. If the CSR file is specified without also specifying a device private key, the Device Client will use Claim Certificate and Private key to generate new Certificate and Private Key while provisioning the device
--device-key <device-key-path>:                                         Use specified device key to connect to IoT core after provisioning using csr file is completed. If the CSR file is specified without also specifying a device private key, the Device Client will use Claim Certificate and Private key to generate new Certificate and Private Key while provisioning the device
--publish-topic <publish-topic>:                                        The topic the Pub/Sub sample feature will publish to
--publish-file <path/to/publish/file>:                                  The file the Pub/Sub sample feature will read from when publishing
--subscribe-topic <subscribe-topic>:                                    The topic the Pub/Sub sample feature will receive messages on
--subscribe-file <path/to/sub/file>:                                    The file the Pub/Sub sample feature will write received messaged to
--shadow-name <shadow-name>:                                            The name of shadow SampleShadow feature will create or update
--shadow-input-file <shadow-input-file>:                                The file the Sample Shadow feature will read from when updating shadow data
--shadow-output-file <shadow-output-file>:                              The file the Sample Shadow feature will write the latest shadow document to
--pkcs11-lib <pkcs11-lib-path>:                                 The file path to PKCS#11 library
--secure-element-pin <secure-element-pin>:                                      The user PIN for logging into PKCS#11 token.
--secure-element-key-label <secure-element-key-label>:                                  The Label of private key on the PKCS#11 token (optional).
--secure-element-slot-id <secure-element-slot-id>:                                      The Slot ID containing PKCS#11 token to use (optional).
--secure-element-token-label <secure-element-token-label>:                                      The Label of the PKCS#11 token to use (optional).
--http-proxy-config <http-proxy-config-file>:                           Use specified file path to load HTTP proxy configs
設定ファイルのテンプレートを入手
設定項目についてはオプションで一つずつ指定する方法と、--config-fileオプションで設定ファイルを指定する方法とがあります。
また、テンプレートとなる設定ファイルは、--export-default-settingsオプションで生成することができます。
touch $PWD/config.json
docker run -it --rm \
 -v $PWD/config-template.json:/tmp/config-template.json
 device-client:ubuntu --export-default-settings /tmp/config-template.json
config-template.json
{
    "endpoint": "<replace_with_endpoint_value>",
    "cert": "<replace_with_certificate_file_path>",
    "key": "<replace_with_private_key_file_path>",
    "root-ca": "<replace_with_root_ca_file_path>",
    "thing-name": "<replace_with_thing_name>",
    "logging": {
        "level": "DEBUG",
        "type": "FILE",
        "file": "/var/log/aws-iot-device-client/aws-iot-device-client.log",
        "enable-sdk-logging": false,
        "sdk-log-level": "TRACE",
        "sdk-log-file": "/var/log/aws-iot-device-client/sdk.log"
    },
    "jobs": {
        "enabled": true,
        "handler-directory": "<replace_with_job_handler_directory_path>"
    },
    "tunneling": {
        "enabled": true
    },
    "device-defender": {
        "enabled": true,
        "interval": <replace_with_interval>
    },
    "fleet-provisioning": {
        "enabled": false,
        "template-name": "<replace_with_template_name>",
        "template-parameters": "<replace_with_template_parameters>",
        "csr-file": "<replace_with_csr_file_path>",
        "device-key": "<replace_with_device_private_key_file_path>"
    },
    "samples": {
        "pub-sub": {
            "enabled": false,
            "publish-topic": "<replace_with_publish_topic>",
            "publish-file": "<replace_with_publish_file_path>",
            "subscribe-topic": "<replace_with_subscribe_topic>",
            "subscribe-file": "<replace_with_subscribe_file_path>"
        }
    },
    "sample-shadow": {
        "enabled": false,
        "shadow-name": "<replace_with_shadow_name>",
        "shadow-input-file": "<replace_with_shaodw_input_file_path>",
        "shadow-output-file": "<replace_with_shaodw_output_file_path>"
    },
    "config-shadow": {
        "enabled": false
    },
    "secure-element": {
        "enabled": false,
        "pkcs11-lib": "<replace_with_pkcs11_lib_path>",
        "secure-element-pin": "<replace_with_secure_element_pin>",
        "secure-element-key-label": "<replace_with_secure_element_key_label>",
        "secure-element-slot-id": replace_with_secure_element_slot_id_integer,
        "secure-element-token-label": "<replace_with_secure_element_token_label>"
    },
        "sensor-publish": [
            "sensors": false,
            "enabled": "<replace>",
            "name": "<replace>",
            "addr": replace,
            "addr_poll_sec": replace,
            "buffer_time_ms": replace,
            "buffer_size": replace,
            "buffer_capacity": "<replace>",
            "eom_delimiter": "<replace>",
            "mqtt_topic": "<replace>",
            "mqtt_dead_letter_topic": "<replace>",
            "mqtt_heartbeat_topic": replace
        ]
    }
}
AWS IoTクラウドの設定(モノの登録、ポリシーの作成、証明書の作成)
マネジメントコンソールから(モノの登録、ポリシーの作成、証明書の作成)を行ってください。
証明書類はcertディレクトリー内に配置しました。
tree cert
cert
├── AmazonRootCA1.pem
├── AmazonRootCA3.pem
├── certificate.pem.crt
├── private.pem.key
└── public.pem.key
0 directories, 5 files
AmazonRootCA3.pemは使用しないので、なくても問題ありません
証明書の権限を設定
IoT Device Clientの起動時にファイルの権限チェックが行われます。(参考) 警告レベルとエラーレベルのチェックがありますが、最低限動作させるために必要な権限を設定します。
chmod 700 cert
chmod 600 cert/private.pem.key
ログファイルの事前準備
ログファイルを自動で生成させると所有者がrootになってしまいますので、事前にファイルだけ用意しておきます。
mkdir log && touch log/aws-iot-device-client.log
準備は以上で完了です。
Pub Sub Sampleを実行
まずはPub Subのサンプルを実行してみましょう。
先程作成したconfig-template.jsonを参考に、config-pubsub.jsonを作成します。
- config-pubsub.json
{
    "endpoint": "xxxxxxxxxx.iot.ap-northeast-1.amazonaws.com",
    "cert": "/root/cert/certificate.pem.crt",
    "key": "/root/cert/private.pem.key",
    "root-ca": "/root/cert/AmazonRootCA1.pem",
    "thing-name": "thing-name",
    "logging": {
        "level": "DEBUG",
        "type": "FILE",
        "file": "/var/log/aws-iot-device-client/aws-iot-device-client.log",
        "enable-sdk-logging": false,
        "sdk-log-level": "TRACE",
        "sdk-log-file": "/var/log/aws-iot-device-client/sdk.log"
    },
    "samples": {
        "pub-sub": {
            "enabled": true,
            "publish-topic": "sample/topic1",
            "subscribe-topic": "sample/topic2"
        }
    }
}
endpointとthing-nameは環境にあわせて変更してください
実行します。
docker run -it --rm \
 -v $PWD/config-pubsub.json:/tmp/config.json:ro \
 -v $PWD/cert:/root/cert:ro \
 -v $PWD/log:/var/log/aws-iot-device-client \
 device-client:ubuntu --config-file /tmp/config.json
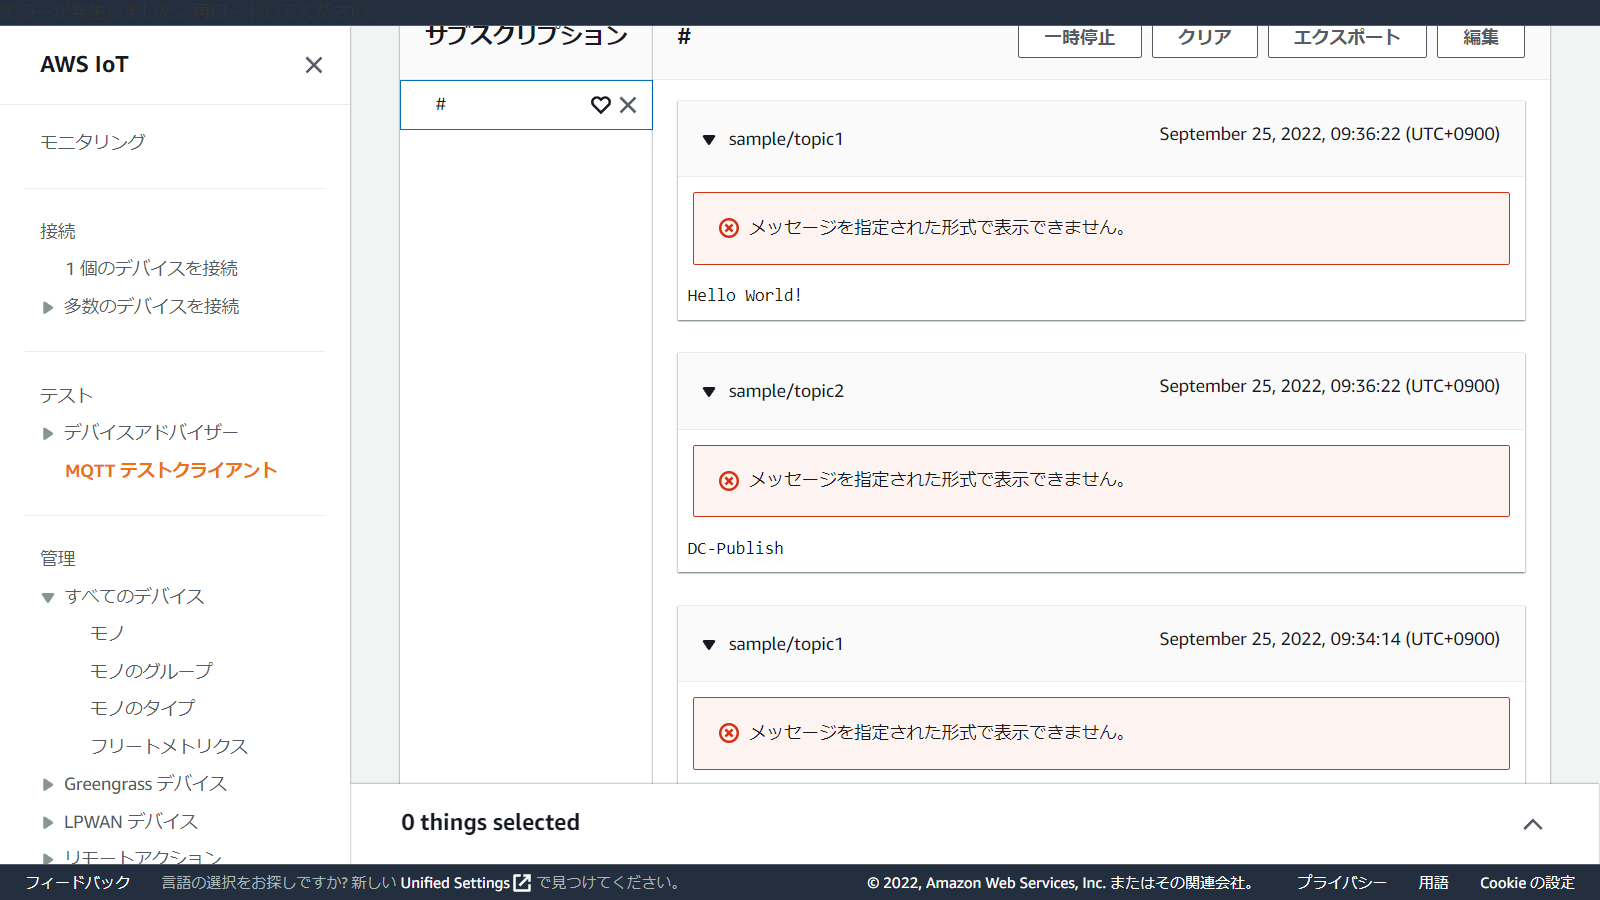
起動すると、設定ファイルのpublish-topicに指定したトピックにメッセージが送信されます。
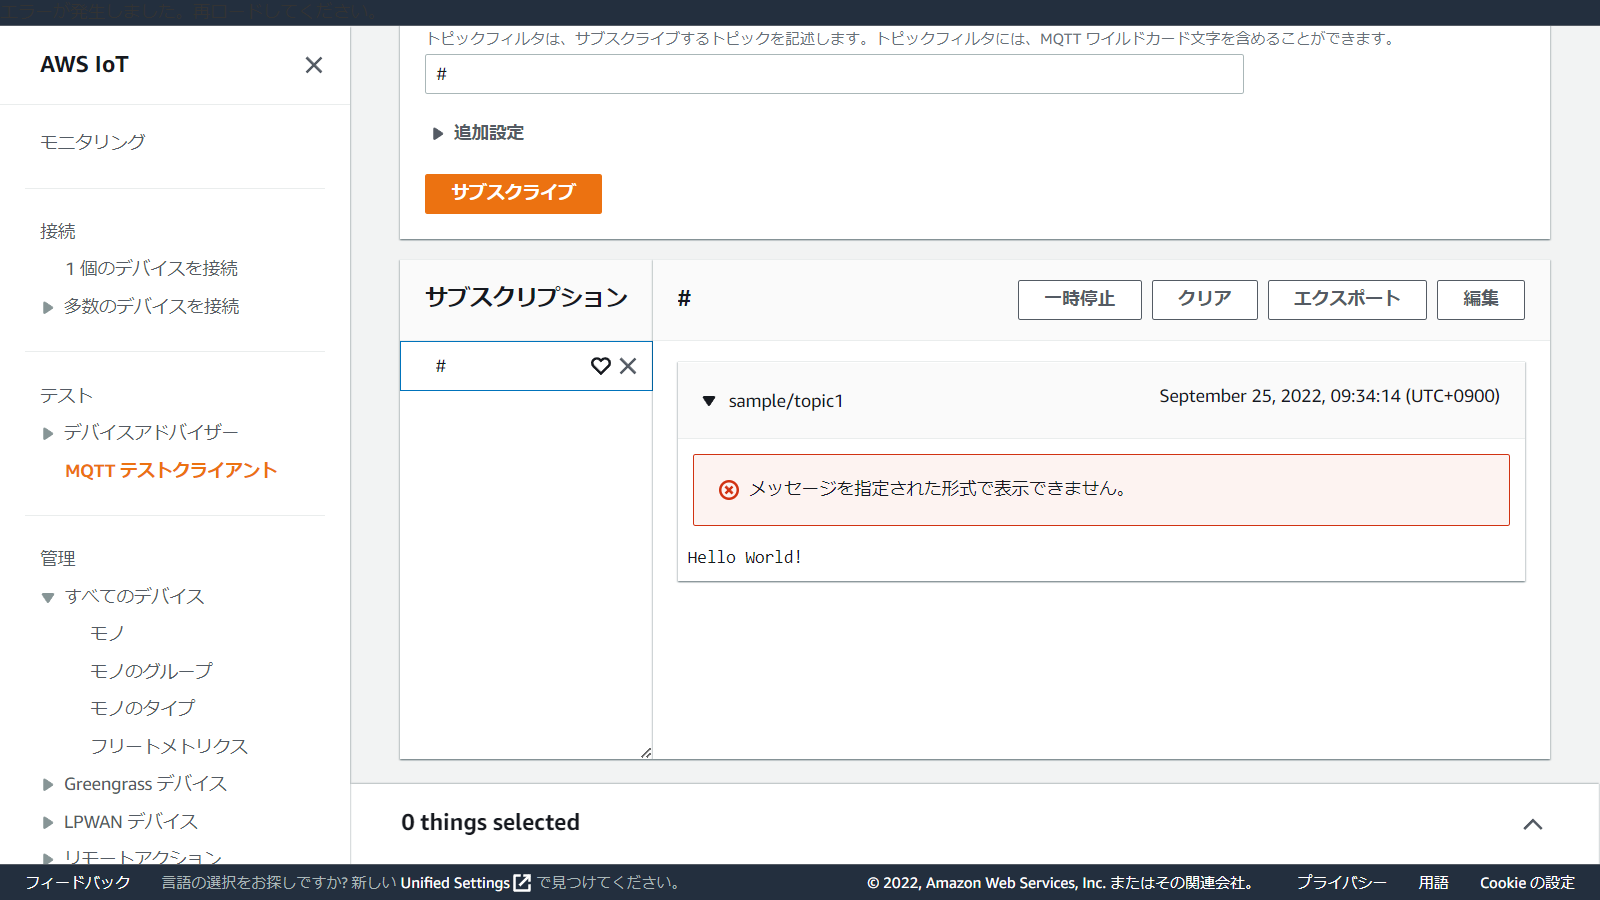
メッセージ内容はHello World!となっていますが、変更する場合はpublish-fileを指定します。
設定ファイルのsubscribe-topicに指定したトピックにDC-Publishというメッセージを送信すると、再度Publishが実行される仕組みになっています。
Jobを実行
次に、Jobを実行してみます。
IoT Device Clientでは事前に以下のジョブハンドラーが用意されています。
- aws-iot-device-client/sample-job-handlers
-rwxr-xr-x 1 root root  938 Sep 24 14:36 download-file.sh
-rwxr-xr-x 1 root root  913 Sep 24 14:36 install-packages.sh
-rwxr-xr-x 1 root root 1488 Sep 24 14:36 reboot.sh
-rwxr-xr-x 1 root root  928 Sep 24 14:36 remove-packages.sh
-rwxr-xr-x 1 root root  821 Sep 24 14:36 restart-services.sh
-rwxr-xr-x 1 root root  333 Sep 24 14:36 shutdown.sh
-rwxr-xr-x 1 root root  748 Sep 24 14:36 start-services.sh
-rwxr-xr-x 1 root root  742 Sep 24 14:36 stop-services.sh
-rwxr-xr-x 1 root root  881 Sep 24 14:36 verify-packages-installed.sh
-rwxr-xr-x 1 root root 1008 Sep 24 14:36 verify-packages-removed.sh
実際のIoTプロジェクトではこれらのスクリプトを参考に独自の処理を実装することが可能です。
lftpとdos2unixをインストールするサンプルが用意されていますので、サンプルのまま試してみます。
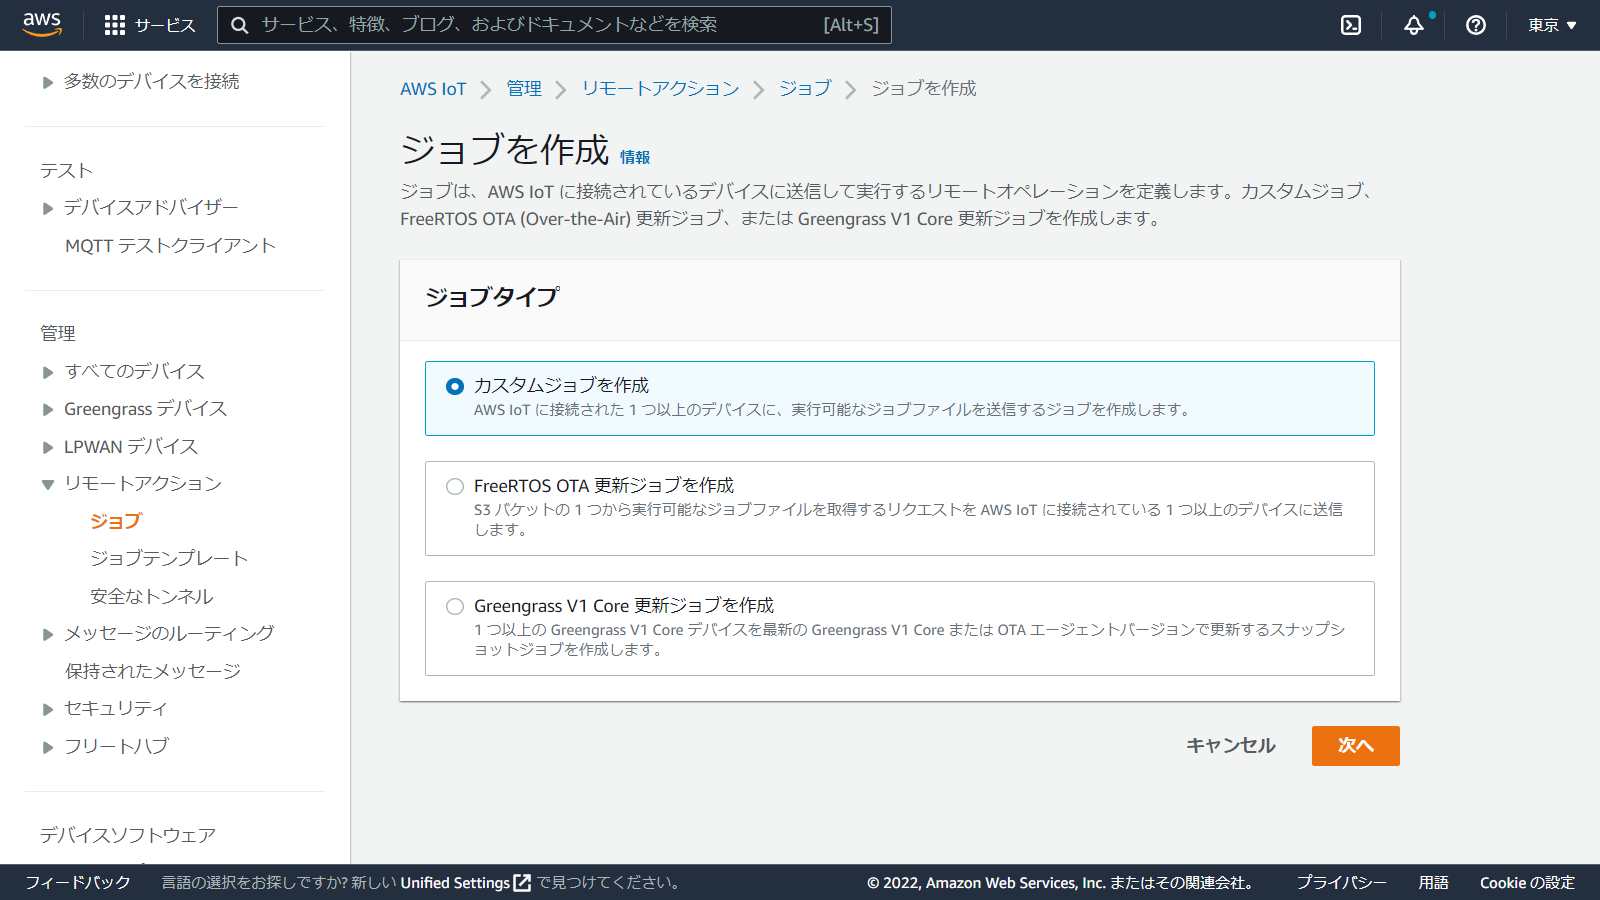
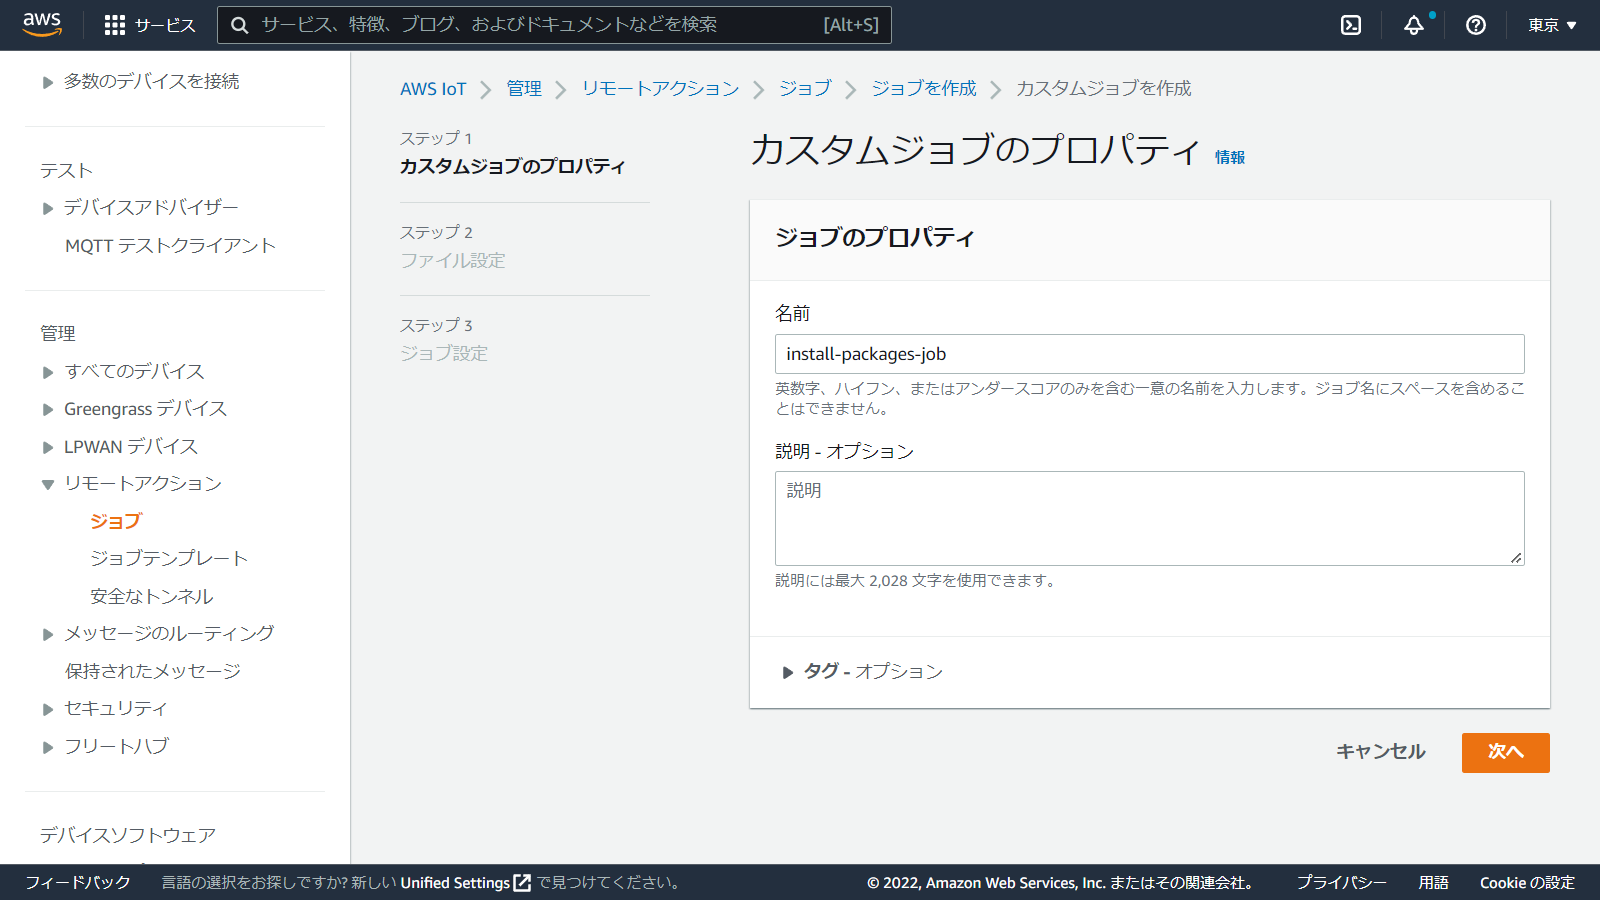
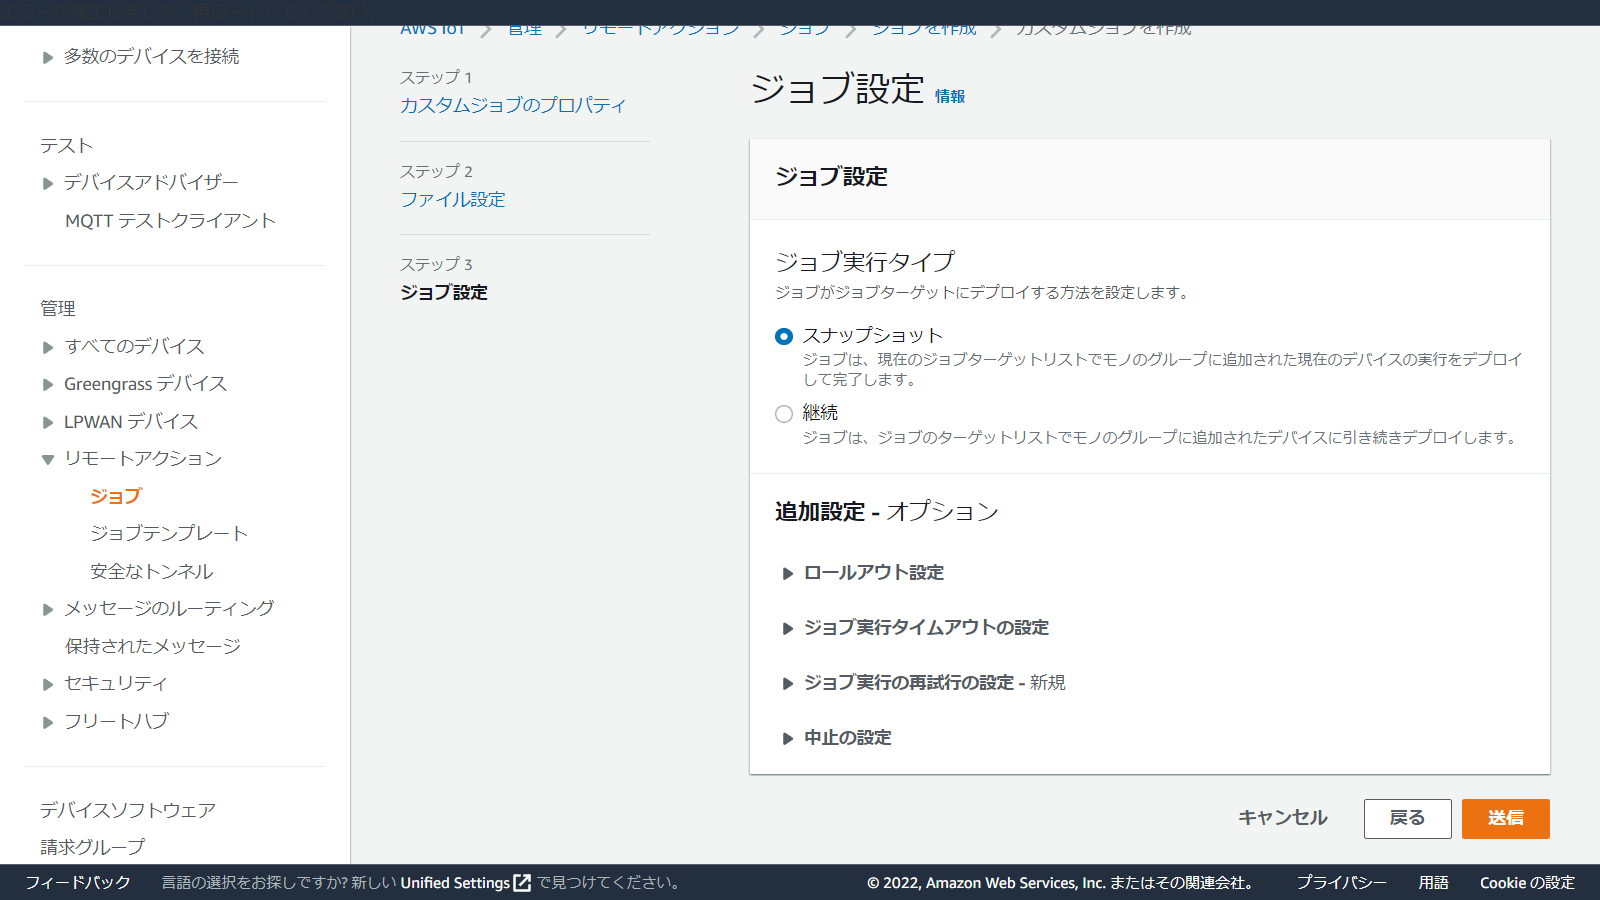
まずはマネジメントコンソールでジョブを作成します。
ジョブドキュメント
{
  "_comment": "This sample JSON file can be used for installing specific list of packages on device. The arguments passed here in `steps`->`action`->`args` are valid package names.",
  "version": "1.0",
  "steps": [
    {
      "action": {
        "name": "Install Packages",
        "type": "runHandler",
        "input": {
          "handler": "install-packages.sh",
          "args": [
            "lftp",
            "dos2unix"
          ],
          "path": "default"
        },
        "runAsUser": "root"
      }
    }
  ]
}
ジョブドキュメントはaws-iot-device-client/sample-job-docsディレクトリに用意されていますのでS3にアップロードして指定します。
- config-job.json
{
    "endpoint": "xxxxxxxxxx.iot.ap-northeast-1.amazonaws.com",
    "cert": "/root/cert/certificate.pem.crt",
    "key": "/root/cert/private.pem.key",
    "root-ca": "/root/cert/AmazonRootCA1.pem",
    "thing-name": "thing-name",
    "logging": {
        "level": "DEBUG",
        "type": "FILE",
        "file": "/var/log/aws-iot-device-client/aws-iot-device-client.log",
        "enable-sdk-logging": false,
        "sdk-log-level": "TRACE",
        "sdk-log-file": "/var/log/aws-iot-device-client/sdk.log"
    },
    "jobs": {
        "enabled": true,
        "handler-directory": "/root/job-handlers"
    }
}
ジョブハンドラーをコピーし、権限を設定します。
cp -r aws-iot-device-client/sample-job-handlers ./
chmod 700 sample-job-handlers/*
IoT Device Clientを実行します。
docker run -it --rm \
 -v $PWD/config-job.json:/tmp/config.json:ro \
 -v $PWD/cert:/root/cert:ro \
 -v $PWD/log:/var/log/aws-iot-device-client \
 -v $PWD/sample-job-handlers:/root/job-handlers \
 device-client:ubuntu --config-file /tmp/config.json
ジョブの実行結果はログで確認ができます。
ログ
2022-09-25T08:34:17.936Z [DEBUG] {JobsFeature.cpp}: We have not seen a job yet, this is not a duplicate job notification
2022-09-25T08:34:17.936Z [DEBUG] {JobsFeature.cpp}: Attempting to update job execution status!
2022-09-25T08:34:17.937Z [INFO]  {JobsFeature.cpp}: Executing job: installjob
2022-09-25T08:34:17.937Z [DEBUG] {Retry.cpp}: Retryable function starting, it will retry until success
2022-09-25T08:34:17.937Z [DEBUG] {JobsFeature.cpp}: Created EphemeralPromise for ClientToken n9QZGlmLVF in the updateJobExecution promises map
2022-09-25T08:34:17.937Z [INFO]  {JobEngine.cpp}: About to execute step with name: Install Packages
2022-09-25T08:34:17.937Z [DEBUG] {JobEngine.cpp}: Using DC default command path {/root/job-handlers} for command execution
2022-09-25T08:34:17.937Z [INFO]  {JobEngine.cpp}: About to execute: /root/job-handlers/install-packages.sh root lftp dos2unix
2022-09-25T08:34:17.937Z [DEBUG] {JobEngine.cpp}: Child process now running
2022-09-25T08:34:17.938Z [DEBUG] {JobEngine.cpp}: Child process about to call execvp
2022-09-25T08:34:17.940Z [DEBUG] {JobEngine.cpp}: Parent process now running, child PID is 14
2022-09-25T08:34:17.942Z [DEBUG] {14}: Running install-packages.sh
2022-09-25T08:34:17.942Z [DEBUG] {14}: Username: root
2022-09-25T08:34:17.942Z [DEBUG] {14}: Packages to install: lftp dos2unix
2022-09-25T08:34:17.942Z [DEBUG] {14}: Using apt-get for package install
2022-09-25T08:34:17.947Z [DEBUG] {14}: uid=0(root) gid=0(root) groups=0(root)
2022-09-25T08:34:17.947Z [DEBUG] {14}: username or sudo command not found
2022-09-25T08:34:18.037Z [DEBUG] {JobsFeature.cpp}: Ack received for PublishUpdateJobExecutionStatus with code {0}
2022-09-25T08:34:18.037Z [DEBUG] {JobsFeature.cpp}: Removing ClientToken n9QZGlmLVF from the updateJobExecution promises map
2022-09-25T08:34:18.038Z [DEBUG] {JobsFeature.cpp}: Success response after UpdateJobExecution for job installjob
2022-09-25T08:34:19.521Z [DEBUG] {14}: Reading package lists...
2022-09-25T08:34:19.832Z [DEBUG] {14}: Building dependency tree...
2022-09-25T08:34:19.832Z [DEBUG] {14}: Reading state information...
2022-09-25T08:34:20.195Z [DEBUG] {14}: The following NEW packages will be installed:
2022-09-25T08:34:20.196Z [DEBUG] {14}:   dos2unix lftp
2022-09-25T08:34:21.917Z [DEBUG] {14}: 0 upgraded, 2 newly installed, 0 to remove and 2 not upgraded.
2022-09-25T08:34:21.917Z [DEBUG] {14}: Need to get 912 kB of archives.
2022-09-25T08:34:21.917Z [DEBUG] {14}: After this operation, 2942 kB of additional disk space will be used.
2022-09-25T08:34:21.917Z [DEBUG] {14}: Get:1 http://archive.ubuntu.com/ubuntu bionic-updates/main amd64 lftp amd64 4.8.1-1ubuntu0.2 [561 kB]
2022-09-25T08:34:23.453Z [DEBUG] {14}: Get:2 http://archive.ubuntu.com/ubuntu bionic/universe amd64 dos2unix amd64 7.3.4-3 [351 kB]
2022-09-25T08:34:23.910Z [DEBUG] {14}: Fetched 912 kB in 3s (273 kB/s)
2022-09-25T08:34:23.964Z [DEBUG] {14}: Selecting previously unselected package lftp.
2022-09-25T08:34:24.119Z [DEBUG] {14}: (Reading database ...  (Reading database ... 5  (Reading database ... 10  (Reading database ... 15  (Reading database ... 20  (Reading database ... 25  (Reading database ... 30  (Reading database ... 35  (Reading database ... 40  (Reading database ... 45  (Reading database ... 50  (Reading database ... 55  (Reading database ... 60  (Reading database ... 65  (Reading database ... 70  (Reading database ... 75  (Reading database ... 80  (Reading database ... 85  (Reading database ... 90  (Reading database ... 95  (Reading database ... 100  (Reading database ... 16054 files and directories currently installed.)
2022-09-25T08:34:24.121Z [DEBUG] {14}: Preparing to unpack .../lftp_4.8.1-1ubuntu0.2_amd64.deb ...
2022-09-25T08:34:24.131Z [DEBUG] {14}: Unpacking lftp (4.8.1-1ubuntu0.2) ...
2022-09-25T08:34:24.319Z [DEBUG] {14}: Selecting previously unselected package dos2unix.
2022-09-25T08:34:24.322Z [DEBUG] {14}: Preparing to unpack .../dos2unix_7.3.4-3_amd64.deb ...
2022-09-25T08:34:24.333Z [DEBUG] {14}: Unpacking dos2unix (7.3.4-3) ...
2022-09-25T08:34:24.505Z [DEBUG] {14}: Setting up dos2unix (7.3.4-3) ...
2022-09-25T08:34:24.537Z [DEBUG] {14}: Setting up lftp (4.8.1-1ubuntu0.2) ...
2022-09-25T08:34:24.587Z [DEBUG] {14}: Processing triggers for mime-support (3.60ubuntu1) ...
2022-09-25T08:34:24.667Z [ERROR] {14}: debconf: delaying package configuration, since apt-utils is not installed
2022-09-25T08:34:24.668Z [DEBUG] {JobEngine.cpp}: JobEngine finished waiting for child process, returning 0
2022-09-25T08:34:24.668Z [WARN]  {JobEngine.cpp}: While executing action Install Packages, JobEngine reported receiving errors from STDERR
2022-09-25T08:34:24.668Z [INFO]  {JobsFeature.cpp}: Job exited with status: 0
2022-09-25T08:34:24.668Z [WARN]  {JobsFeature.cpp}: JobEngine reported receiving errors from STDERR
2022-09-25T08:34:24.668Z [INFO]  {JobsFeature.cpp}: Job executed successfully!
2022-09-25T08:34:24.668Z [DEBUG] {JobsFeature.cpp}: Attempting to update job execution status!
2022-09-25T08:34:24.668Z [DEBUG] {Retry.cpp}: Retryable function starting, it will retry until success
2022-09-25T08:34:24.668Z [DEBUG] {JobsFeature.cpp}: Created EphemeralPromise for ClientToken FmcsxnvYV5 in the updateJobExecution promises map
2022-09-25T08:34:24.702Z [DEBUG] {JobsFeature.cpp}: Ack received for PublishUpdateJobExecutionStatus with code {0}
2022-09-25T08:34:24.703Z [DEBUG] {JobsFeature.cpp}: Removing ClientToken FmcsxnvYV5 from the updateJobExecution promises map
2022-09-25T08:34:24.703Z [DEBUG] {JobsFeature.cpp}: Success response after UpdateJobExecution for job installjob
2022-09-25T08:34:25.787Z [INFO]  {JobsFeature.cpp}: No pending jobs are scheduled, waiting for the next incoming job
ジョブの動きが理解できました。
まとめ
今回はPub/SubとJobのサンプルを実行しました。他にも色々できるようです。機会があれば挑戦しようと思います。
- Fleet Provisioning Feature
- Device Defender Feature
- Secure Tunneling Feature
- Named Shadow Feature
- Sensor Publish Feature
- Provisioning with Secure Elements Feature